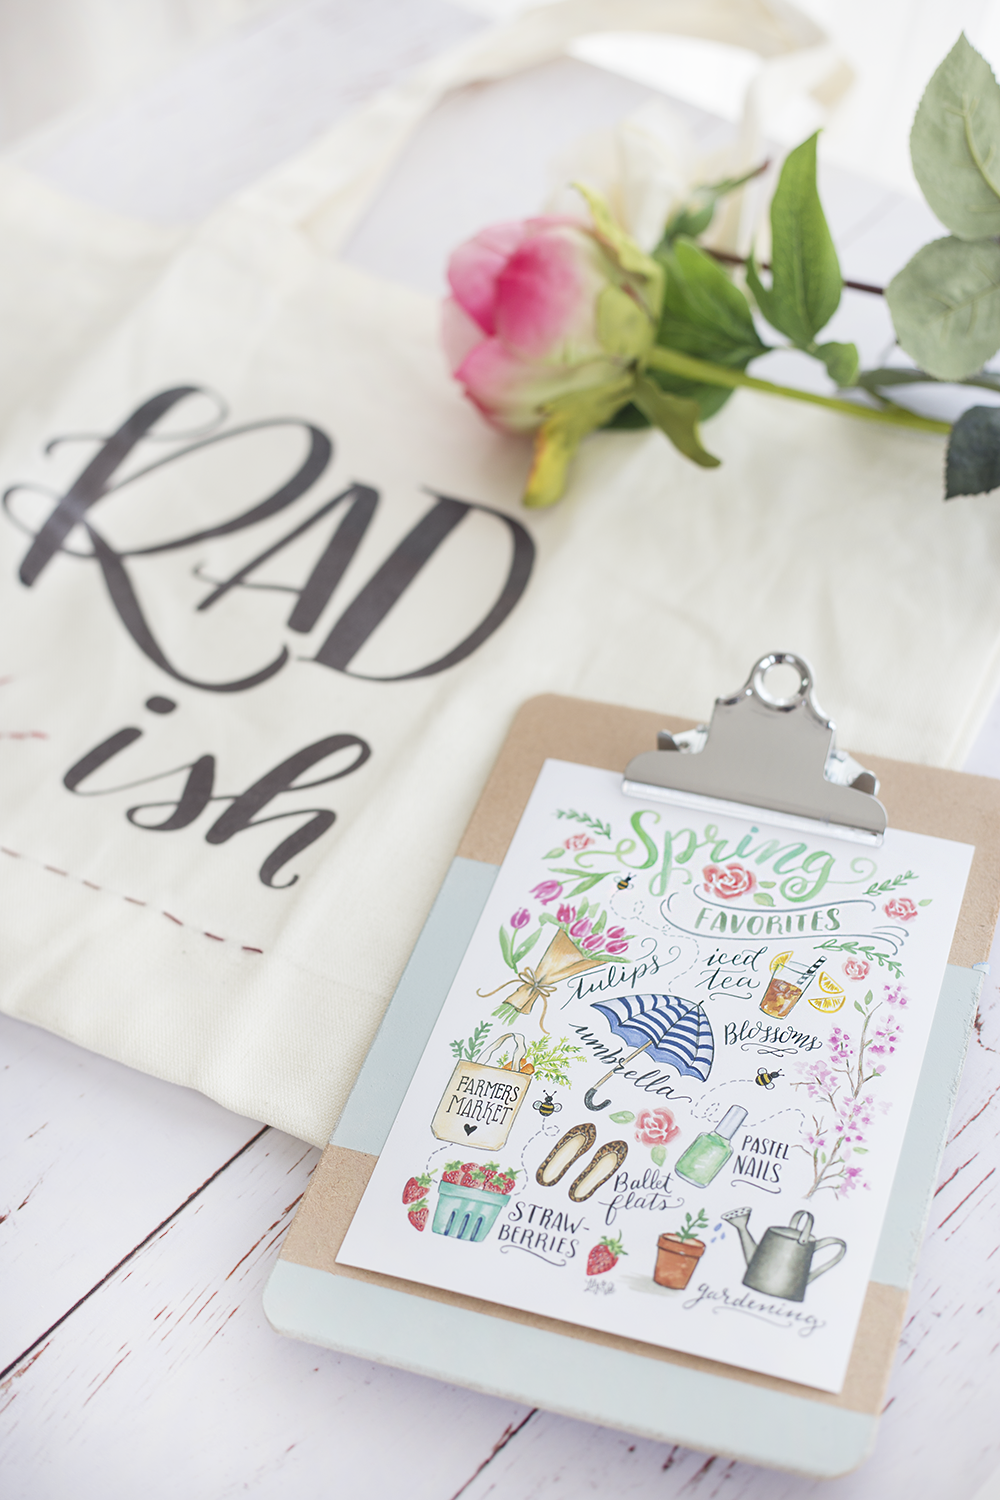
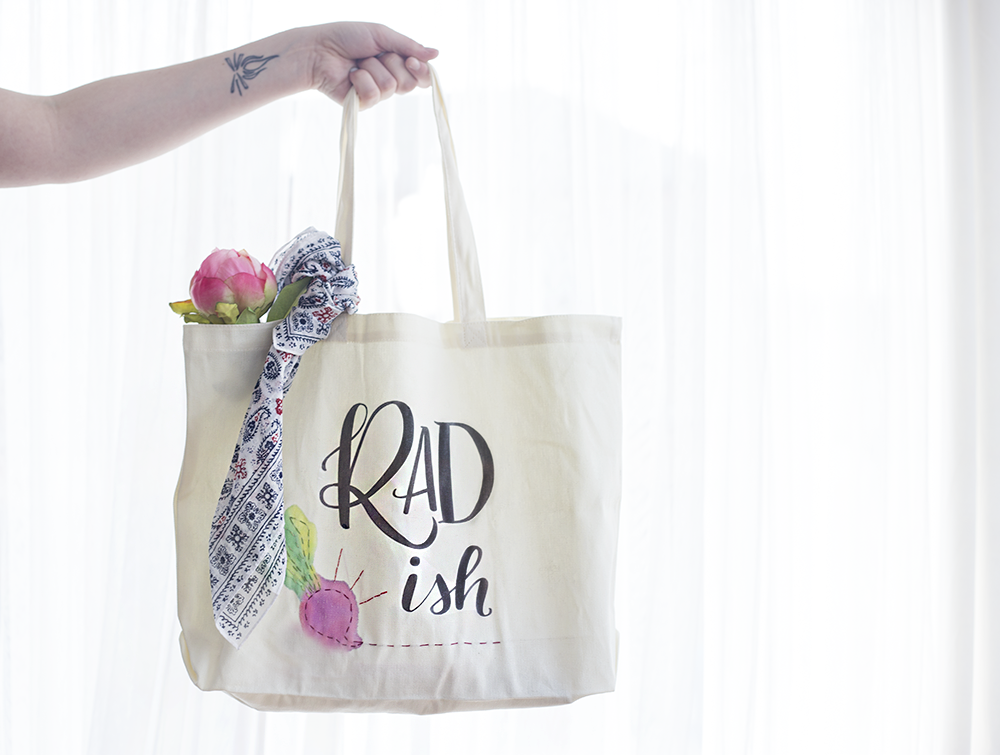
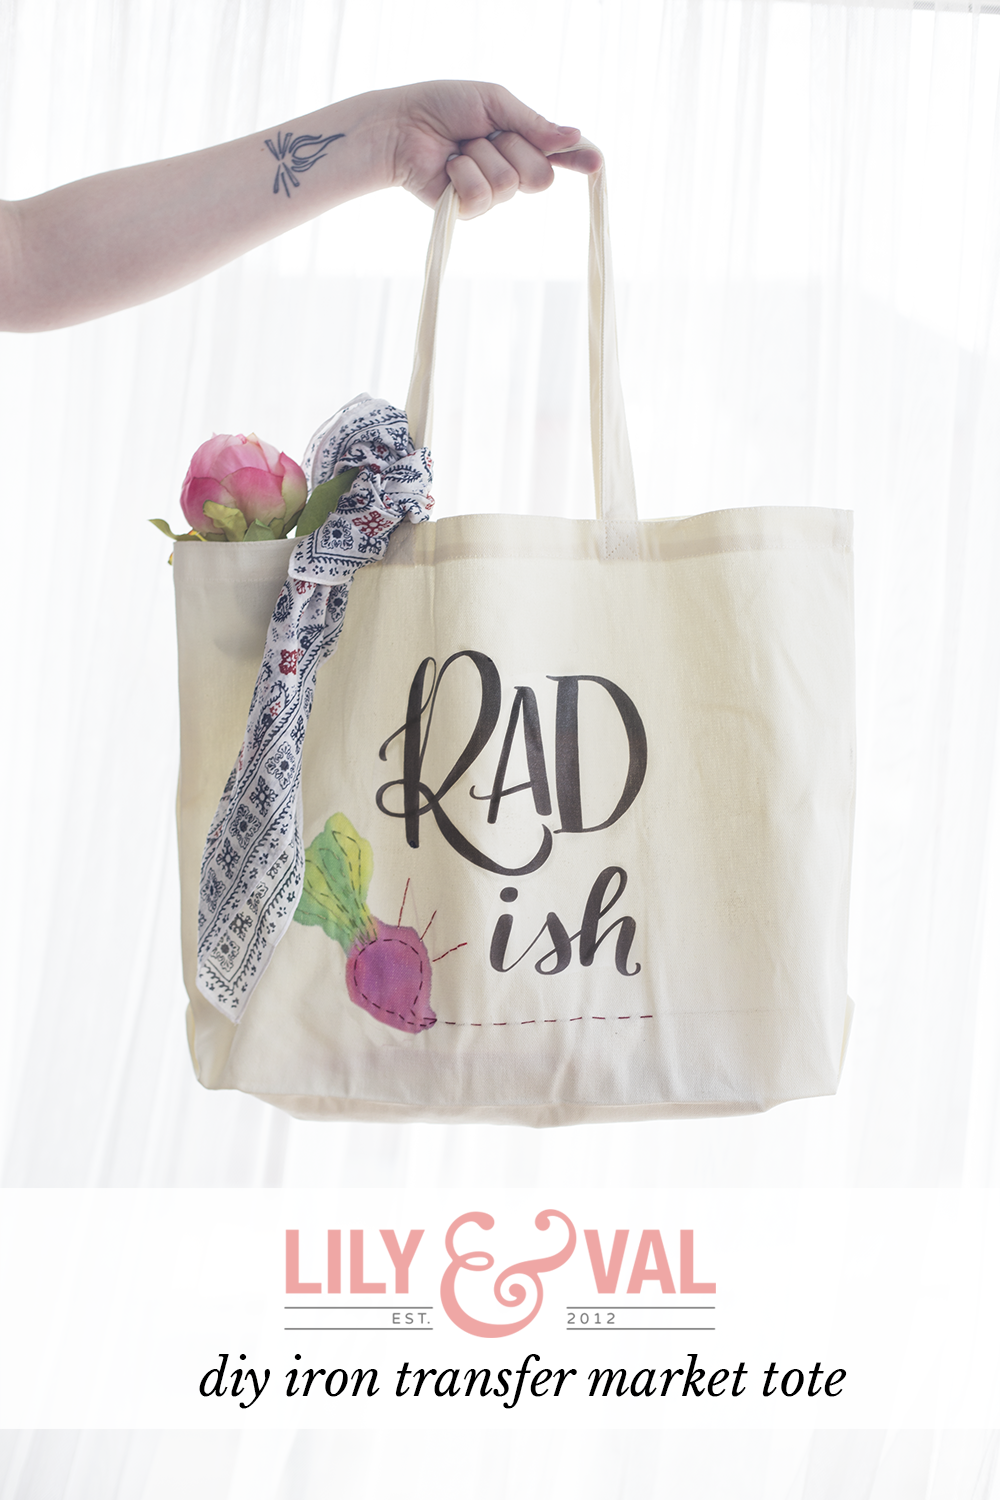
 Have you noticed the outdoor markets have been popping up for the season? I’m going to one this weekend! When strolling around local farmer’s markets and the like, I always like to take a roomy tote bag with me for my impulse buys. That’s why we decided to try out a iron transfer farmer’s market tote DIY for you – so you can hit up as many markets as you like! After all, they’re one of our favorite things for spring.
To get started, make sure you first download this design that Val hand-lettered specifically for this post!
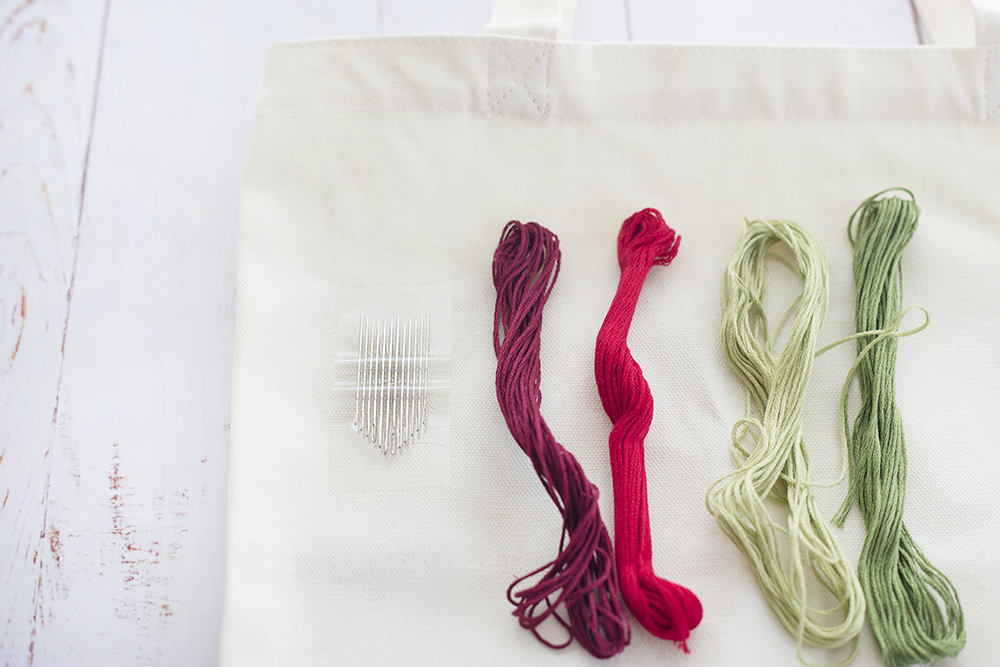
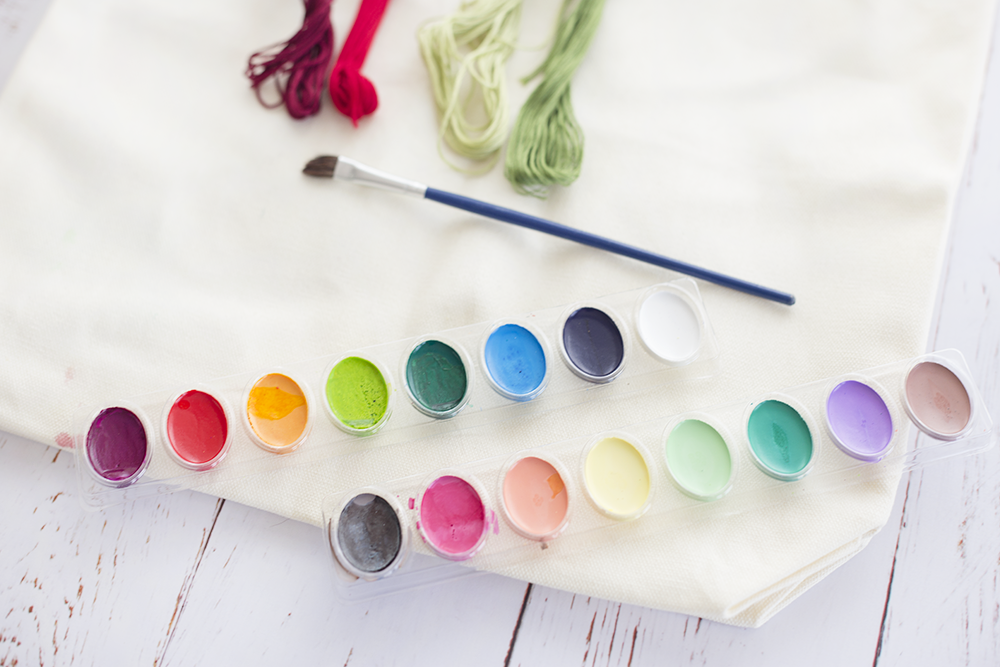
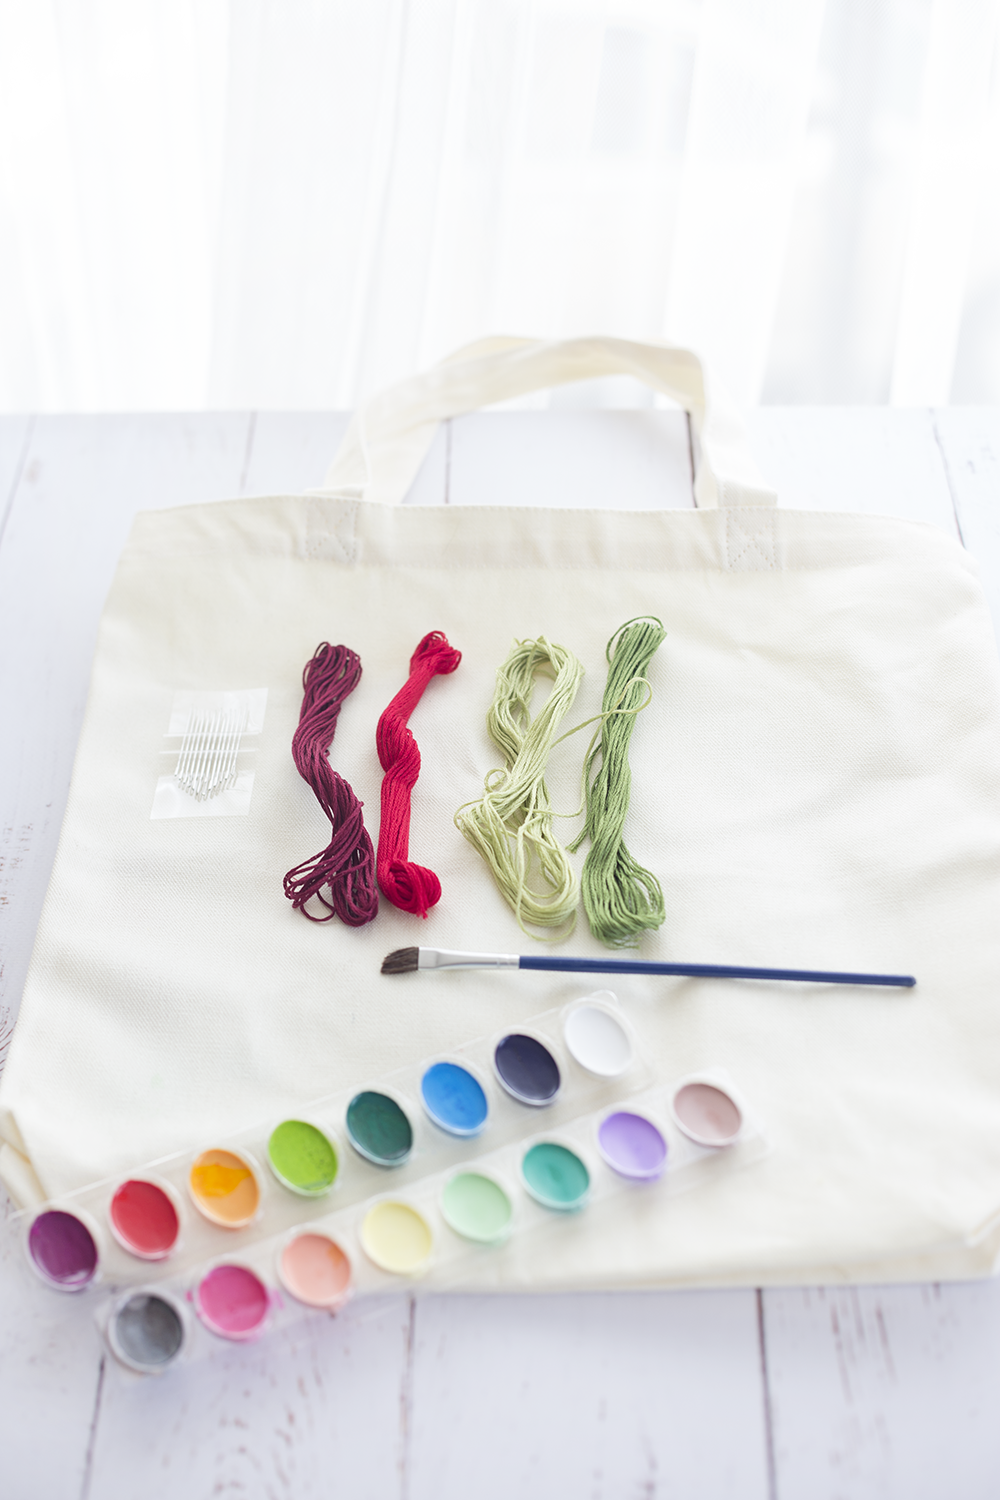 Farmer’s Market Tote Supplies
To create this punny DIY, you’ll need:
- A plain canvas tote bag
- Our hand-lettered “Rad-ish” design
- Embroidery floss in multiple colors
- Embroidery needles
- Watercolor paints
- Paint brush
- Iron-on transfer paper (made for light fabrics)
- Scissors
Step One – Print & Cut the Transfer Design
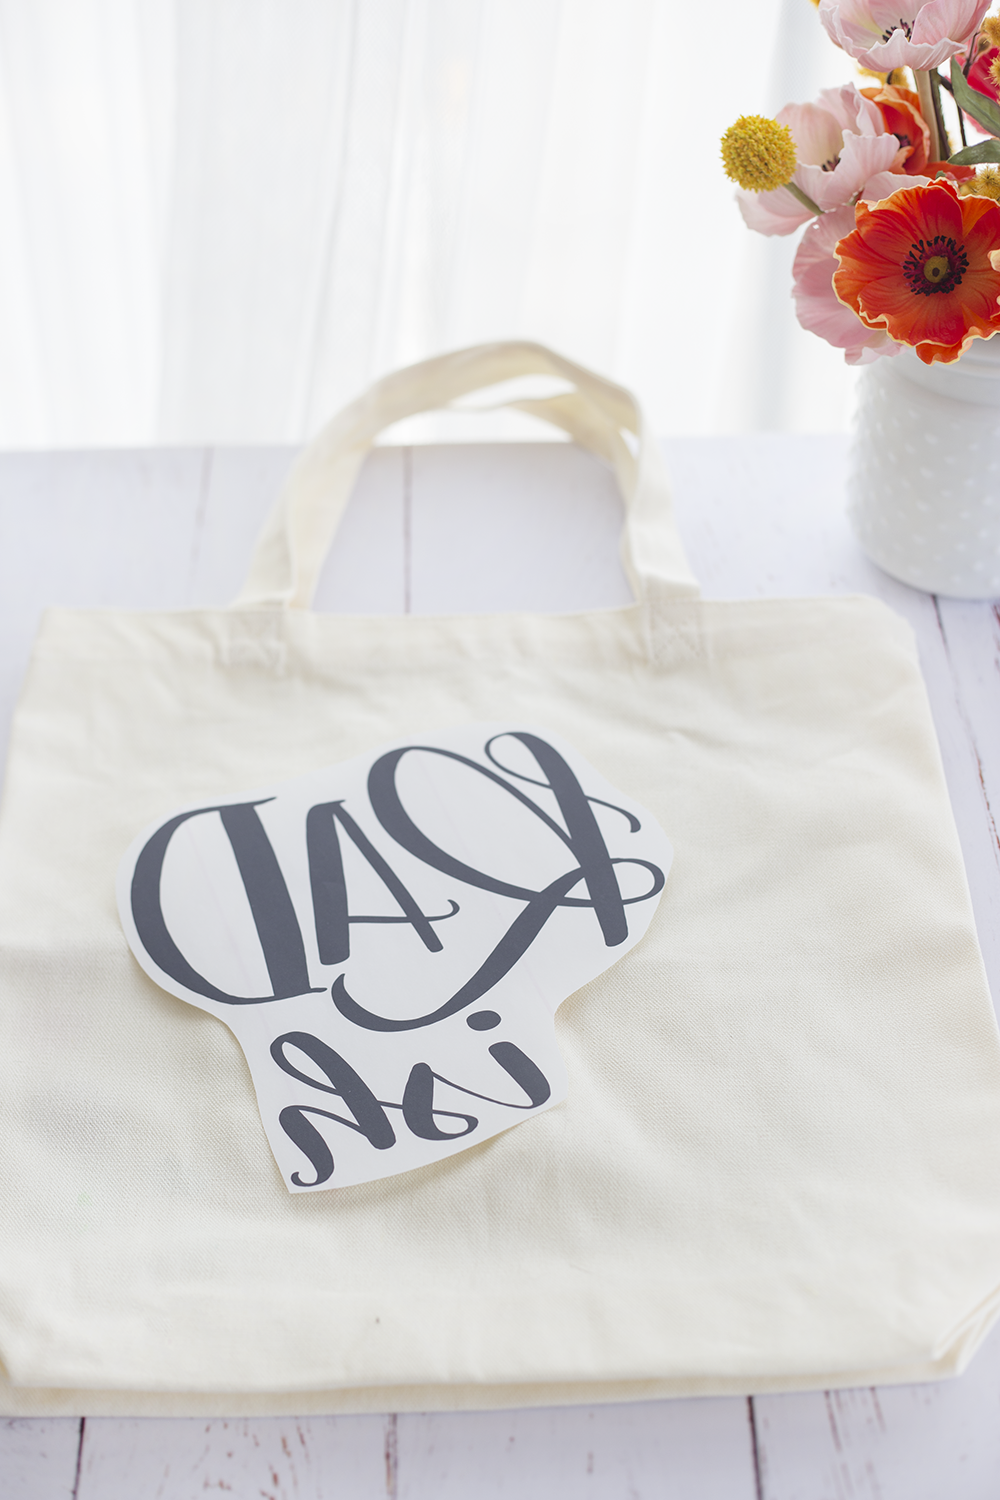
The first thing we need to do to make this rad (ish) – hehe – farmer’s market tote is to print out our design on to iron on transfer paper. Very important: be sure to flip the image horizontally in your photo editor so that it appears backwards when it prints. Example below.
Follow the instructions on your transfer paper to be sure you’re printing on the correct settings. Once you’ve got your design printed out (backwards), cut it out close to the letters – leaving yourself enough room to peel the design off.
 Step Two – Iron on the Design
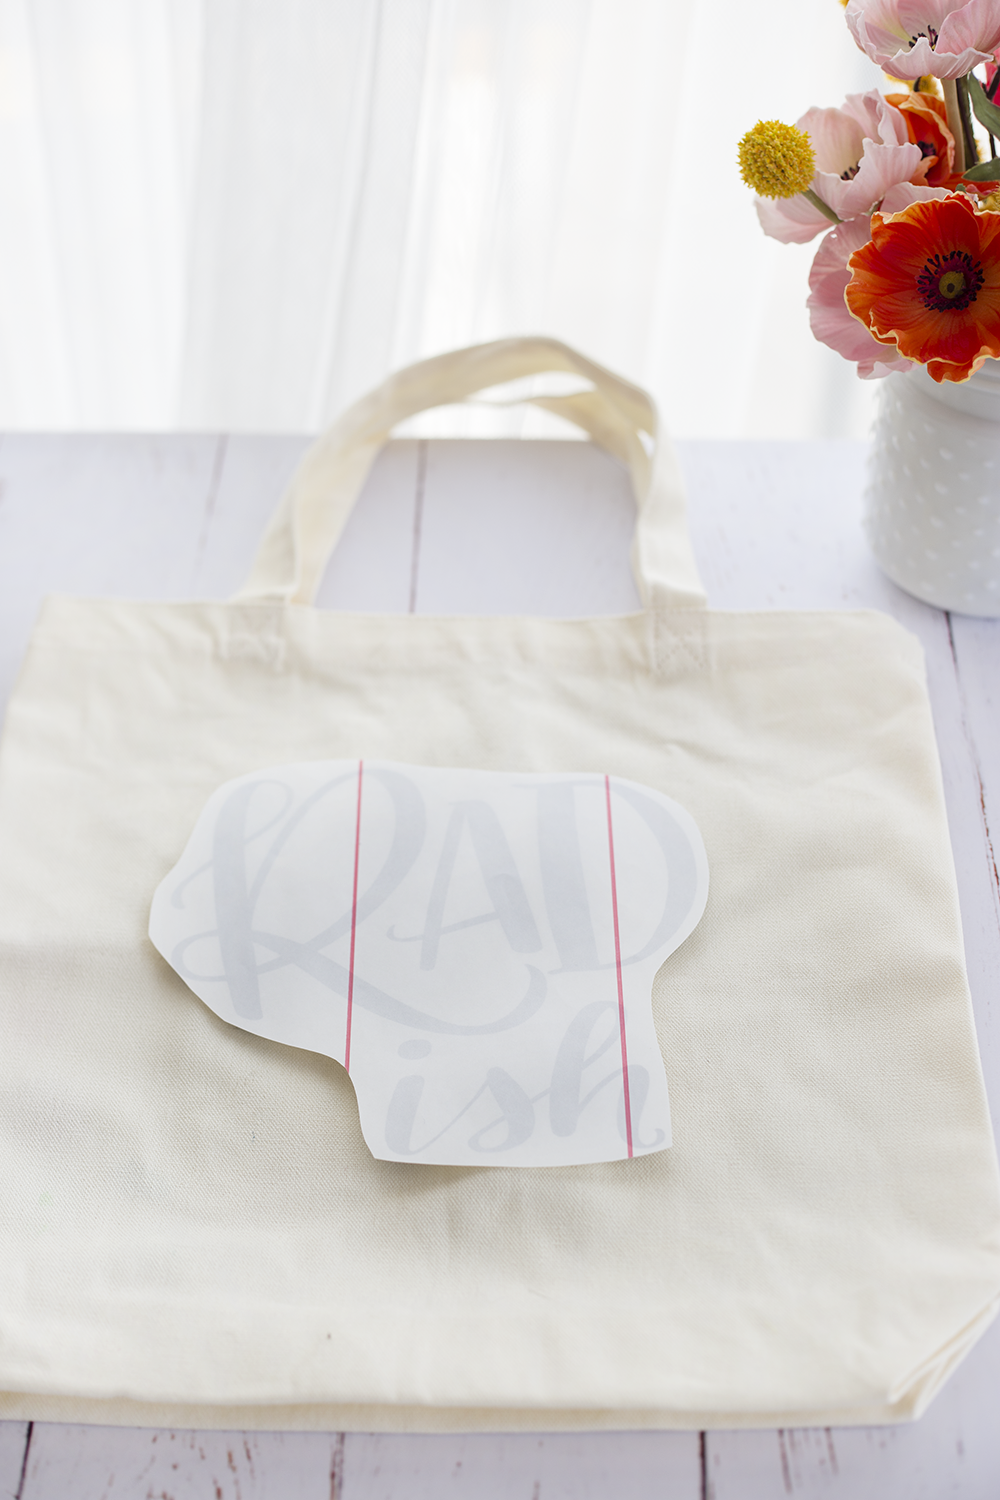
Once again, be sure to check your transfer paper instructions for the right iron settings! Then, place your design face down so that it will be ironed on reading the correct direction.
My transfer paper had me iron my design onto the canvas using only a hard surface beneath (skipping the ironing board) and rubbing the design down on the highest heat setting for 2-3 minutes.
After ironing, I let my transfer cool completely so there was no warmth to the touch. Then, I chose a corner of the paper to start peeling off the backing, exposing just the black letters. This is super tricky depending on how accommodating your paper is – so be patient!
Step Three – Create your Embroidery
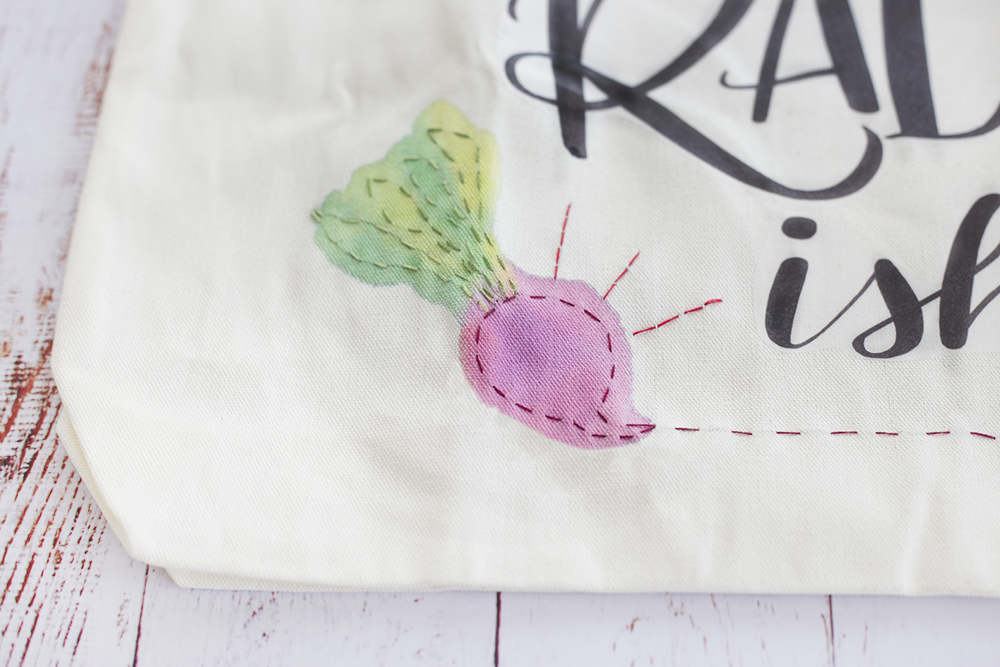
Once your backing has been successfully peeled off and your design looks good, it’s time to embellish! I chose to embroider a radish onto my tote so that the pun was more easily understood.
If you’d like to embroider a radish as well, print out this image from Google and cut it right next to the outline. I lightly traced the cut out in pencil onto my tote and used that as a guide for my stitches. To create a more ombre effect, I used two different greens for the leaves and a dark red for the radish.
To see my guide for learning basic embroidery, check out this post! Those same stitches will help you complete this design.
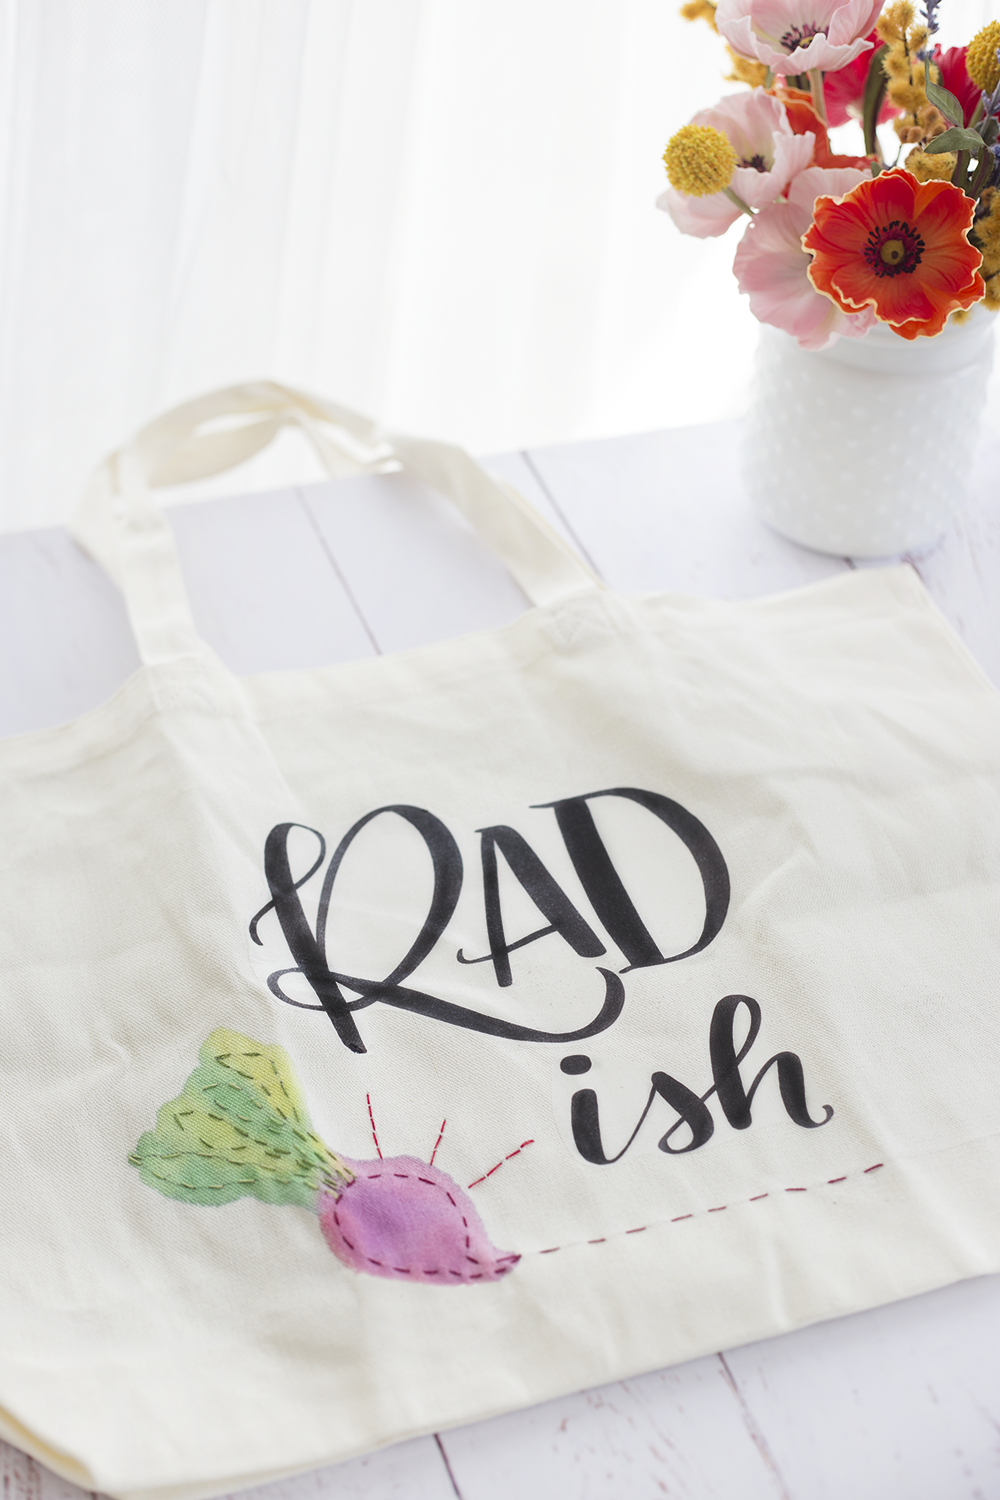
Step Four – Color in Your Design!
After I finished my radish embroidery, I realized that without filling in the entire shape (using a lot of thread), it wasn’t immediately apparent what the design was.
To fix this situation, I decided to try a more spring look with watercolors! It was a bit of an experiment, but I love how it turned out.
Using my watercolor palette (Crayola from Target) I mixed a red and purple for the body of the radish and used a lighter green on the darker stitches and vice versa. I wanted the stitching to stand out but the shape to be readable.

Step Five – Show off Your Farmer’s Market Tote!
Now that you have an adorable, punny and functional tote – show it off! Check out your local chamber of commerce or city website to see a list of outdoor markets in your area.
A couple of things I love carrying around in my tote:
- Fresh bread
- Flowers
- Farm-grown fruit
- Books from the local used bookstore
- Homemade treats for my pup
You can even tie a colorful scarf around the handle of your bag to give it a whimsical, spring feel!

So, what do you think? How did your tote-making go? If you got a little aggressive while peeling off the transfer paper backing, don’t worry – so did I.
We’d love to see your finished projects! Tag us in any photos you take on Instagram with #lilyandvalliving and, as always, pin the image above if you liked this post!
Happy strolling!

3 Comments
Love it!
This idea is soooo great. Thanks for sharing!
Love!