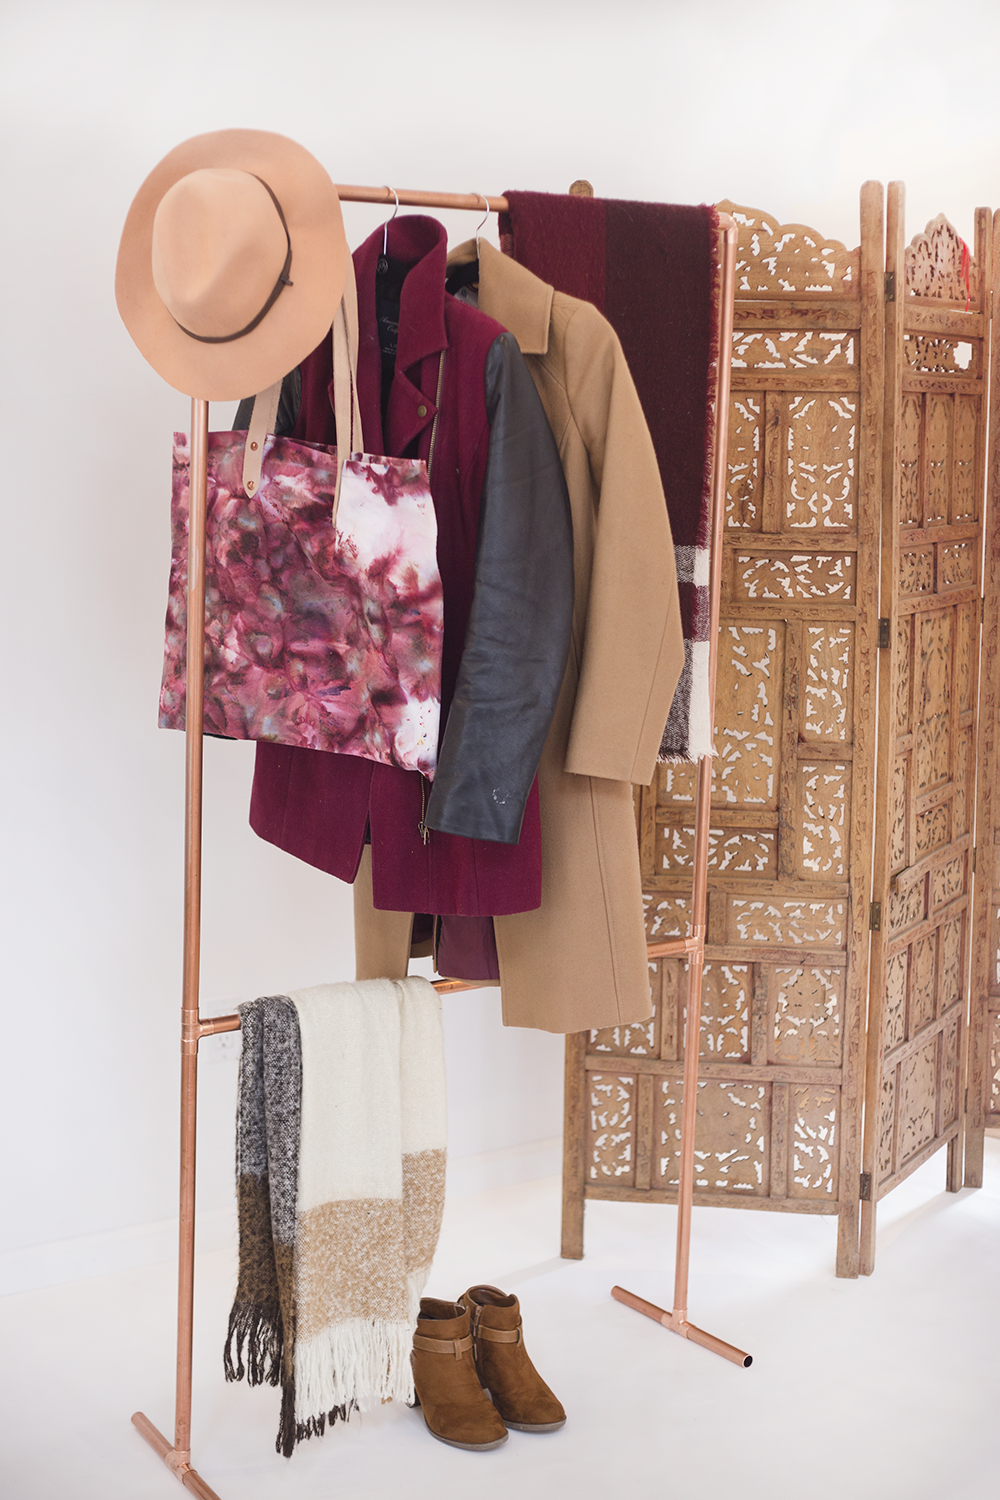
 It’s hard to miss how present garment racks are lately on Instagram and Pinterest. Sure, the copper and wood combinations are pretty to look at, but there’s good reason they’re so popular – they’re also functional. This copper garment rack is a surprisingly easy DIY and can be the perfect shake up for your winter wardrobe (or a great coat rack alternative, or bag display).
I’m personally going through Anuschka Rees’s Curated Closet book and workbook right now to transition to more of a capsule wardrobe, so this garment rack is just what I needed to show off a smaller amount of clothes I actually love.
I’ve broken this DIY down for you by steps and measurements with handy diagrams to help you visualize – but don’t worry, it’s not scary. After buying the supplies, putting together the garment rack took less than twenty minutes.

Garment Rack Supplies
I bought all of my supplies at Home Depot but you can find similar products at most home improvement stores. For the piping and joints (not including the pipe cutter) I paid about $40. That’s pretty darn good for a garment rack!
You’ll need:
(2) 3/4” Copper pipes measuring 10 feet long each
Pipe cutter (optional)
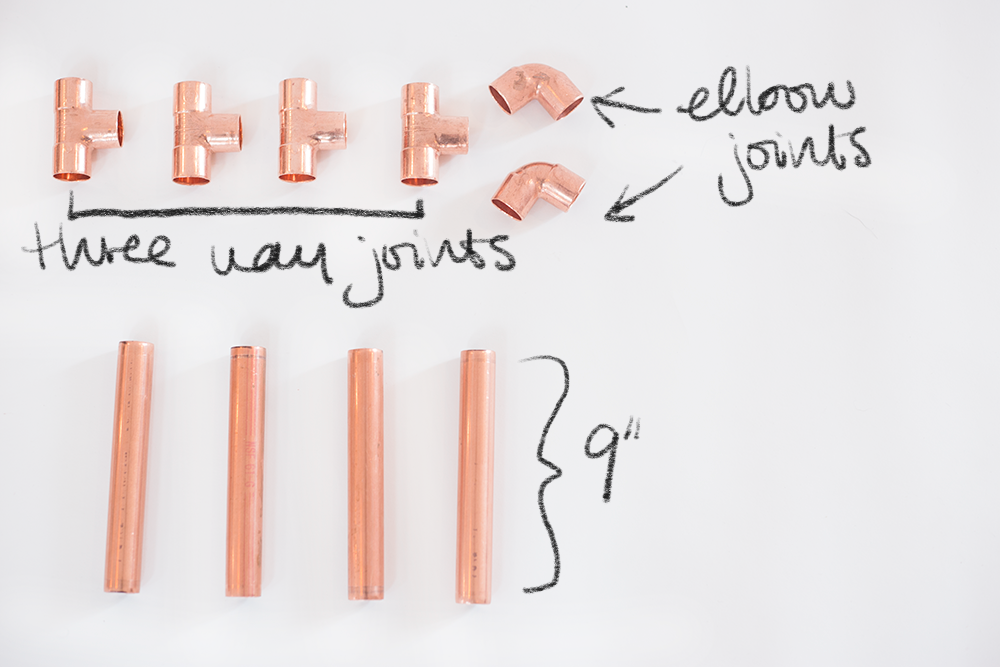
(4) 3/4” Three way elbow joints in copper
(2) 3/4” Elbow joints in copper
Copper spray paint for metal surfaces (optional)
Step One – Cut the Pipe to Size
Separate your two copper pipes (that should be 10 feet long each). If Home Depot won’t cut the copper for you – they wouldn’t for us, in less we wanted it in half only – you can do it yourself easily with a pipe cutter. I recommend the one linked above!
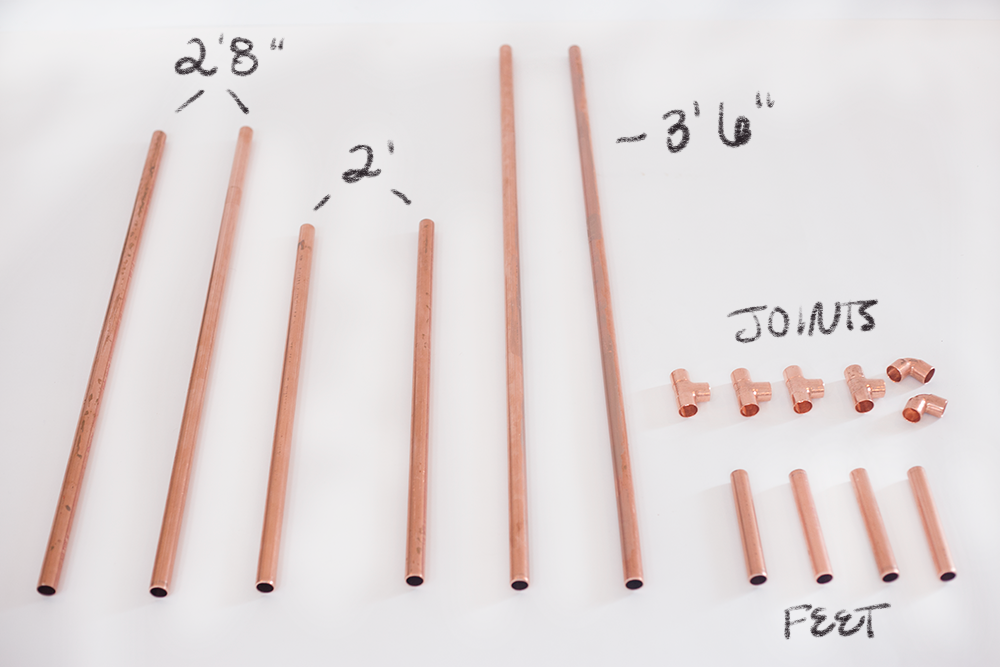
From one of your pipes, cut ONE segment of each of the following lengths:
- 3’6”
- 2’8”
- 2′
- 9”
- 9” (again)
We’ll cut what would be an 18” segment into two separate 9” segments for BOTH copper pipes. This is so we can place the three way joints in between.
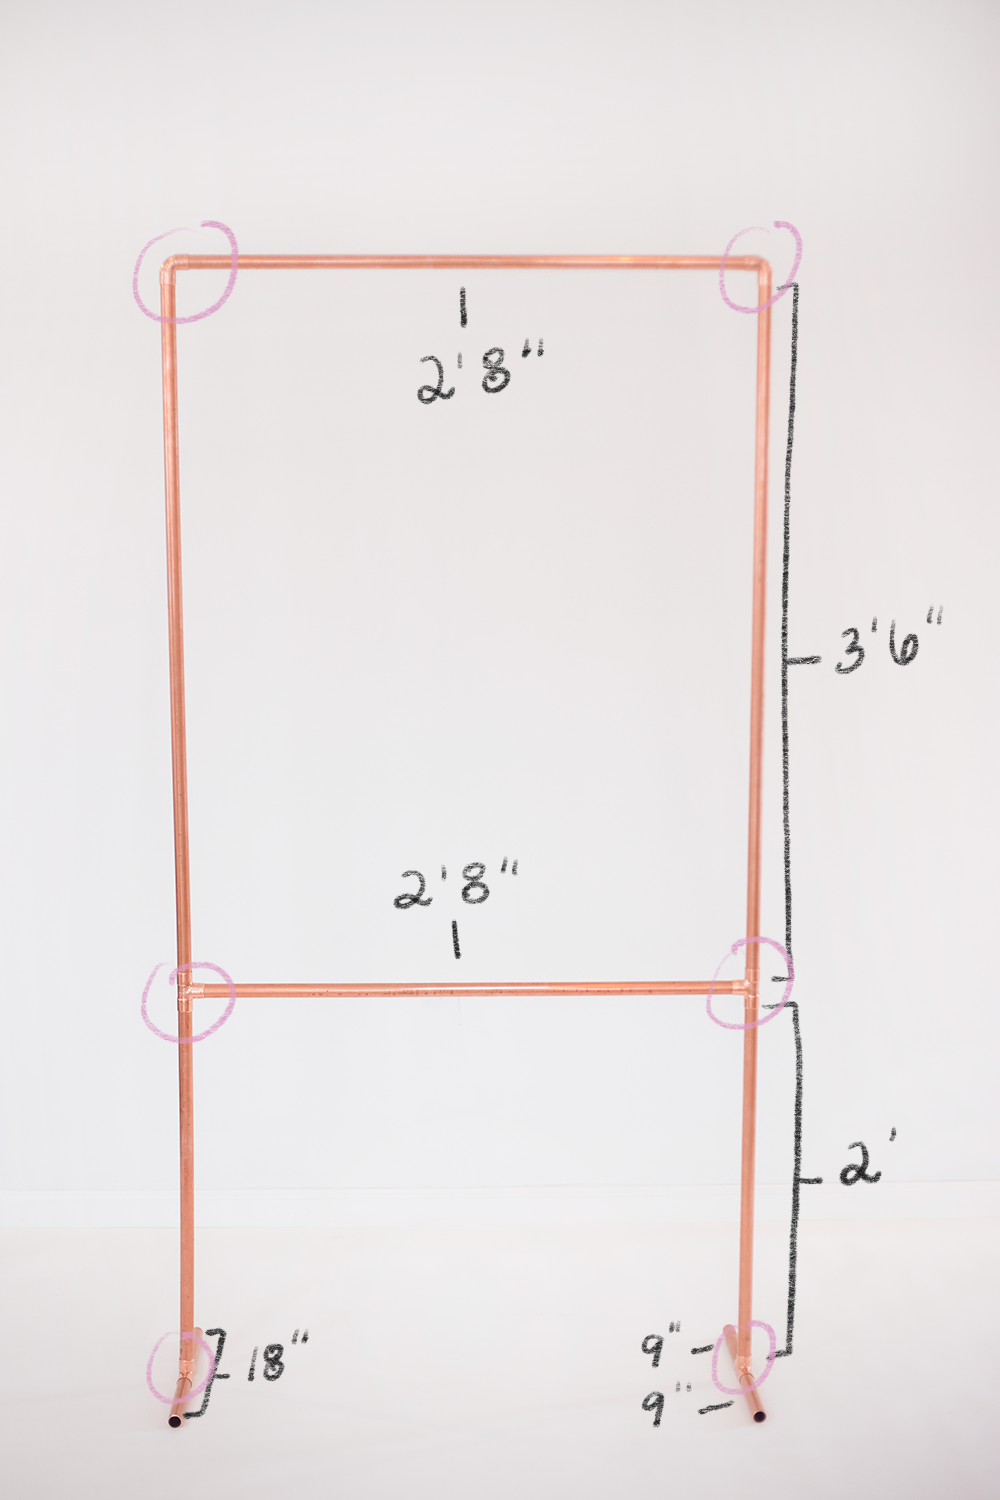
Now that you have your first copper pipe segmented, do the exact same thing with the second pipe. You should be left with the following number of segments with these measurements (see photo below):
 You should be left with 4” from each of the two copper pipes. I turned mine into washi tape holders!
Step Two – Assemble the Feet
This is where you’ll want to grab a buddy. Shout out to L&V Marketing Coordinator Alivia for being mine in the office…sorry, Alivia.
Grab all four of your 9” pipe segments – two per garment rack foot. Join them with a three way joint in between, with the lone opening pointing upwards.

Step Three – Add the Legs
Next, insert the 2” pipes into the open joints. Secure another three way joint to the top of each of the pipes and connect them with one of the 2’8” segments in the middle. Congrats! You have a really great game of ladder golf.
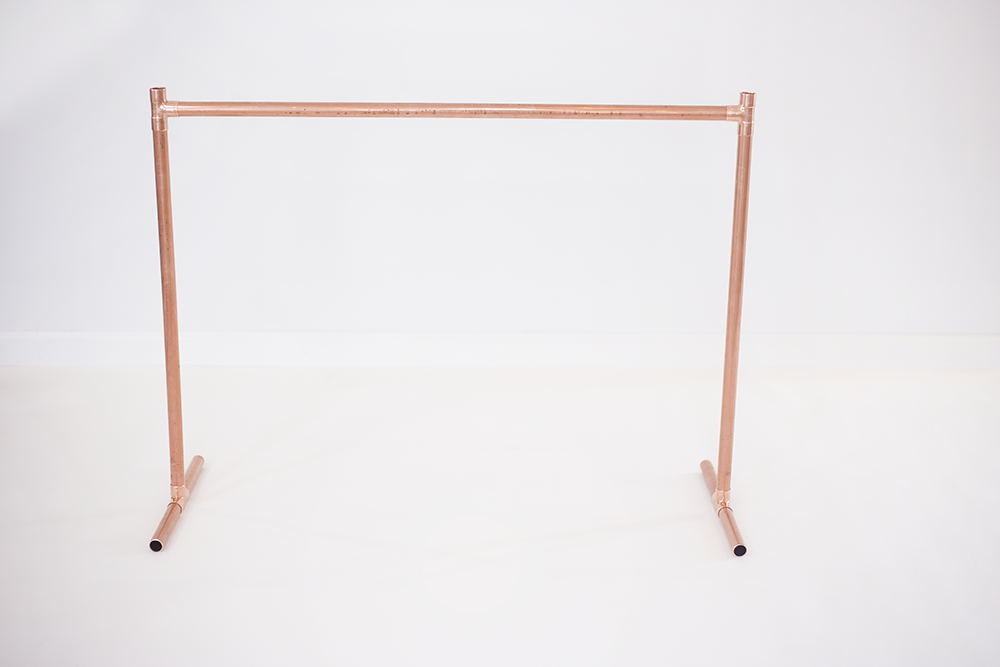
Step Four – Finish the Upper Legs and Top Beam
In the upward-facing three way joints, secure the 3’6” upper legs and add an elbow joint on each pipe. To complete the rack, connect the two full legs with the top beam, which is the remaining 2’8” segment.
In the diagram below, I’ve broken down all the segment lengths and circled in pink where the joints go. Ta-da!
If you aren’t a big fan of the natural copper patina that comes on the pipes when you buy them, this is the time to lug your garment rack out to the lawn and spray paint it with the copper spray paint. If you spray paint it before assembling, it’s possible the extra coat will keep the segments from fitting into the joints.
The copper spray paint will seal in the look without the patina. Give it ample drying time before putting anything on it!
Step Five – Dress It Up!
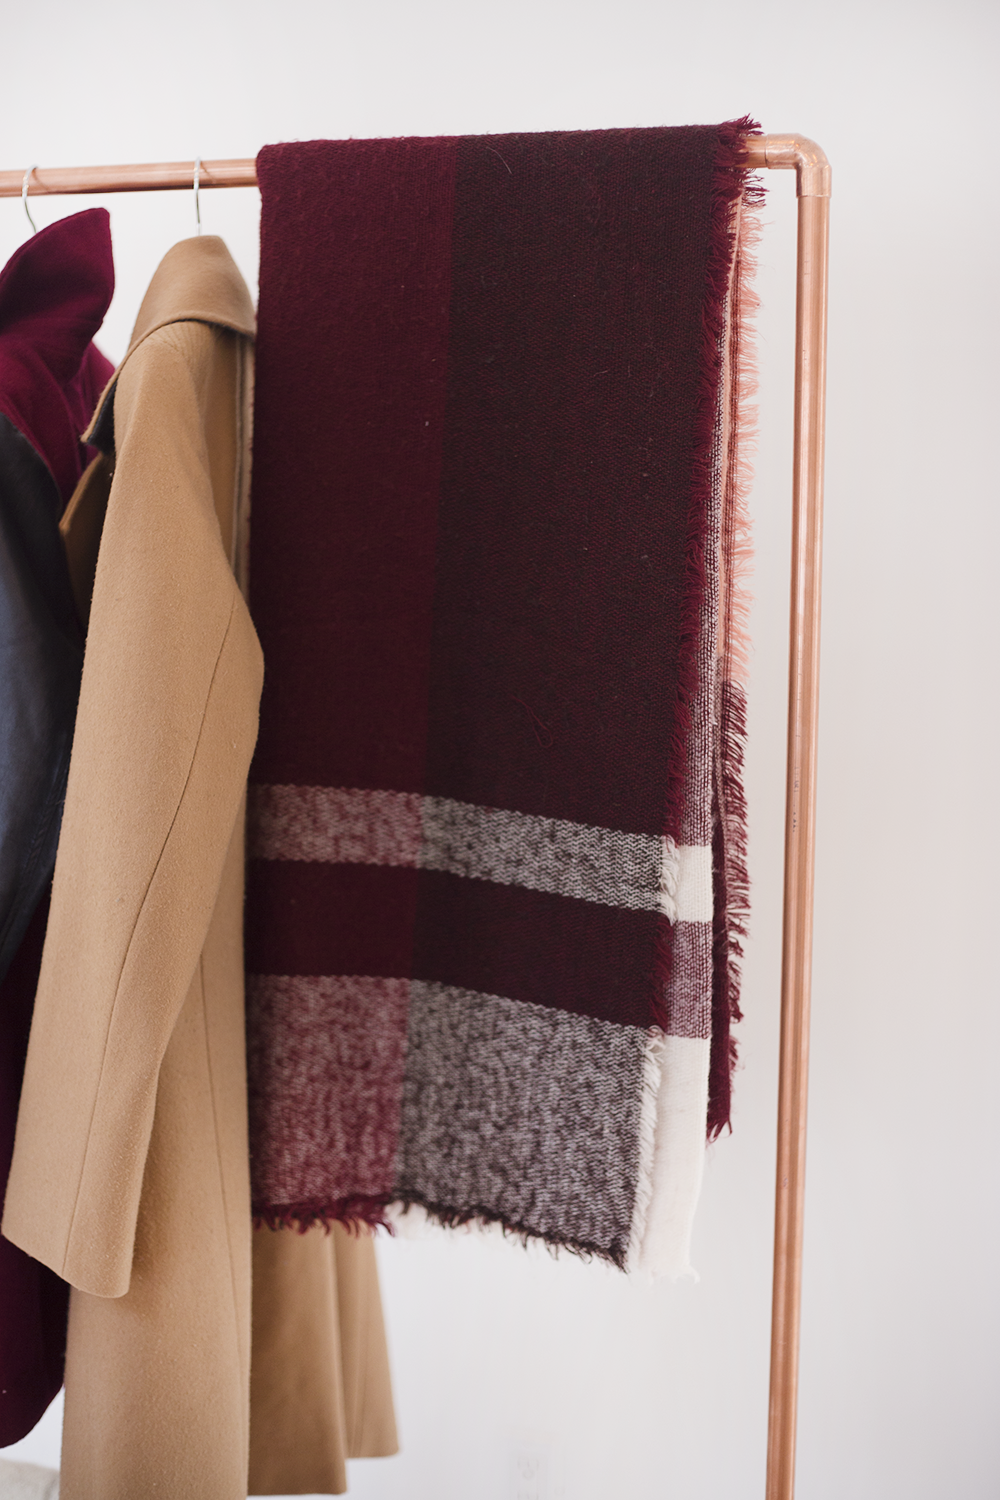
Literally. The best part of having this beautiful copper garment rack? Using it! It holds coats, clothes, bags, scarves, hats…anything you can think of.
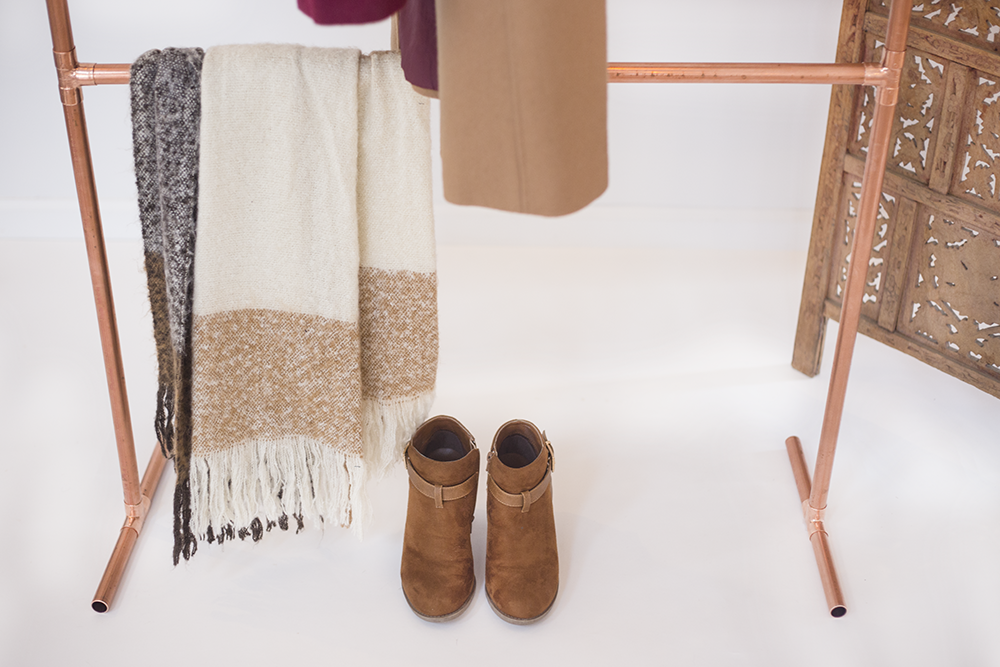
While technically the lower beam is for support, it also holds a great blanket scarf. Place your shoes underneath for extra organizing!

There you have it! Your own gorgeous DIY copper garment rack. How will you dress it up? Have you read The Curated Closet? Did you like the gif I made? These are important questions.
As always, show us your projects on Instagram with #lilyandvalliving, pin the above image if you enjoyed this project and please comment below with your thoughts on this DIY!


No Comments