
Happy October 1st, friends! This is my absolute favorite time of the year. If you follow me on Instagram you probably noticed the fall overload! I love everything about the season and the abundance of pumpkin spice everything is one of my favorite parts. (P.S. For my other pumpkin obsessed friends, I’ve created a Happy Pumpkin Spice Season card to celebrate!)
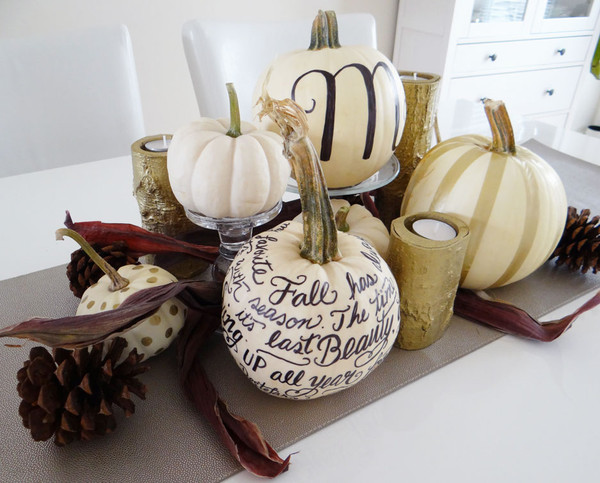
Not only do I love pumpkin spice, but I am in love with decorating with pumpkins! They are just the coolest things and the creative possibilities are endless. This year, I decided to make a pumpkin centerpiece for our dining room table out of white pumpkins! The main focus of the display is the two hand lettered pumpkins I drew with a black sharpie for a fun contrast against the white. The centerpiece was simple and fun to create so I thought I would share this little DIY. I hope you enjoy it!
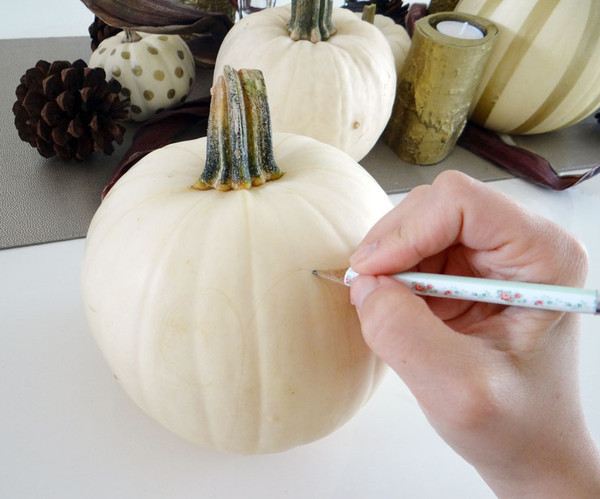
Be sure to thoroughly wash any dirt from the pumpkin and dry completely before lettering. I started with a very rough pencil layout on the pumpkin just to be sure the monogram would be centered and cover the appropriate space. Next, I drew the outline of the monogram with a sharpie and filled it in.

I decided to draw all over the second large pumpkin to add a fun element next to the simplicity of the monogram. This quote by Lauren DeStefano was perfect- “Fall has always been my favorite season. The time when everything bursts with its last beauty, as if nature had been saving up all year for the grand finale.” Seriously. How amazing is this quote?! I just love it. I started at the top and drew the words in a circle around the entire pumpkin. Once I created the first circle I continued the quote on the second circle, and third, and so forth.
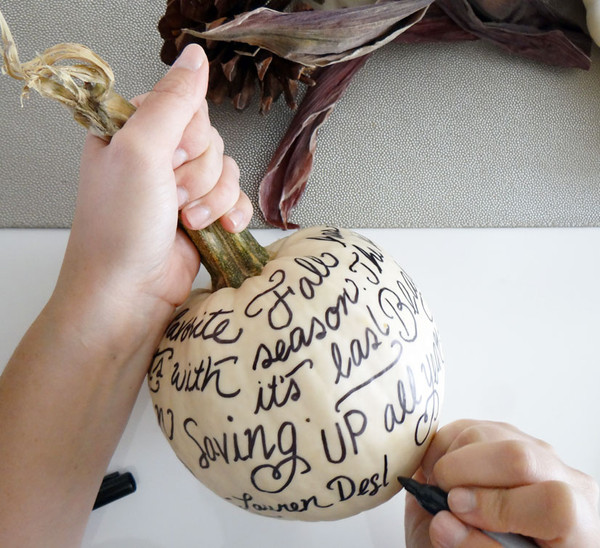
The great thing about this design is that it does not need to be perfect! The lettering as a whole will create a very pretty pumpkin so no worries if each word isn’t perfectly lined up etc. Hint: As you’re drawing around the pumpkin be aware of how the sharpie is drying. You may want to take a few breaks to avoid any smudging on your work surface and the lettering. After everything was drawn and dried, I went back over the letters to thicken them up and add a bit of polish.
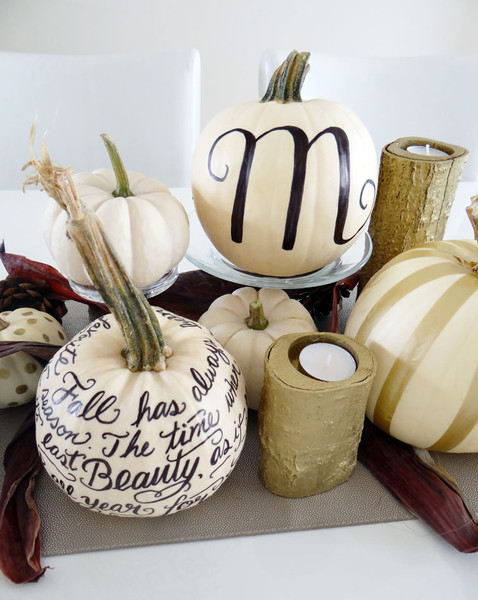
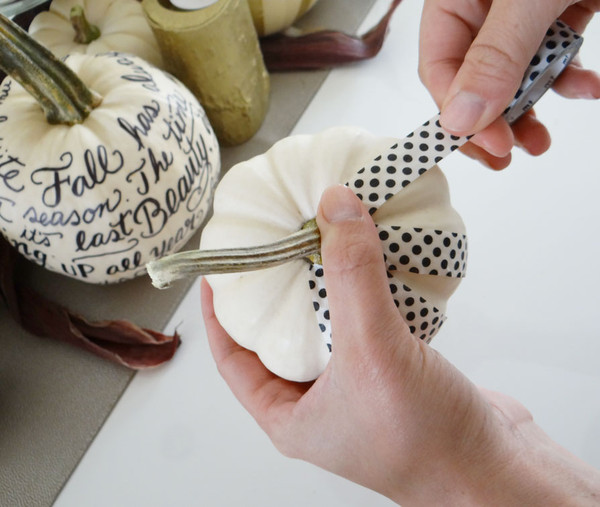
Now for the other pumpkins in the display! I added gold dots with a gold sharpie paint pen to two of the mini pumpkins. The gold striped pumpkin was created with washi tape! This was such an easy task with a gorgeous result! I also used this method on one of the mini pumpkins using black and white polka dot washi tape! I’m telling you – SO easy and adorable.
The rustic tea light holders are from Worley’s Lighting on Etsy. I spray-painted them gold to give an elegant vibe.
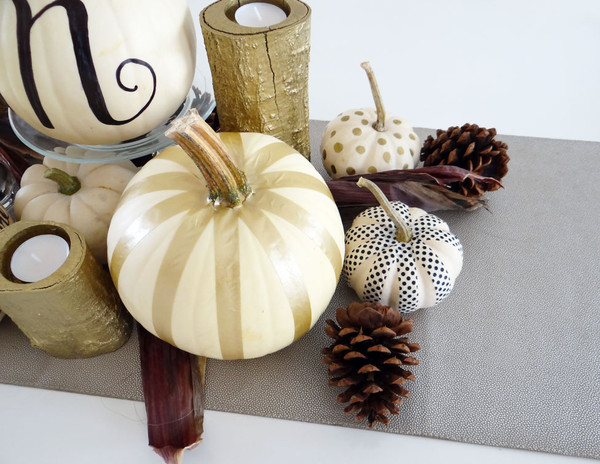
Final centerpiece details include a few pine cones and Indian corn husks peaking at the bottom for texture.
Happy Fall, everyone!!!! <3

1 Comment
[…] projekt 1 LILYANDVAL, DIY projekt 2 PINTEREST (Gold dipped […]