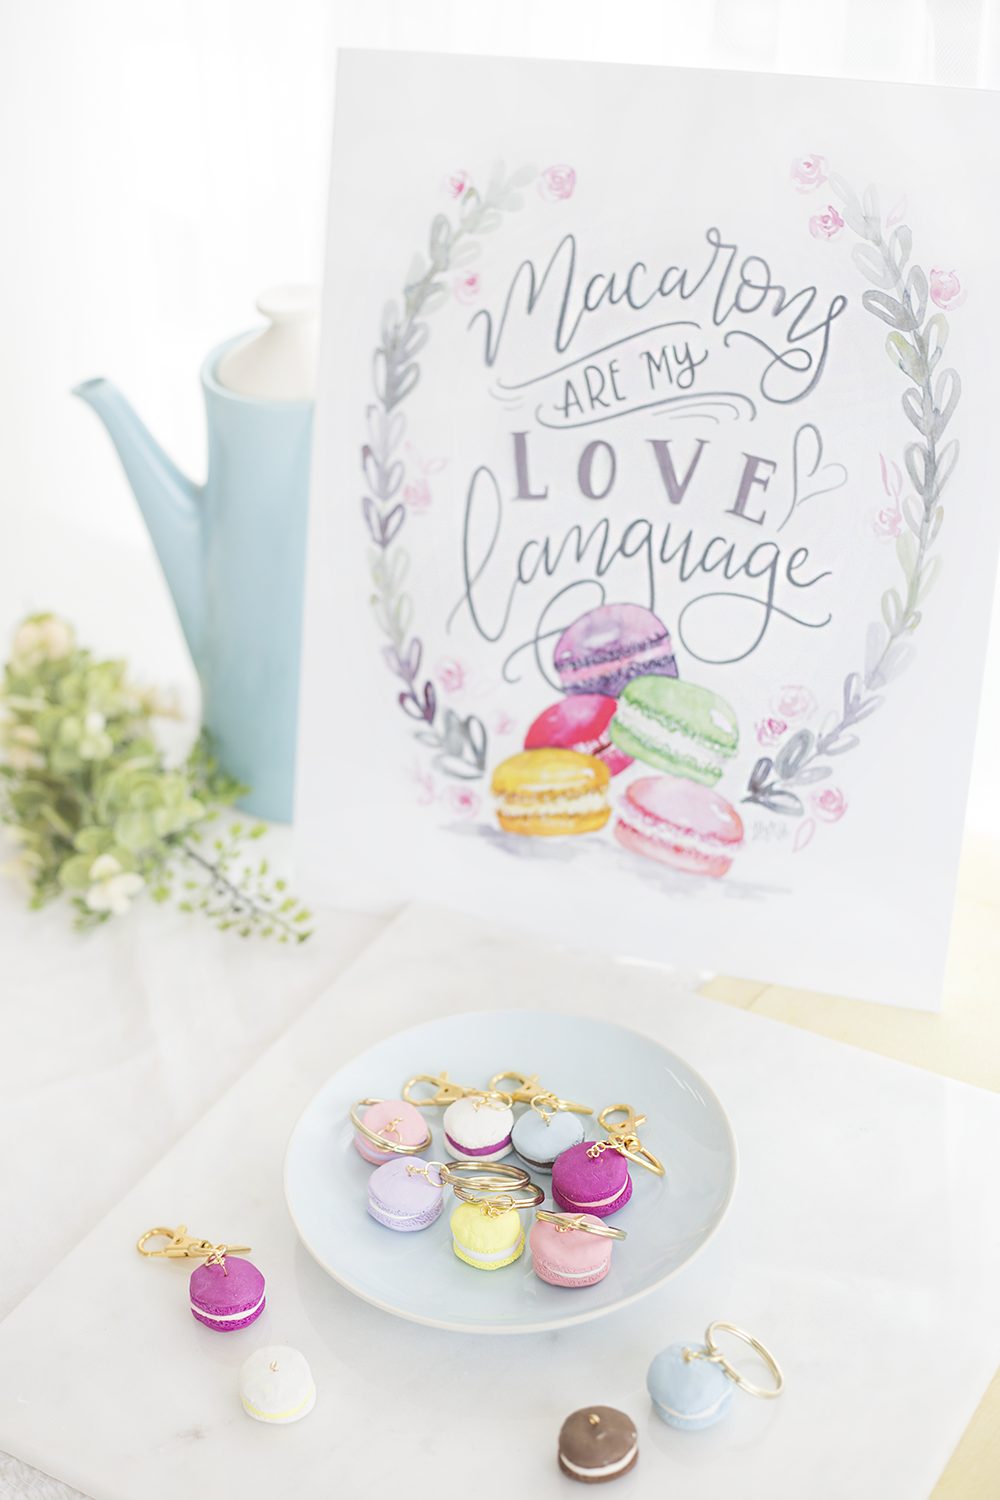
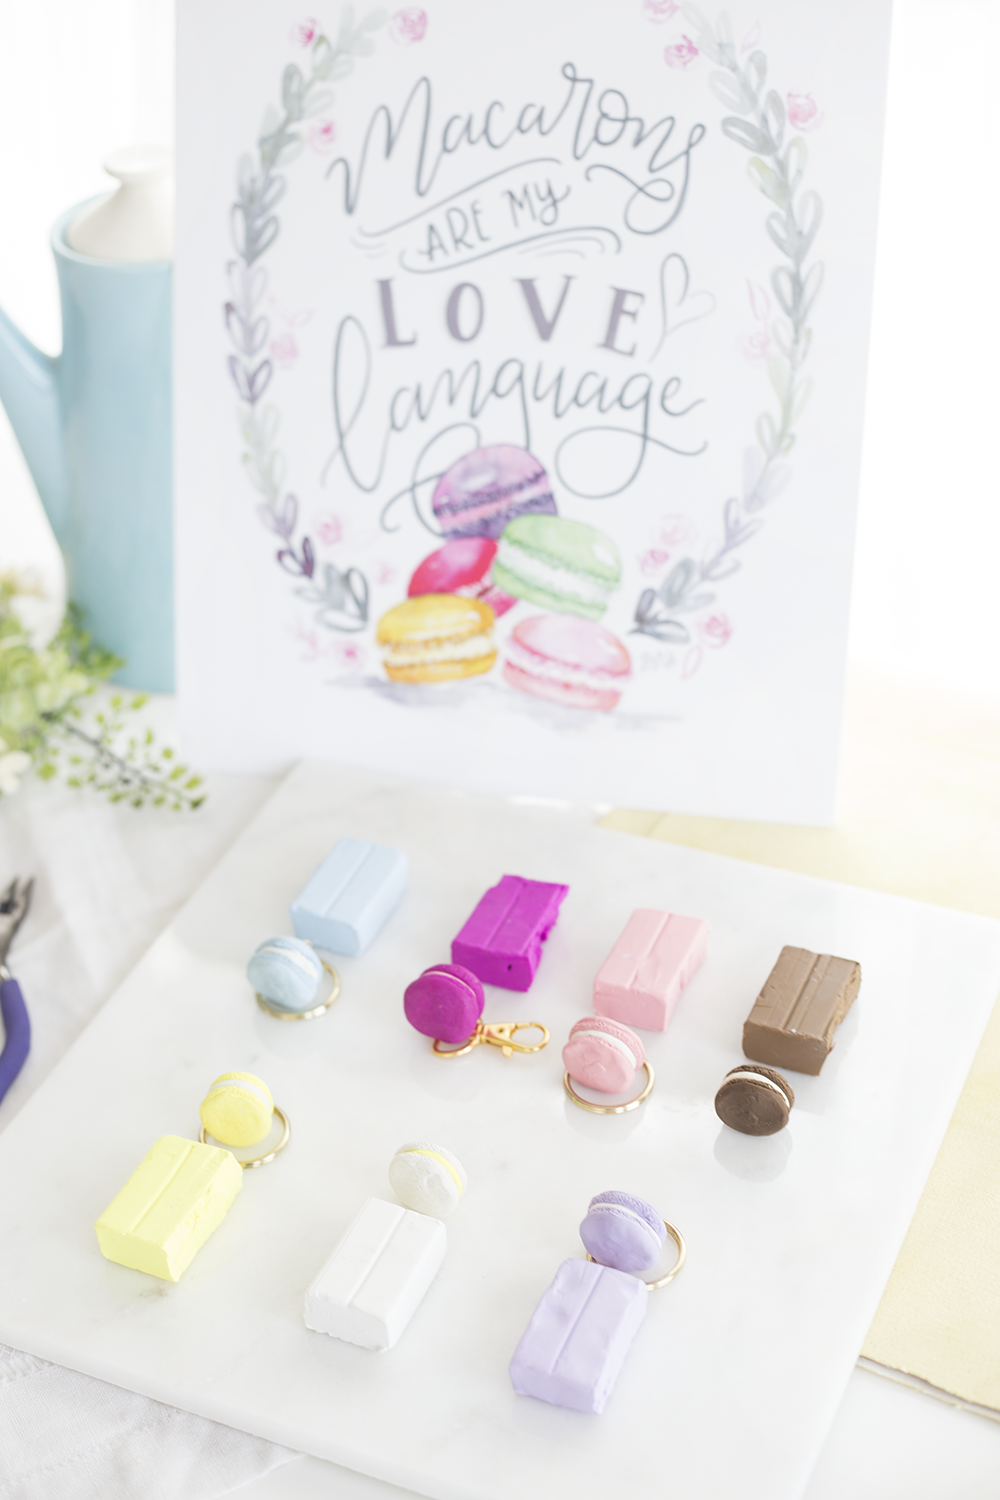
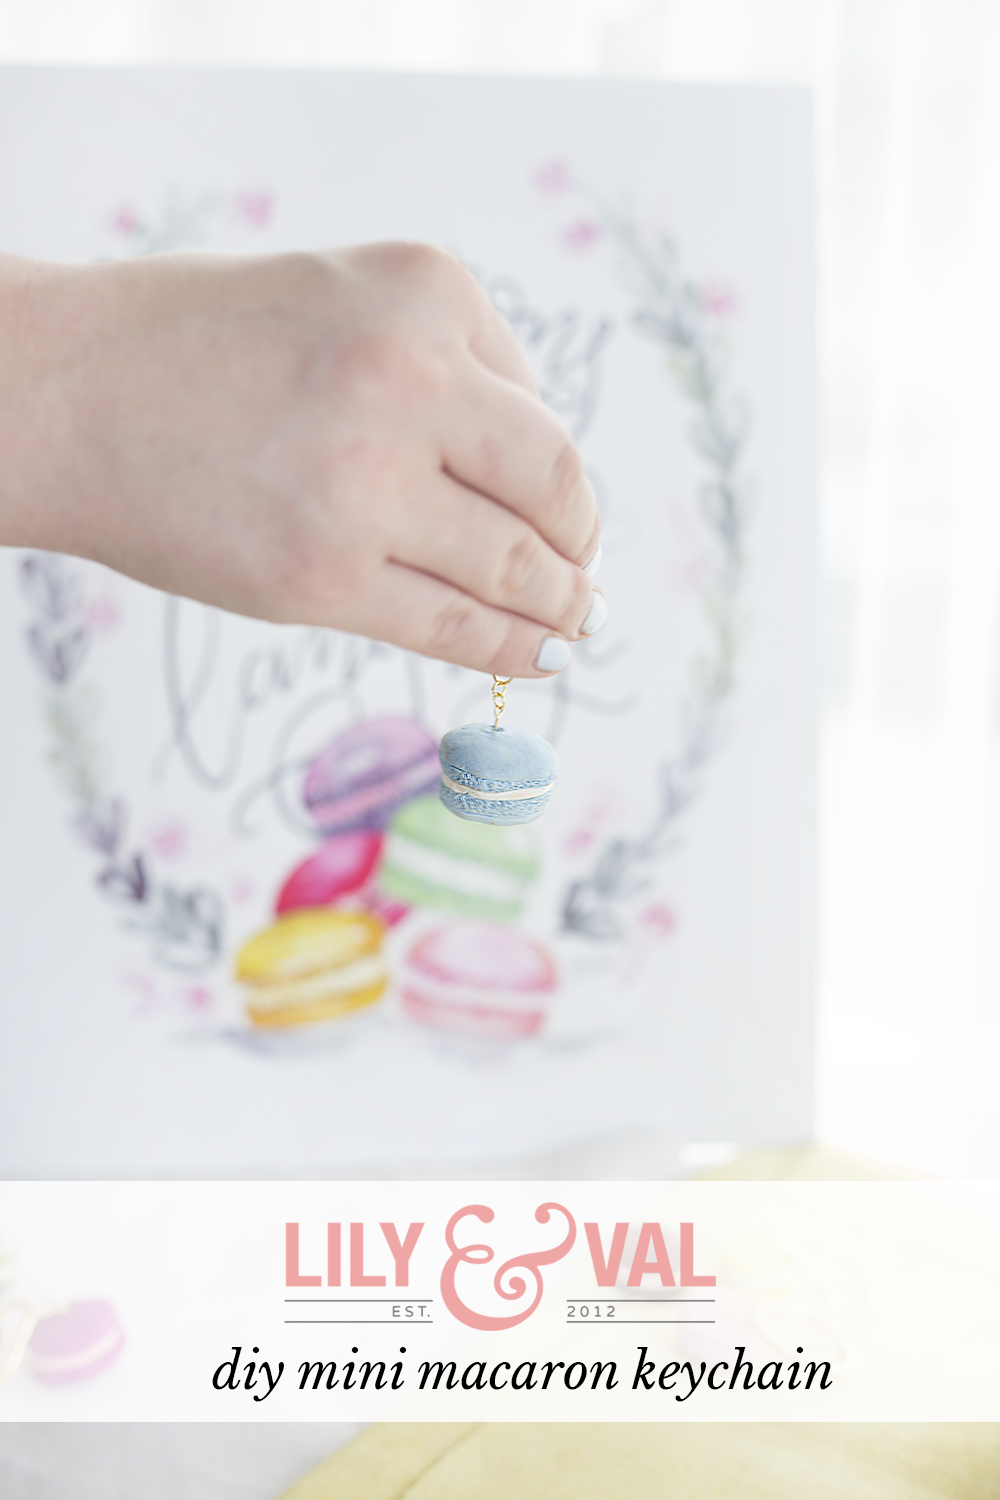
 Are macarons your love language? If so, you have something in common with 90% of the Lily & Val team (which is why Val made this print). It could be because they’re delicious, but personally I love macarons because they’re also adorable. These mini macaron keychains are even cuter – if that’s possible – because they’re pocket-sized!
Making your own DIY mini macaron keychain is easy and quick! I couldn’t help myself from making one in all the pastel colors I could find at Michaels. It’s a perfect afternoon project that results in the most precious little macaron you’ve ever seen.

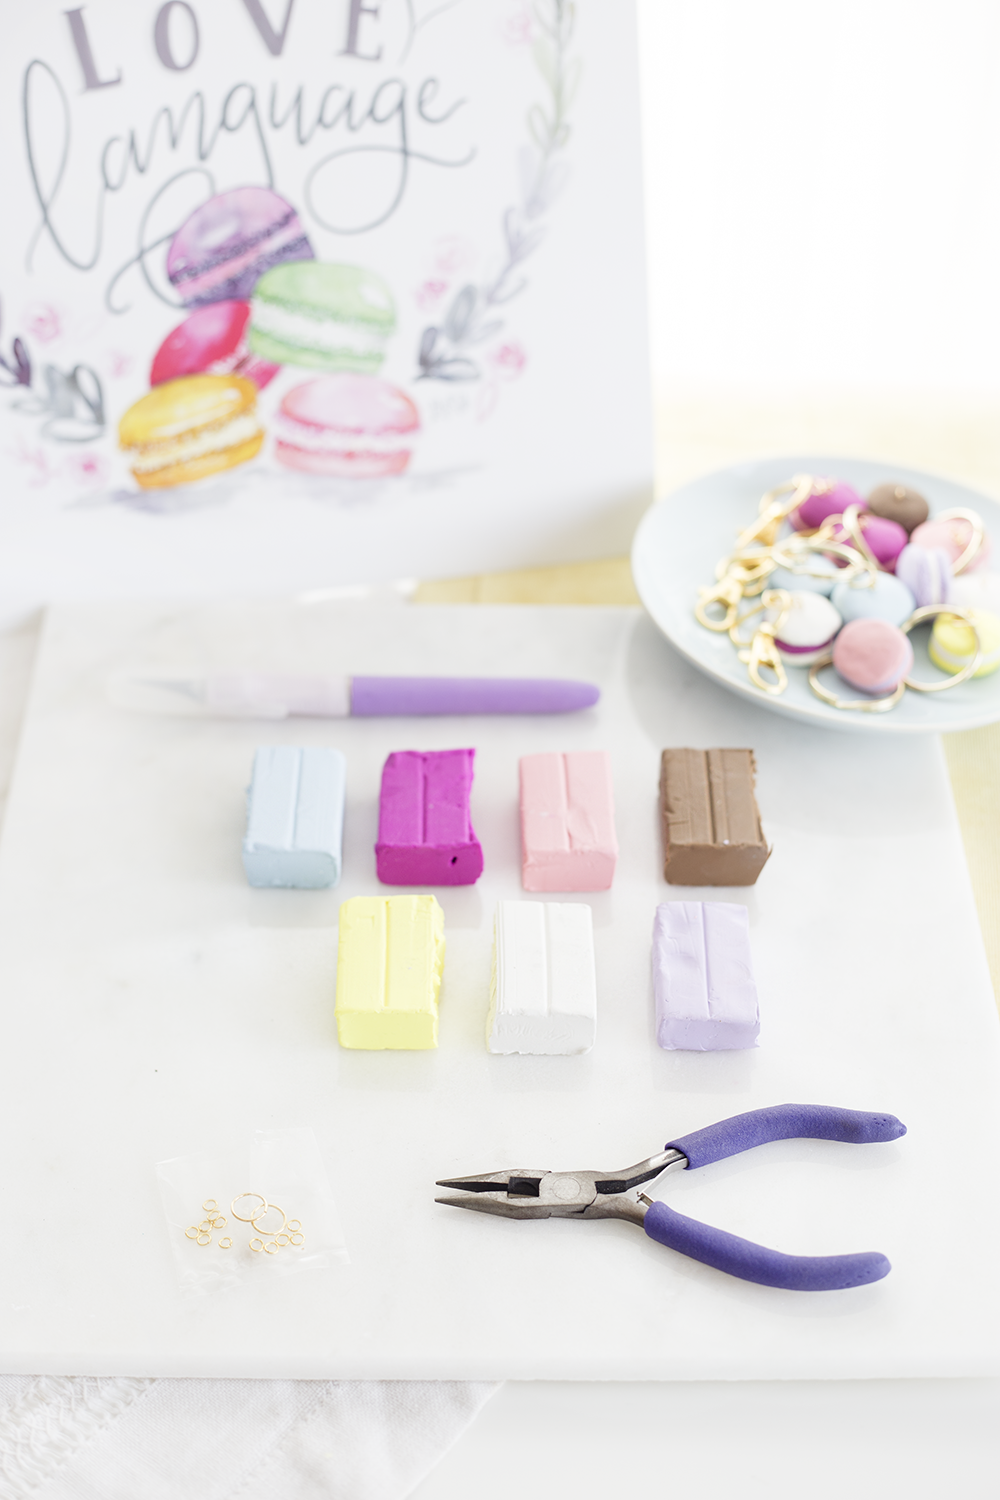
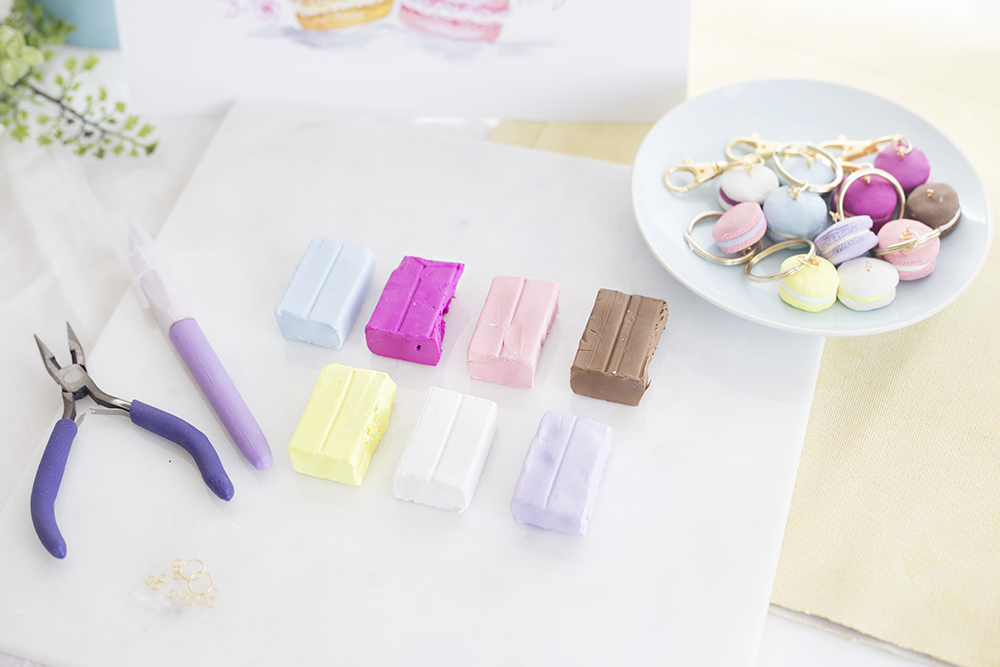
Mini Macaron Keychain Supplies
To make this project, you’ll need:
- Polymer/Sculpey clay in your choice of colors (one for the “cookie” and one for the “filling”)
- X-Acto knife
- Small pliers
- Jump rings
- Keychain ring
- Eye pins
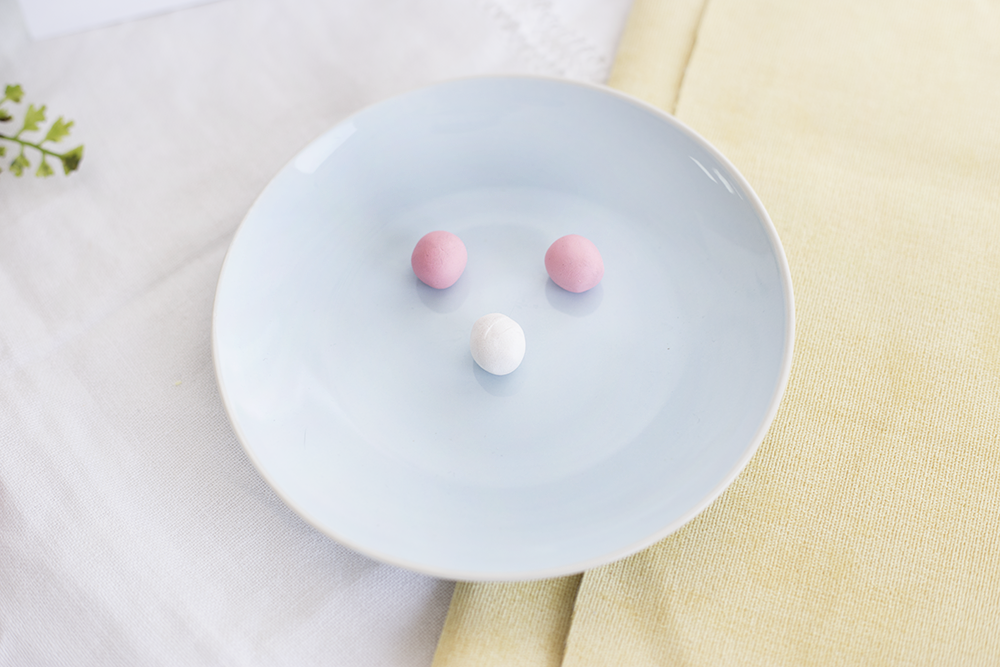
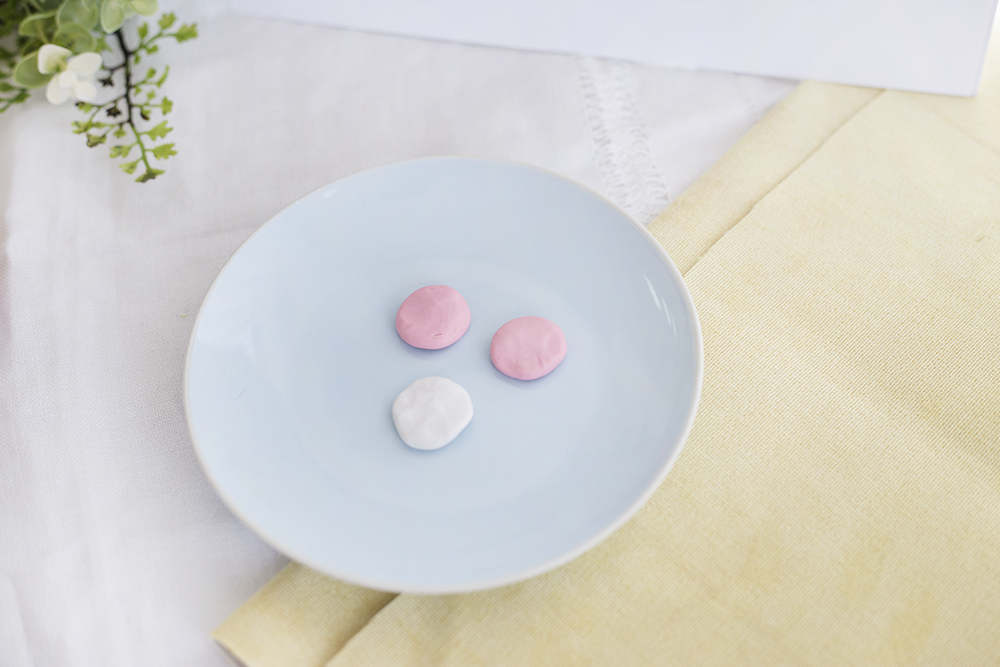
Step One – Roll and Form the Clay
In order to make mini macarons, you’ll need to first form the top and bottom cookies and the filling separately.
Cut small squares out of your clay (about 1/4” thick) – two out of the cookie color and one out of the filling color – making sure that they are close to the same size.
Next, roll the squares into balls using the palms of your hand. Try to make them as spherical as possible for easier flattening.
Once you’ve done this with all three squares, flatten the balls into a nickel size, using your thumb and pointer finger to start pressing in the middle of the balls. Bend the sides of the newly formed discs so that they take on a dome shape.

Step Two – Layer the Cookie
Place your nickel-sized “filling” disc in between the two “cookie” discs. Mold the sandwich into a macaron shape, pushing in the filling if need be.
To make your clay look more like a mini macaron, draw a line with your X-Acto knife about 1/4” from where the cookie meets the filling (on both cookies) and poke tiny holes in the space between that line and the filling. Do this all the way around the cookies to give your macarons a realistic touch. This really transforms it!
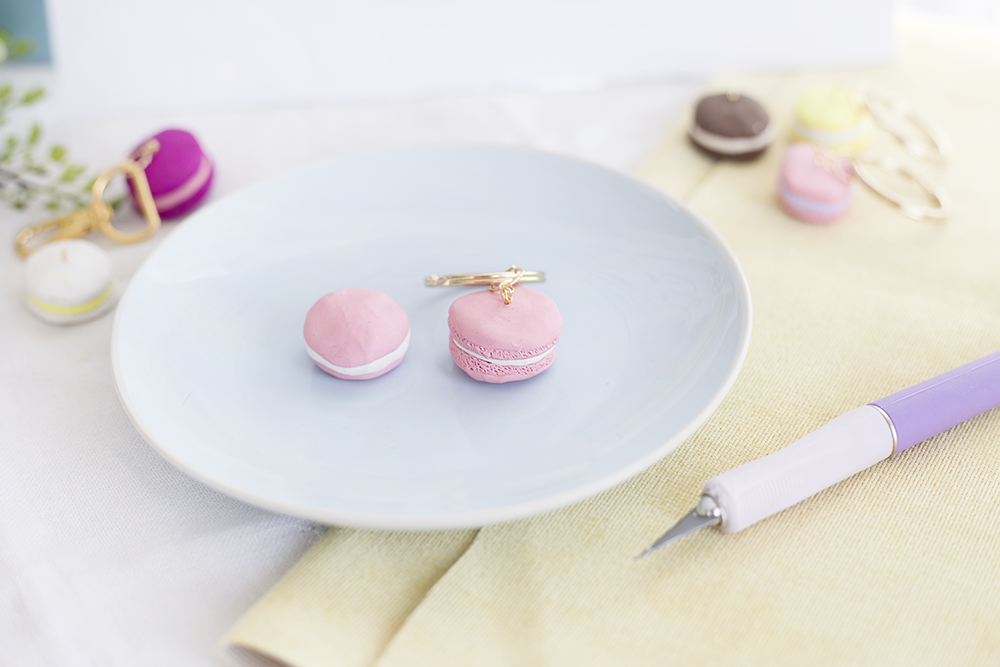
Step Three – Place the Eye Pin and Bake
After you’ve finished creating the macaron texture, it’s almost time to bake! First, though, cut an eye pin to size so it will fit entirely inside the macaron and insert it into the middle of the cookie. This will anchor the keychain.
Bake in the oven according to your clay’s package instructions. Sculpey says to bake at 275 F for 15 minutes per 1/4” of thickness to the clay shape.
After the macarons have baked, let them cool until hardened completely.
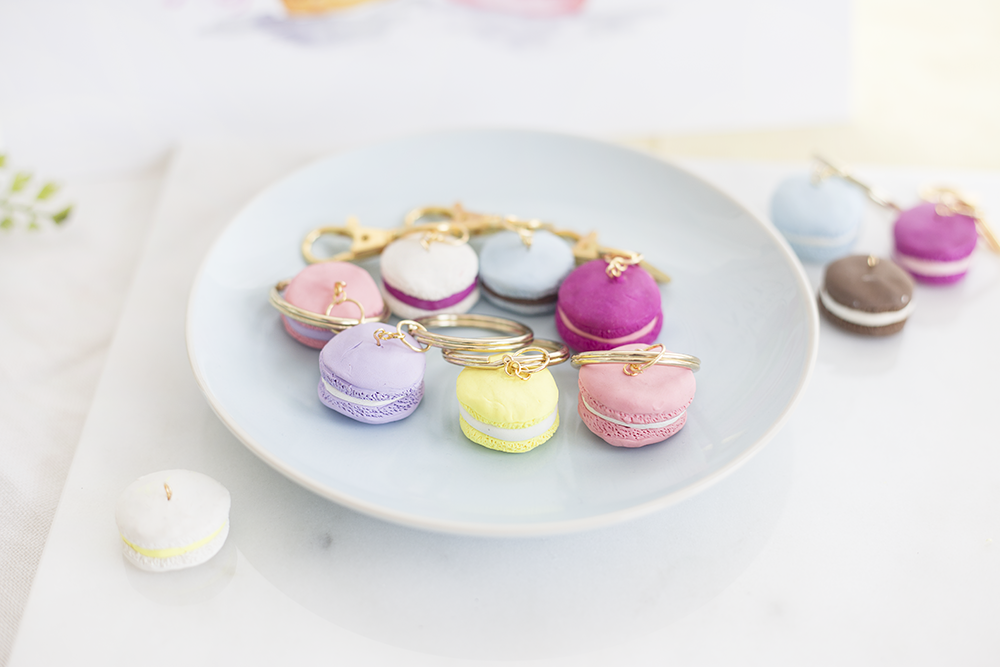
 Step Four – Build the Keychain
Since we baked an eye pin into the macarons, we’ll have a hook to hold our keychain. For mine, I connected three jump rings together (two small and one large, with the largest at the top) by opening each one with pliers and pushing them shut once looped.
Once you have your chain built, you can connect it to your split key ring and voila!

 Admittedly, I’m not the best at sculpting clay. But I still love how my many keychains turned out! What do you think of this project? We’d love to see what you make! Tag us in your photos on Instagram with #lilyandvalliving.
If you liked this DIY, feel free to pin it with the image above! Share our love language with the world. I can’t wait to see your mini macaron keychains!


3 Comments
So fun!
This is awesome! Thank you for sharing this with us!
Too fun, they are super cute!!