 Remember making salt dough ornaments as a kid? My aunt always had a Christmas craft for the cousins to do during the holidays – many of which involved making ornaments. One year we painted glass bulbs but the next we were only given baked dough so apparently kids with glass was too much to supervise.
I love simple decorations. To me, the natural look of salt dough brings out the nostalgia of Christmas and gives the tree an elegant minimal vibe. If you like our marbled, grown-up version of the salt dough ornament, keep reading for the super easy recipe and embellishing ideas!
 Salt dough is easy to make and takes relatively little effort if you don’t mind getting dirty. Our recipe (adapted from Freutcake) only requires four ingredients and thirty minutes, not including drying time.
Marbled Salt Dough Recipe
Ingredients:
2 cups all-purpose flour
1 cup salt
3/4 cup water (add as needed)
1 small bottle white acrylic paint
Directions:
Preheat your oven to 300 F. Prepare a baking sheet with parchment paper and set aside.
In a large bowl, mix the flour and salt together until thoroughly combined. Pour in the water and begin to knead batter into a ball of dough. Continue to combine, adding flour and water as needed, until you have a dough that does not stick to your hands but holds together without crumbling.
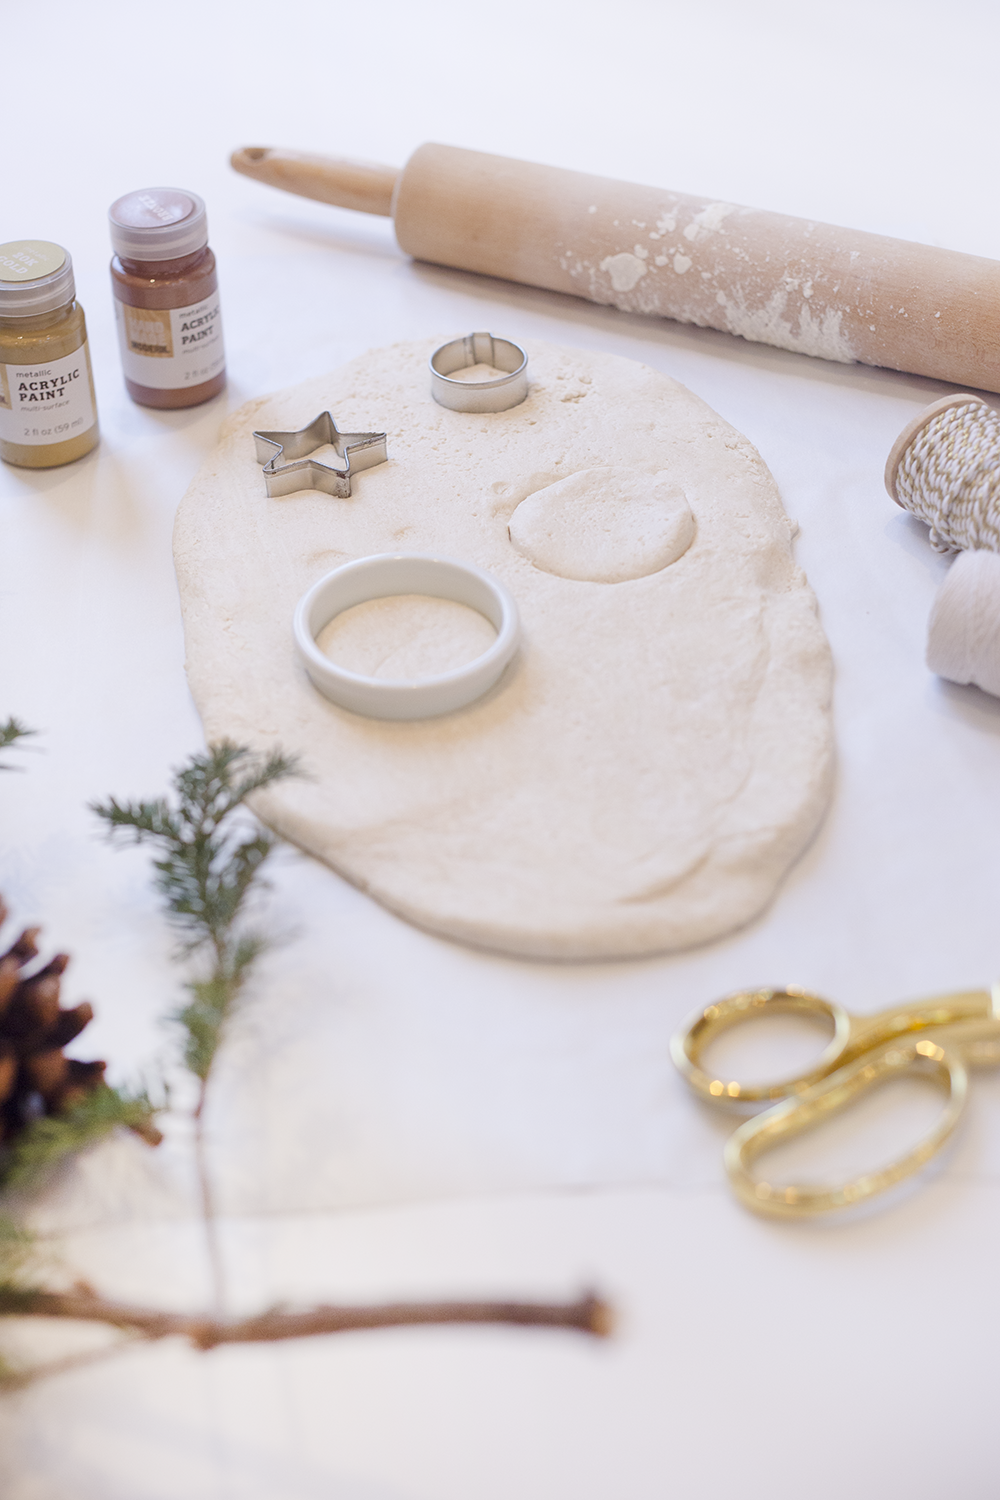
Once your dough is at the right consistency, pour in the white acrylic paint. I used an entire small bottle to make about 20 ornaments. Adjust this according to your preference! If you want your salt dough to be completely white, add in the paint when the batter is still unformed and watery. To make the marbled effect shown here, you need to add the paint after the dough has formed shape.
Continue to knead the dough with the paint added in. Work with it until the paint is combined throughout, adding flour if necessary to balance out the stickiness. Wrap your marbled ball of dough in plastic wrap or tin foil and refrigerate for 10-15 minutes – this helps to firm up the dough for easier rolling.
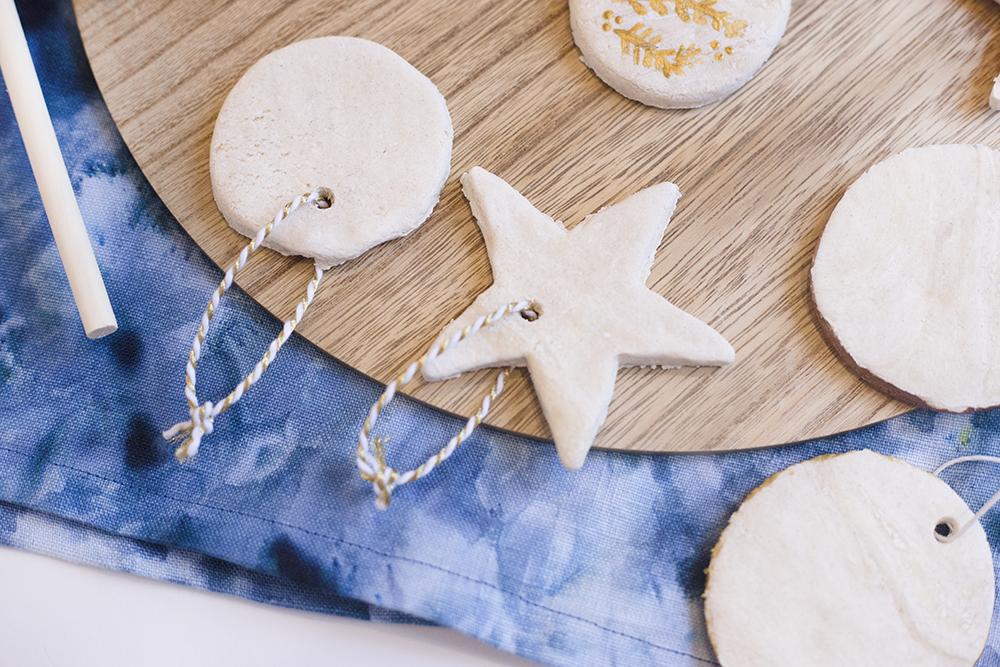
Once your dough is firm, sprinkle flour onto a clean surface and plop your dough ball on top. Dust a rolling pin with extra flour and roll out your dough until it’s about 1/4 inch thick as shown below. Use cookie cutters (I dug out my mom’s old metal collection) to cut out your shapes and transfer them to the parchment paper-lined baking sheet. Use a straw or toothpick to poke holes where you’d like to string the ornaments.
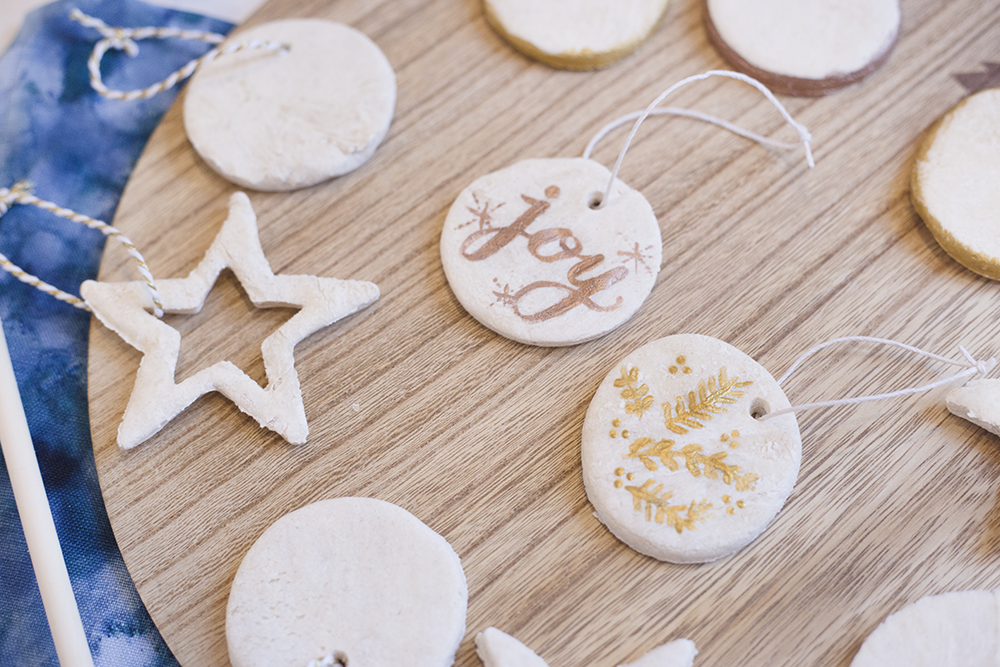
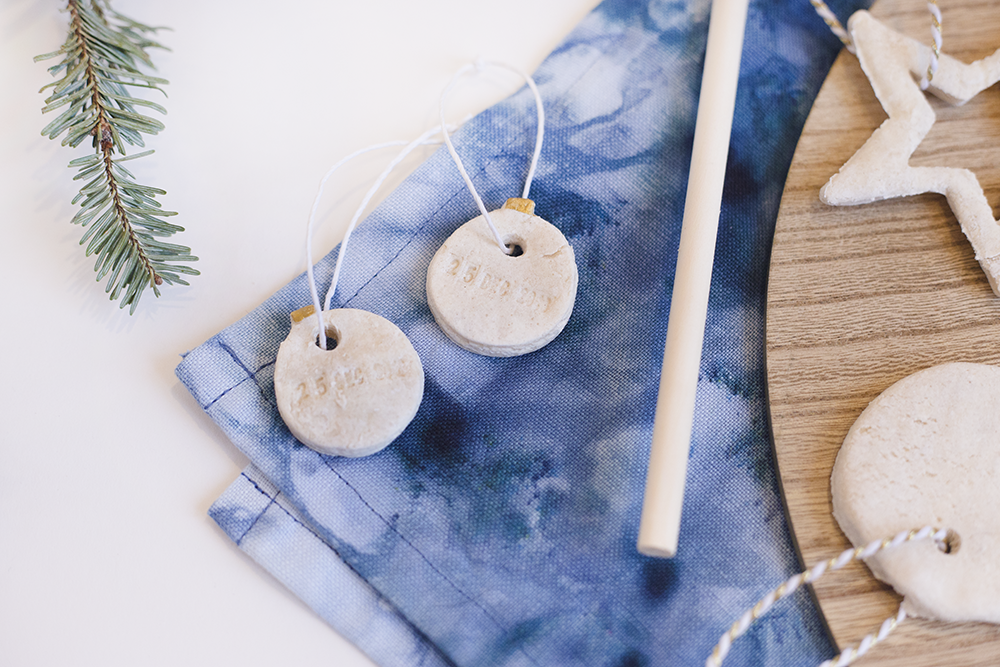
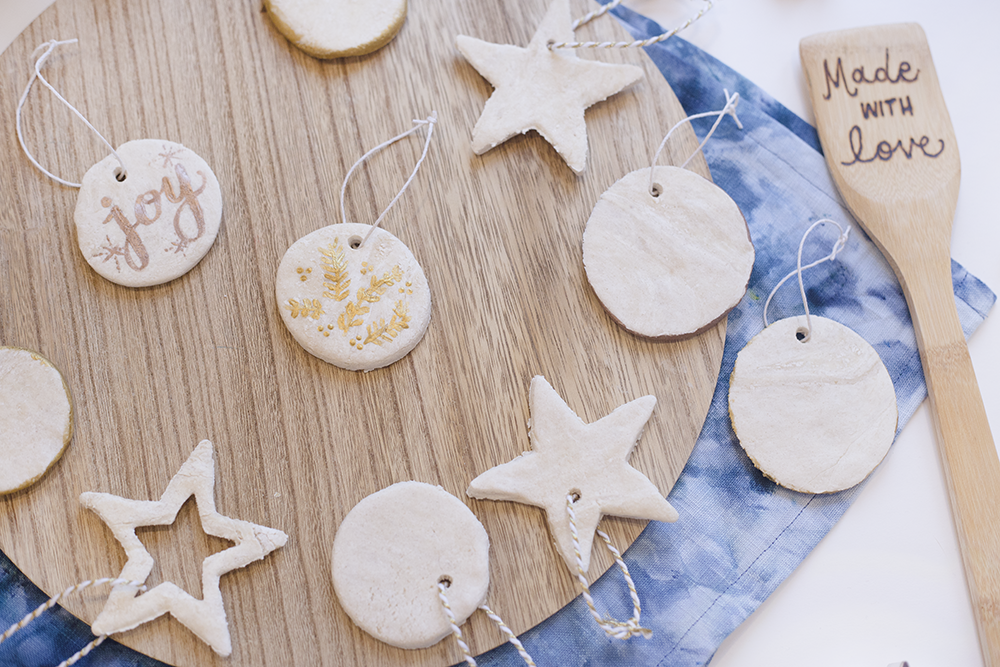
Now for the fun part: personalizing! While the ornaments are still soft, try stamping a date or a name into them. The heat will set this so your design is permanent. Pressing pine needles into your dough, cutting out shapes with mini cookie cutters and using your fingerprints or your pet’s paw print are all adorable ideas for making your ornaments special.
Bake for 30 minutes until stiff but not browned. Set aside to harden uncovered at room temperature for at least six hours – though overnight works best – before you hang them.
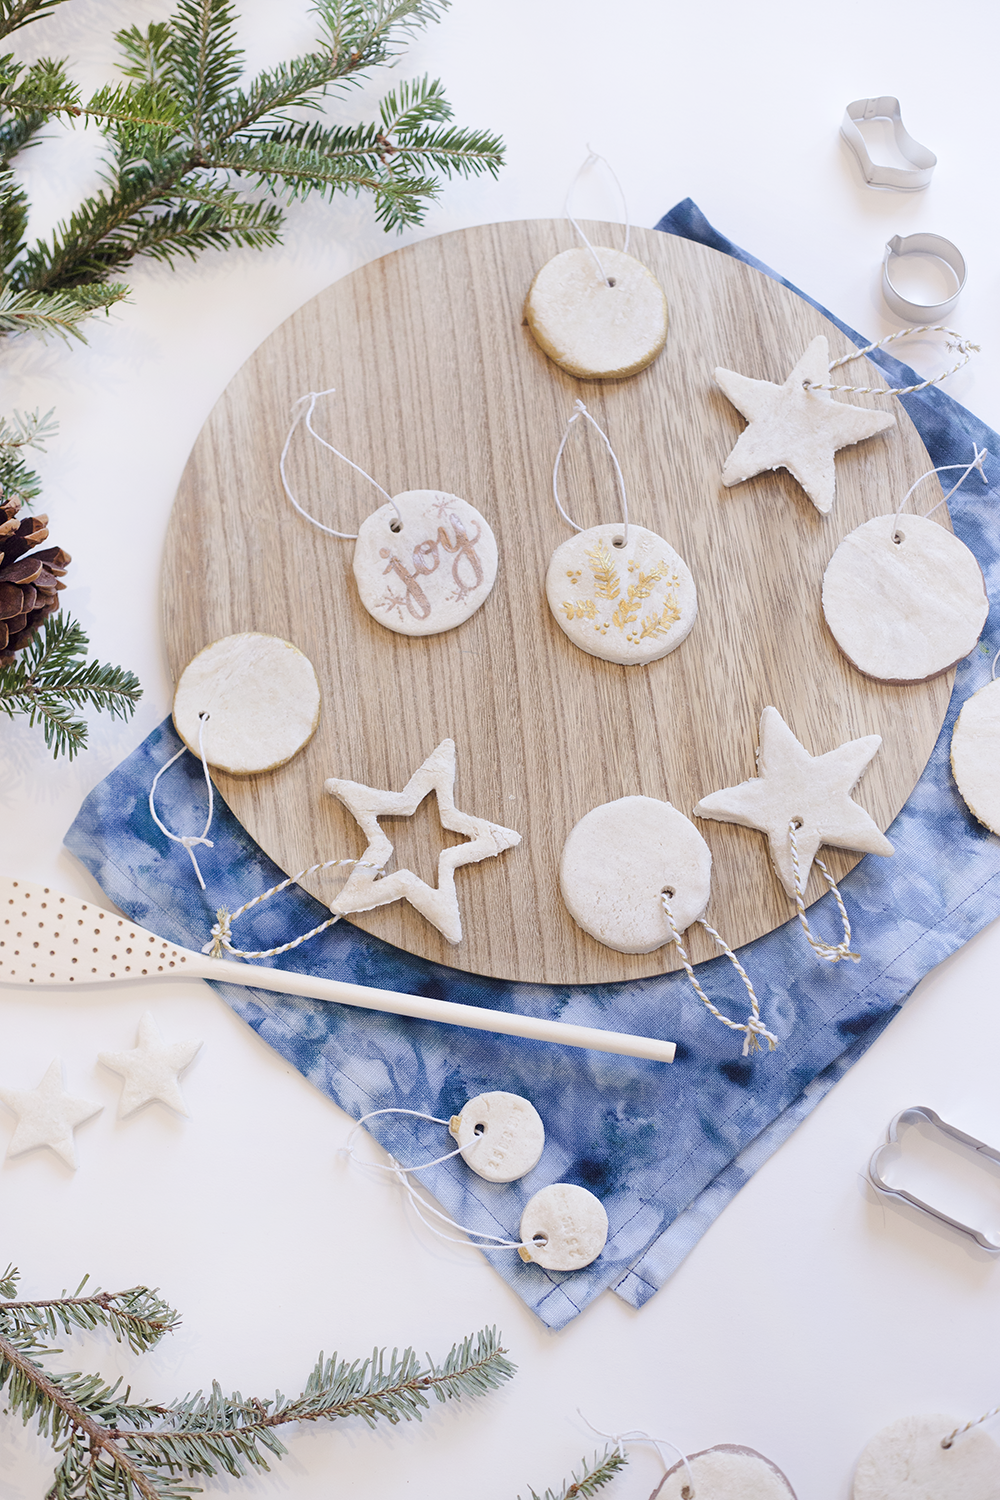
 Once your ornaments have been baked and cooled, try adding some minimal festiveness with gold and copper painted sides or a hand-lettered word. On the mini bulbs below, I stamped the date of this year’s Christmas and painted the tops with gold acrylic paint. Keeping your embellishments minimal lets the natural beauty and texture of the dough shine through.
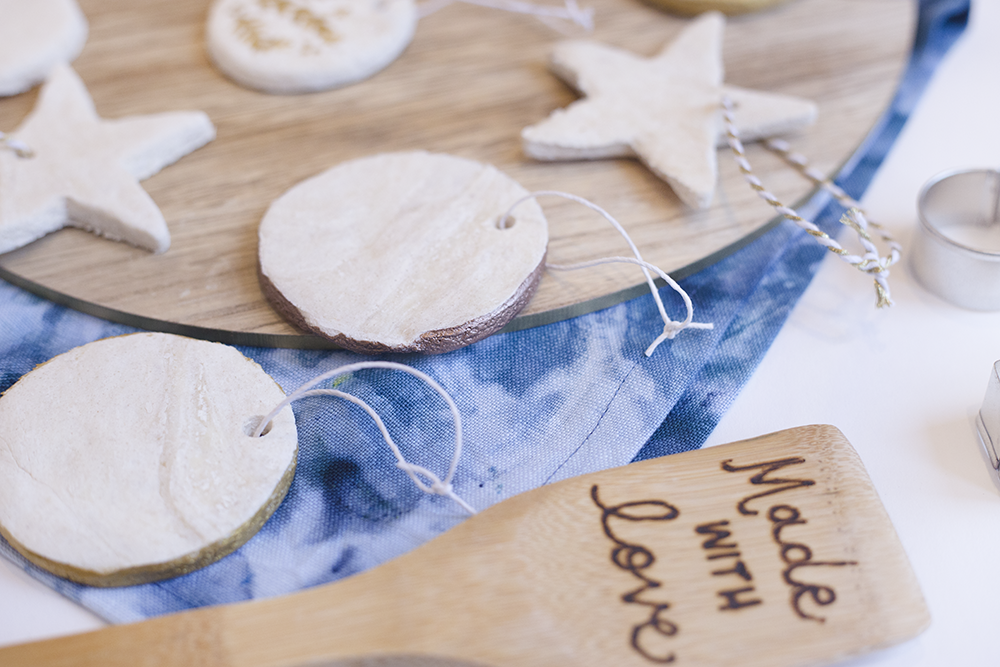 Don’t forget the string! Tie off your ornaments with white or gold-striped baker’s twine for a bit of simple flair. My rule of thumb: if your ornaments are plain, use decorative twine. If your ornaments are painted, use white twine.
 I definitely think crafts like this one are best done with family and friends. Make a tradition out of it! Perhaps personalize an ornament each year or celebrate your first Christmas with your partner/newborn/pet – or use your handmade ornaments for a creative gift tag. There are so many options with this DIY which is why it’s great for the holidays!
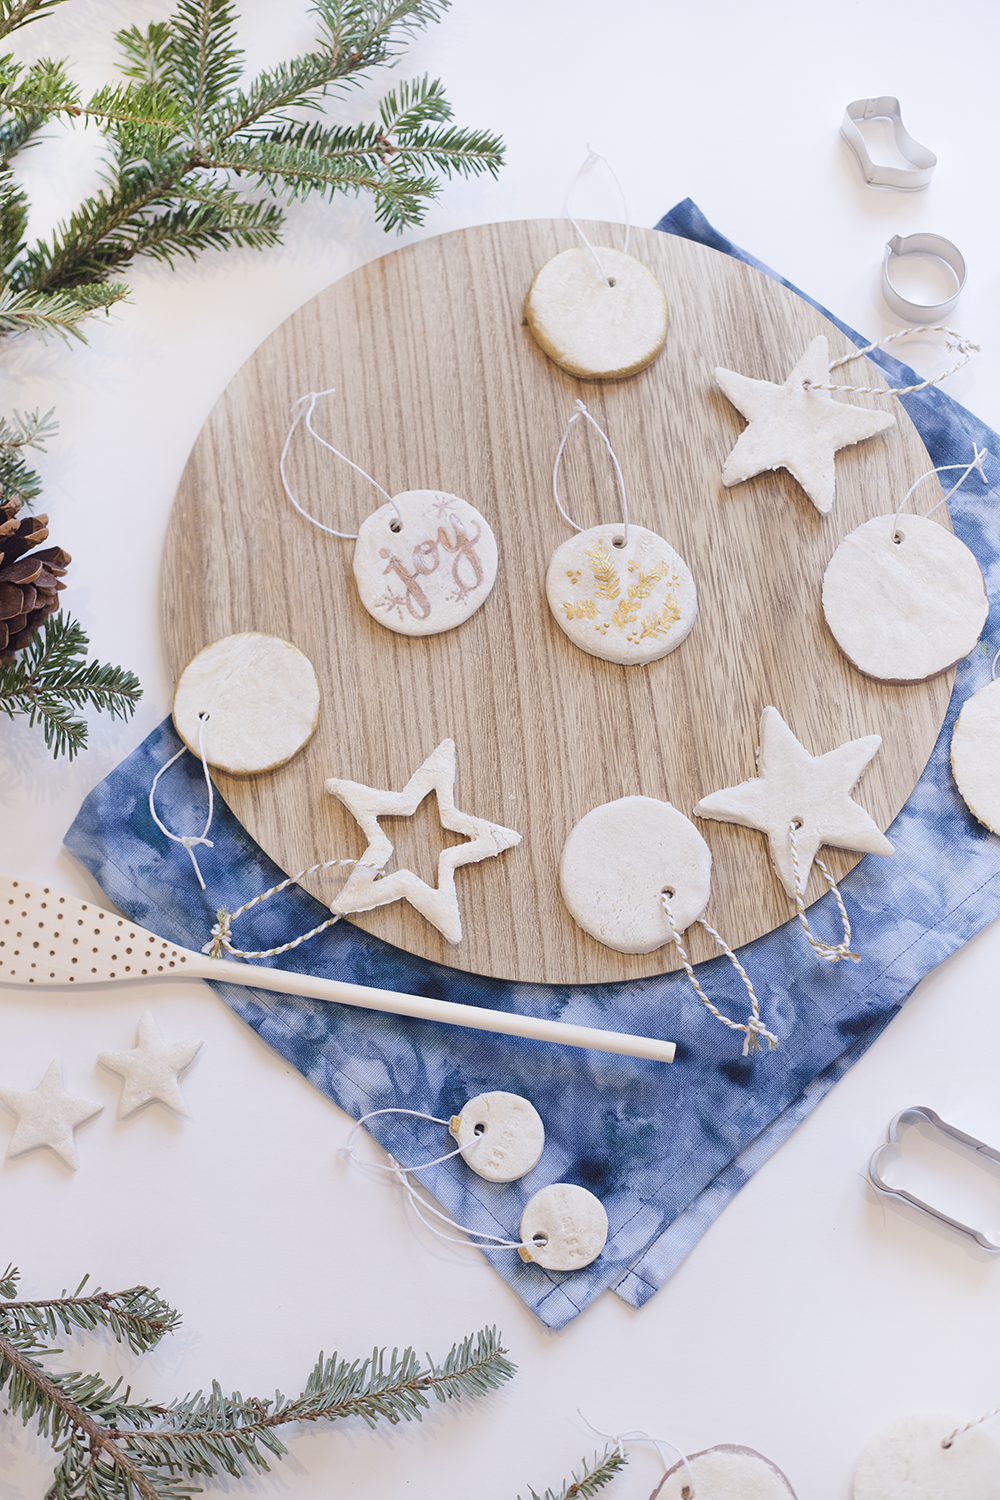 Don’t you love Valerie’s hand-painted touch to these ornaments? The gold pine branches and copper lettering are beautiful and classy. I also love how much dimension is added by varying the shapes and sizes of the cookie cutters. You could string your mix and matched batch of ornaments up to make a super cool garland for the tree or mantle.
What is your favorite holiday craft or tradition? We’d love to hear! Let us know in the comments, and please share your creations on Instagram with #lilyandvalliving!
Featured in this post:
Hand burned wooden spoons | gold & white bakers twine | wood cutting board (similar) | mini cookie cutters | tea towel
Want more holiday inspiration? Check out our Pinterest board!


No Comments