 Hi again! I’m back at it with another holiday-themed DIY for you, though this time we’re focusing on the mantle rather than the tree like we did with our nostalgic salt dough ornaments post. I bring you: DIY modern paper snowflakes! A challenge I find when looking for winter and holiday decor is that there are a lot of projects to bring out your inner child but not a lot that have a simpler, more modern take on traditional crafts. Luckily though, that’s where L&V excels.
This is such an easy DIY that I was able to make all these snowflakes and string them into a garland within an episode of Gilmore Girls – and I was eating cake at the time. Hey, it was my birthday three days ago.
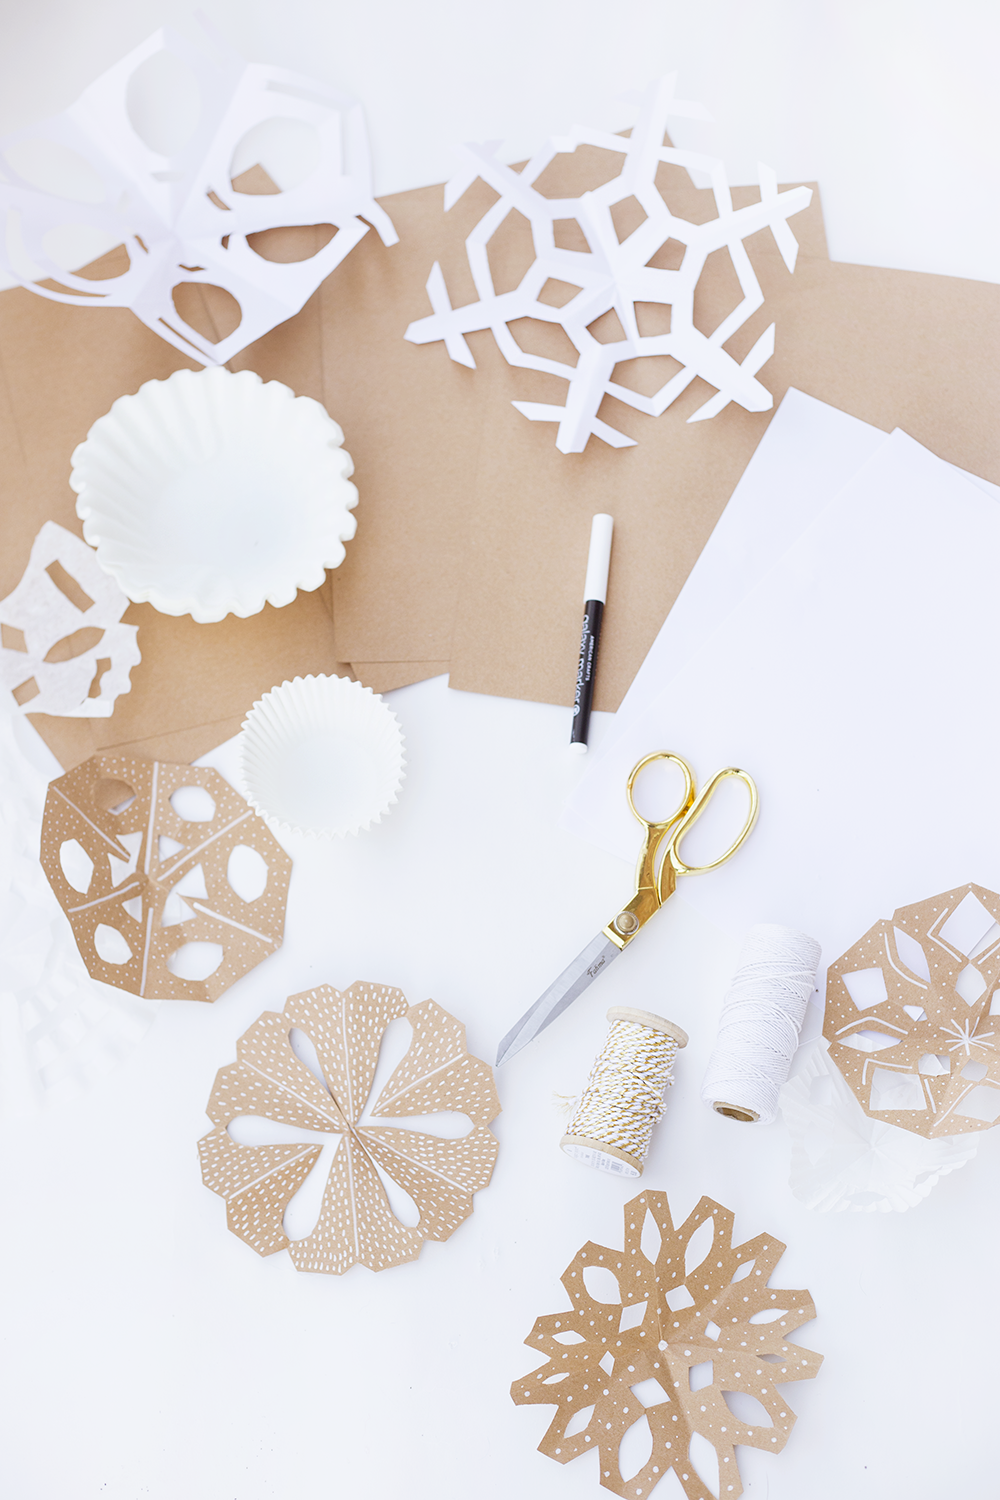
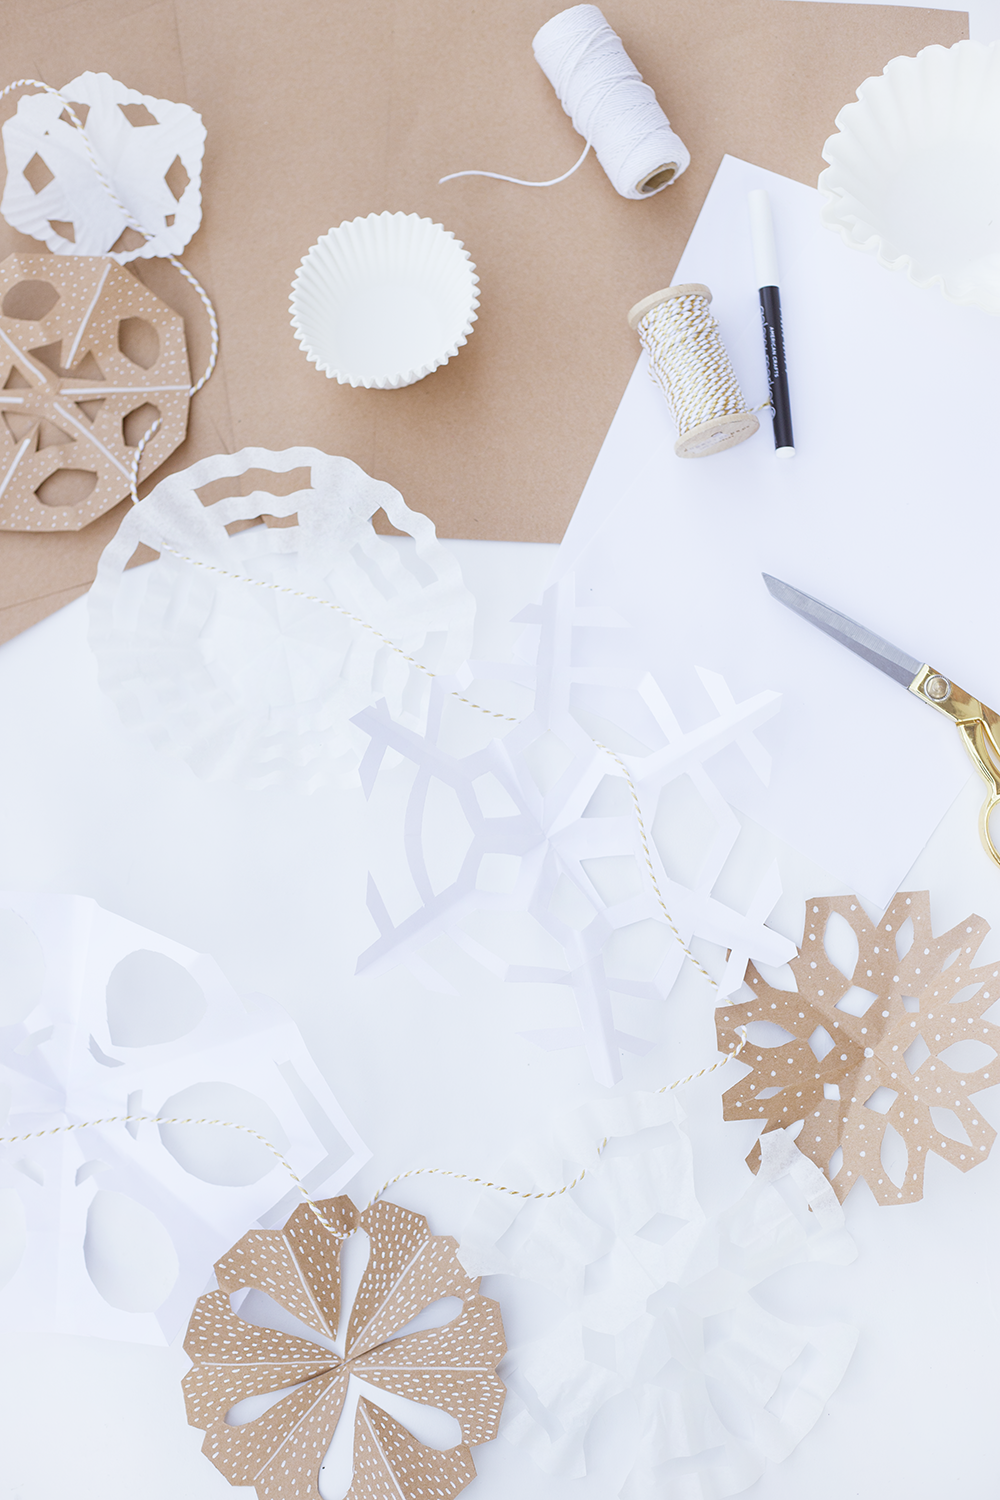
The supplies you’ll need:
-Plain white paper
-Kraft paper
-Coffee filters
-White cupcake tins
-Scissors
-Baker’s twine
-White paint marker
-Folding guide (below)
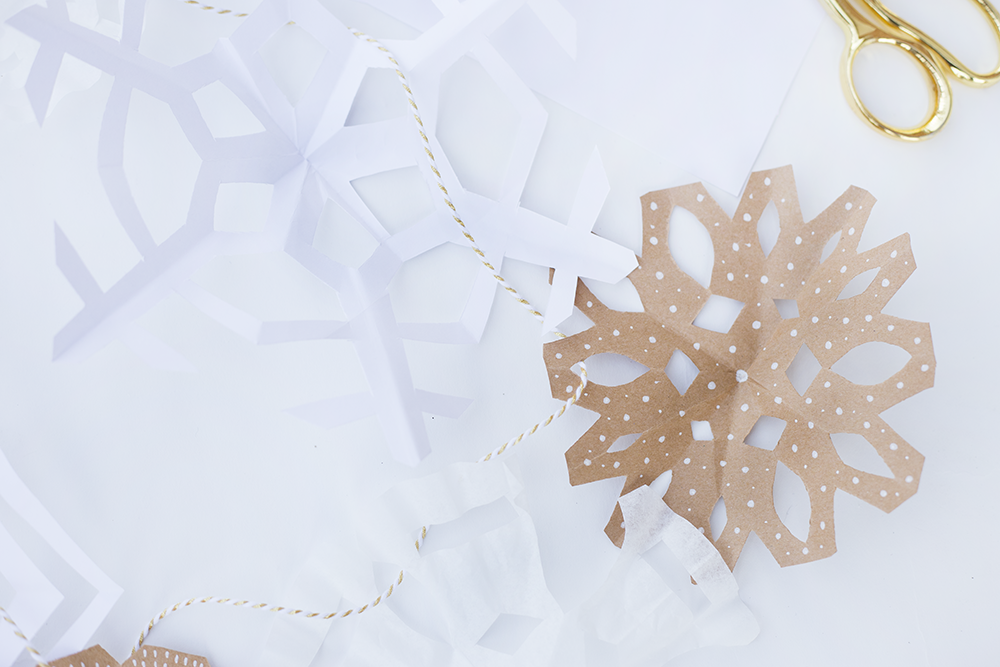
 I chose Kraft paper, coffee filters and cupcake tins to add visual interest to my snowflake garland through the varied textures. Doing this and changing up the size of the snowflakes will make your mantle pop!
STEPS FOR SMALLER SNOWFLAKES
To make smaller snowflakes, I halved the size of an 8.5×11 sheet of paper and used coffee filters and cupcake tins. When folding and cutting these, I followed this guide by Craftiments. Fold circular materials the same way you’d fold a sheet of paper – by matching edges.
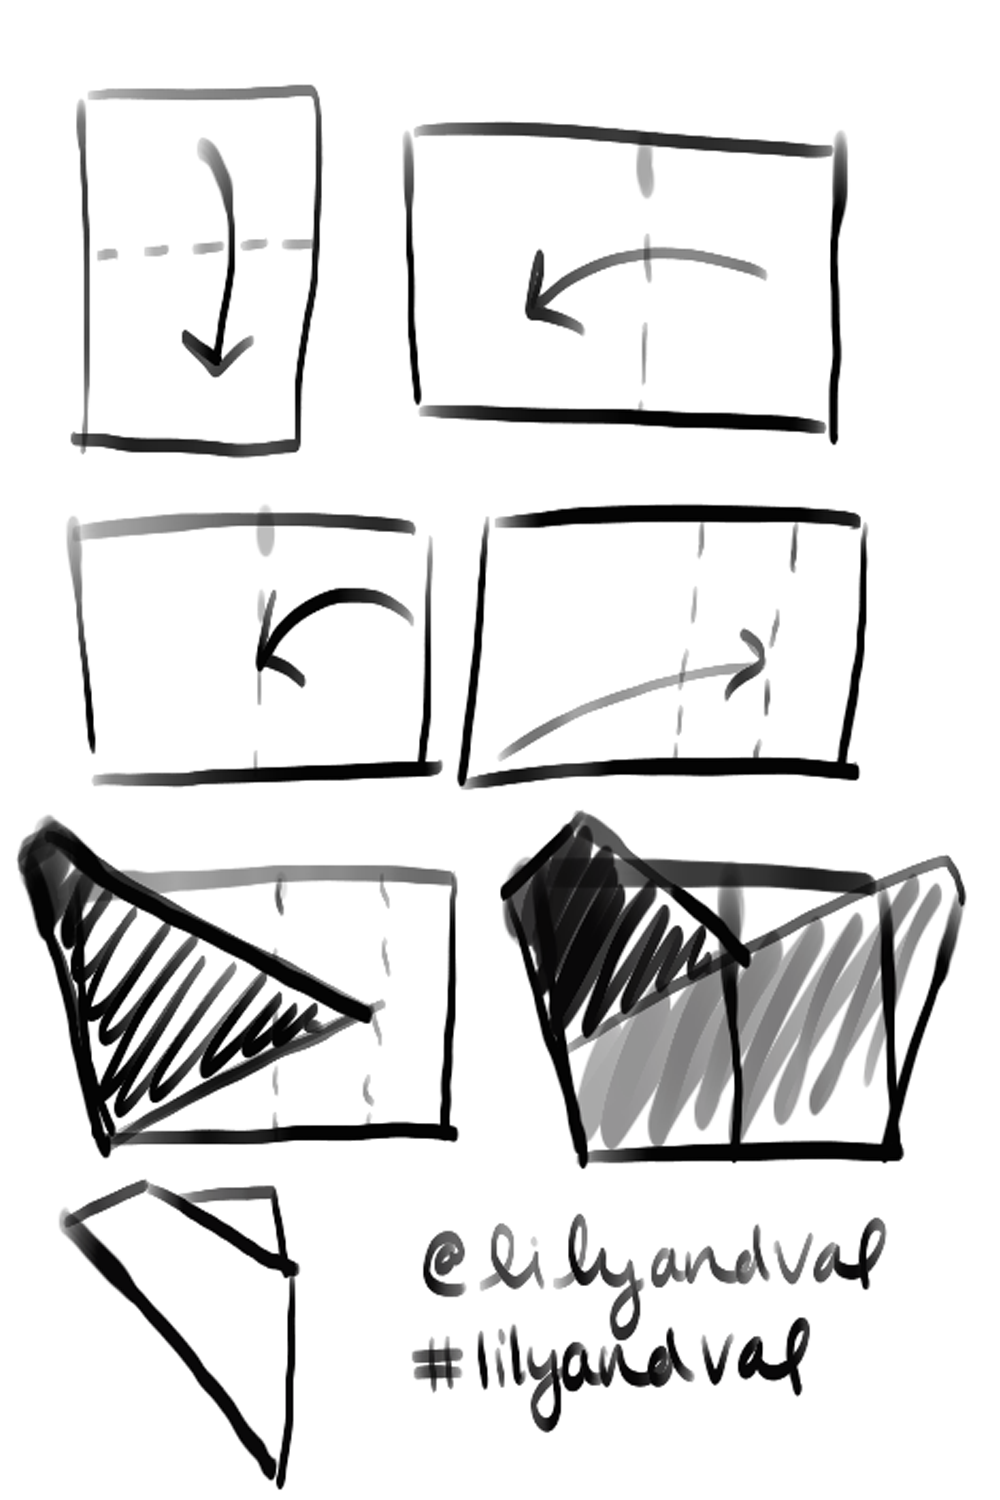
STEPS FOR LARGE SNOWFLAKES
For the bigger, more intricate snowflakes, I used a similar method on a larger scale – as shown by my hand drawn guide above (I’m no lettering artist like Val but I think that looks pretty alright, if I say so myself).
Fold an 8.5×11″ sheet of paper in half hamburger-style (top to bottom, or vertically). Now fold your new segment in half like you’d close a book. We’re about to create quarters to our sheet to use as a guide for folding in the corners. Open up your sheet so that it’s only folded in half, and fold the right half into the center crease, creating two segments on the right side.
Next, fold the bottom left corner of the halved sheet up past the center dividing line to the second crease. Do the same with the bottom right corner until the corner aligns with the left side of the sheet.
Finally, fold this shape in half, meeting the two sides together. They should match up just right (unless you’re an inconsistent folder, like me). If not, don’t worry about it – close cuts it here!
Speaking of cutting, once you’ve reached the final shape shown on my guide, cut the top off so you’re left with an ice cream cone (or triangle if you’re less hungry). This is outlined in steps 5 and 6 in the Craftiments guide for smaller snowflakes if you’d like a visual representation of this step.
CUTTING THE SNOWFLAKES
Cutting out shapes to make the snowflake designs is the easiest, yet most frustrating task in this DIY. Easy because you really just cut wherever you please, frustrating because it takes trial and error to get a design you like. For the larger snowflakes, I followed the first tutorial in this guide.
For the Kraft paper and smaller snowflakes, I made my own designs mostly by cutting out triangle shapes (which turned into diamonds unfolded) and semi-circles. A tip: avoid cutting the points of your folded triangles so that you don’t end up with a big hole in the middle of your snowflakes. If you don’t think your cut-outs aren’t the prettiest, don’t worry! They’ll be even more beautiful after some paint marker TLC. The most important part of this step is to go wherever your creative whim takes you.
 DECORATE
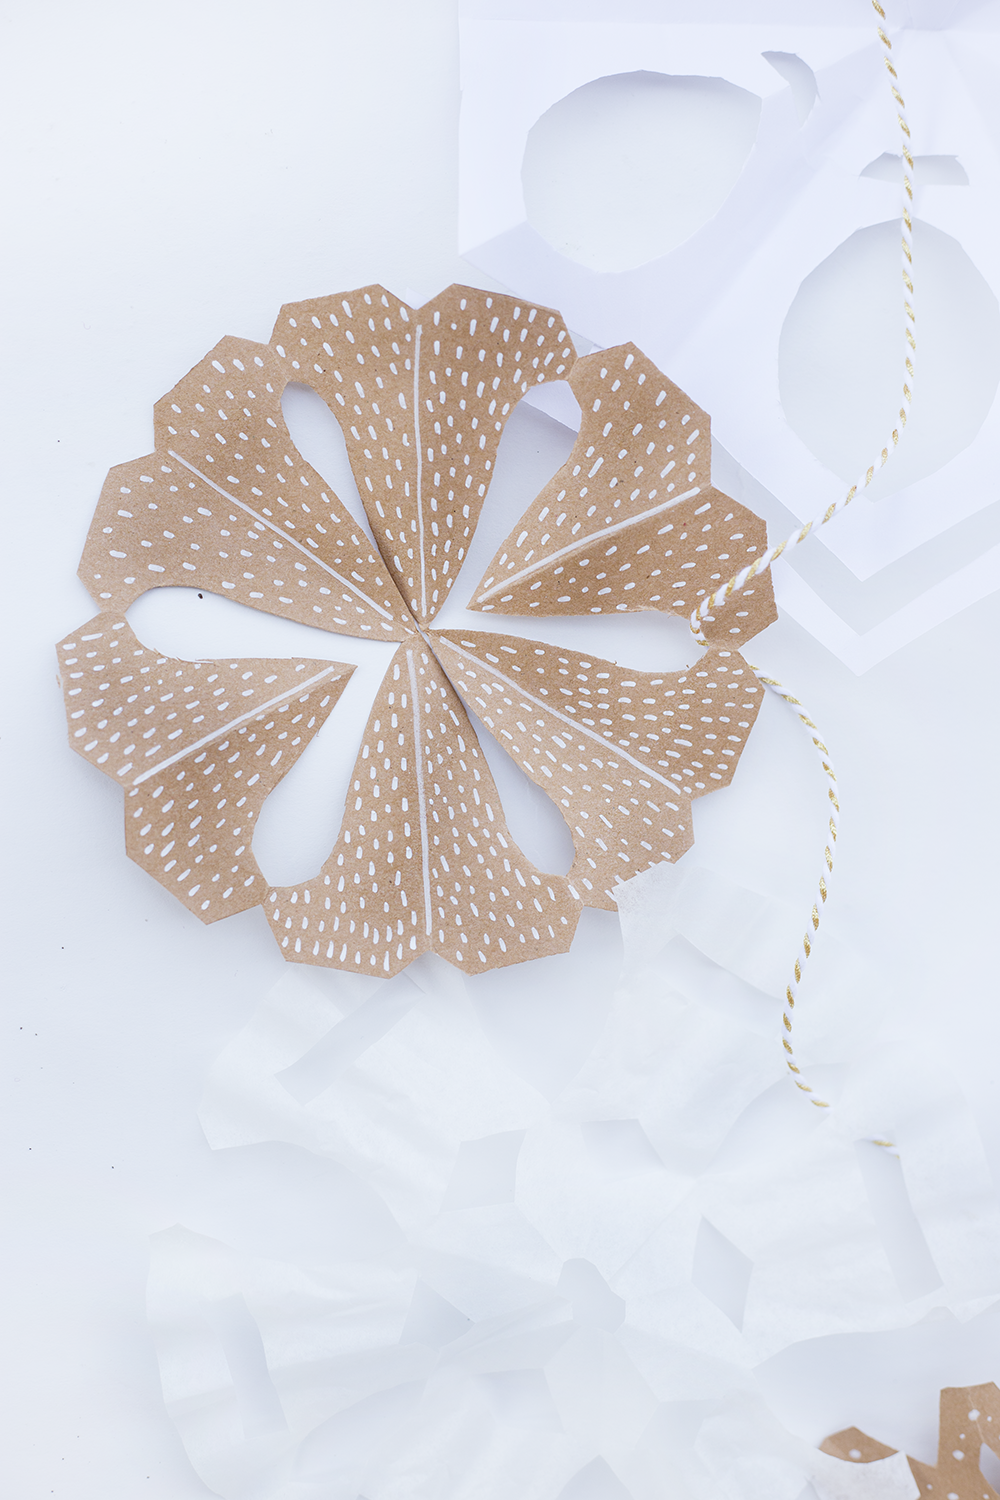
My favorite part about using Kraft paper for this DIY is that it looks so cool when you draw on it with a white paint marker. I wanted my snowflakes to have a hint of, well, snow to them – so I used my marker to make dots and dashes in different sizes on the Kraft. Doing the same thing on your white snowflakes with a gold, silver or black paint marker would also look great!
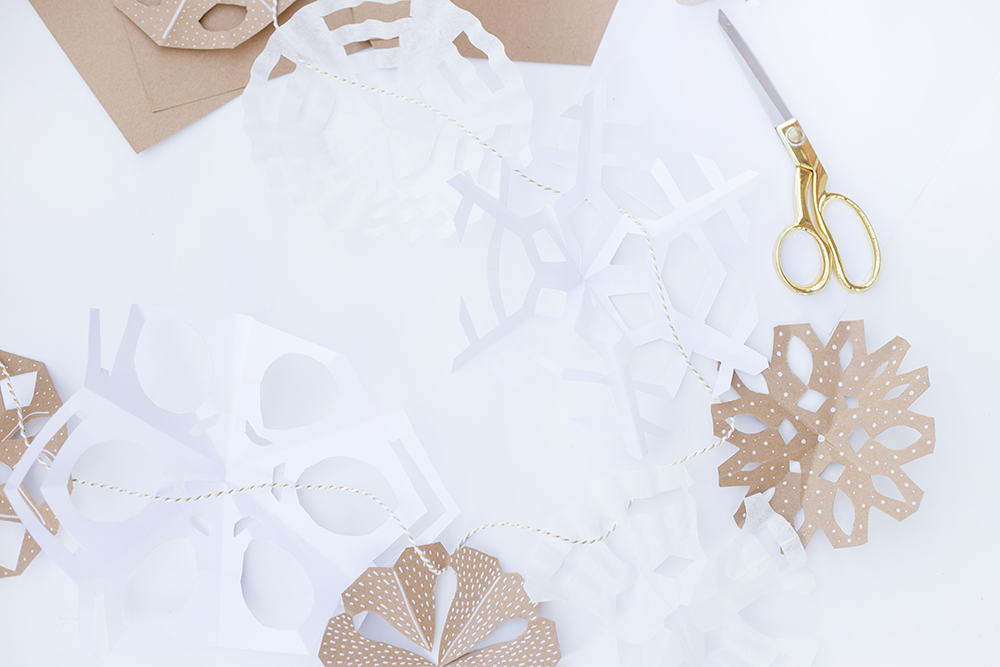
For stringing up my garland, I went with the good old standby – Baker’s twine. You can’t go wrong with this, especially when you use gold and white. It classes up even my shaky snowflake-cutting job. I had a really hard time with the scissors portion of elementary school, okay?
What do you think? How did your modern paper snowflakes turn out? My favorites definitely have to be the Kraft snowflakes – especially the one with the dotted pattern.
This is a perfect DIY to not take too seriously. Just have fun, cut away, and keep going until you’re happy with it. And please, comment below to let us know how it went! What material do you like best for making this project? Don’t forget to tag us on Instagram with #lilyandvalliving to show us what you made!


No Comments