Hello Everyone!
So, let’s be honest. We all love the revival of macramé and woven design that has been happening for the last few years. There are so many amazing artisans out there making beautiful creations full of texture and complex patterning.
The thing that I love most about fiber art is the introduction of a texture and pattern where it could not otherwise exist. Being able to have something on your wall that creates interest and ties together different colors in your room or gallery wall is, to me, the greatest part about decorating with woven pieces.
Since I am a huge fan of sweater weather…and have no patience for repetition (knitting, cross stitch, crochet etc.), I created this simple wall hanging to give you an easy way to incorporate fiber art into your home.
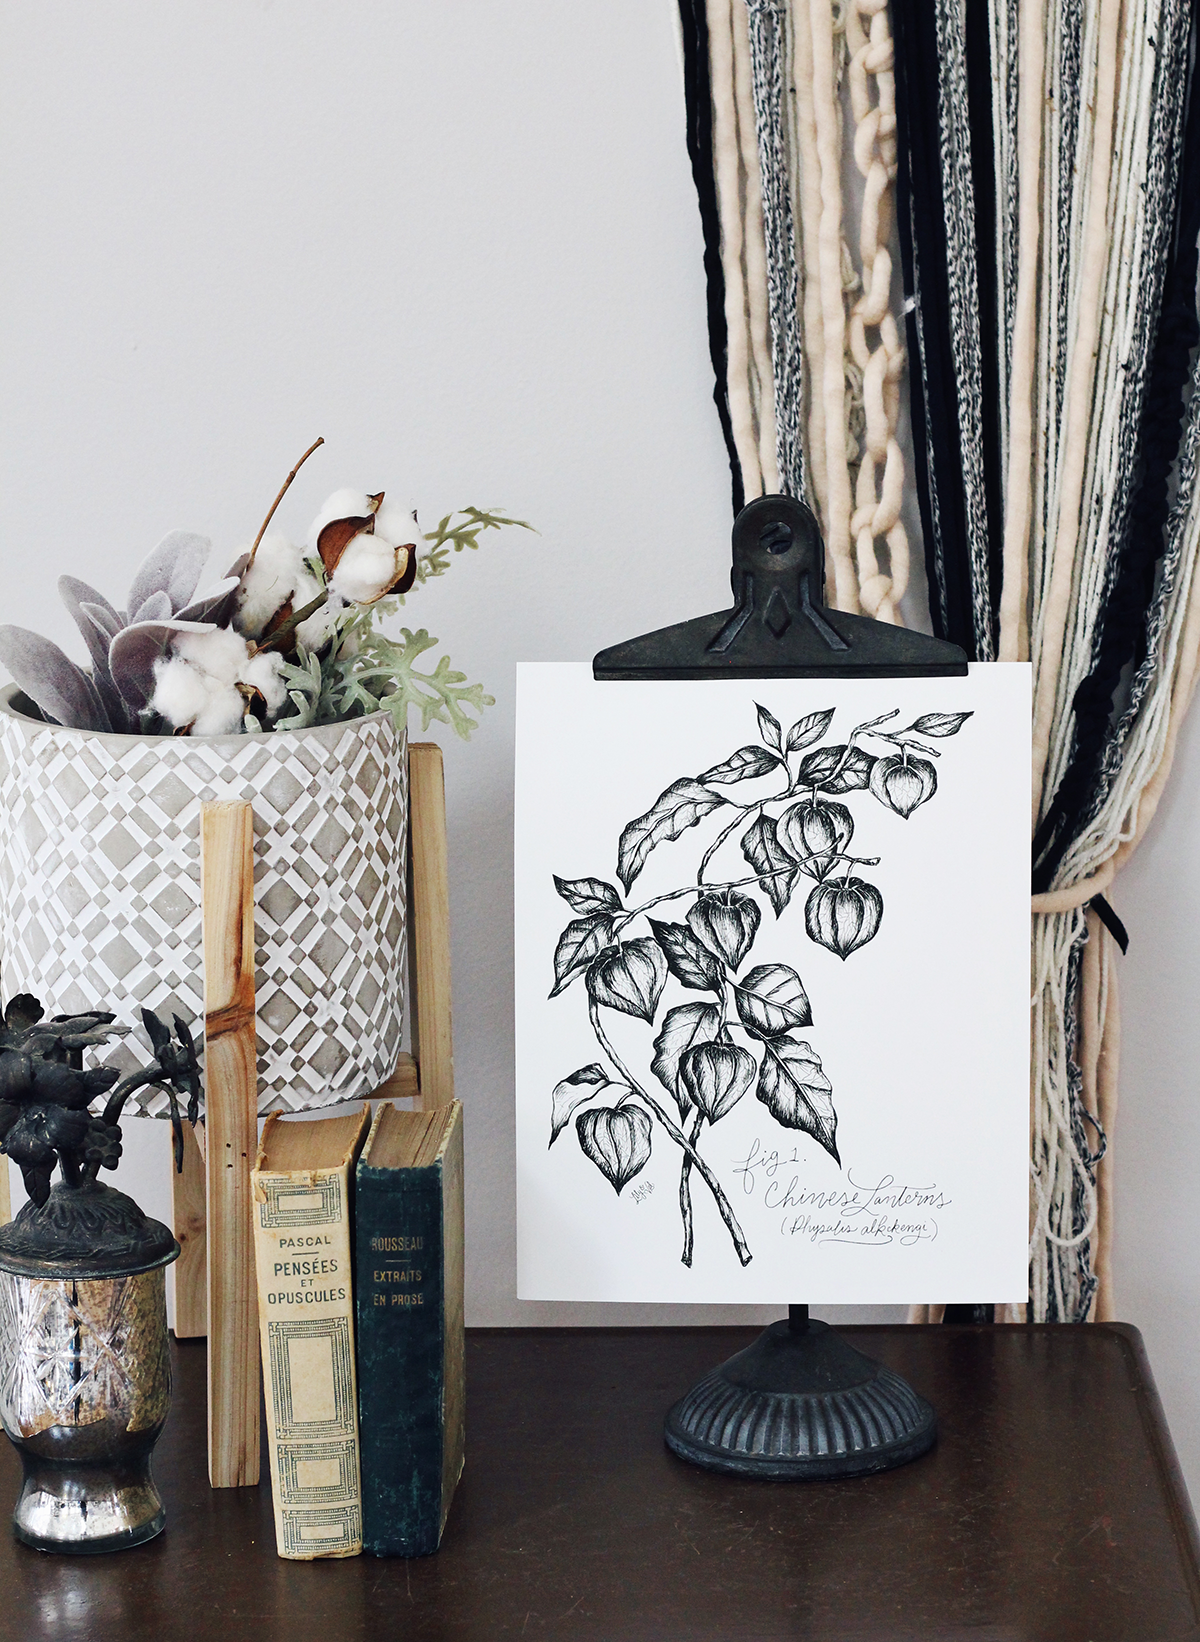
Above: Find the botanical print on lilyandval.com!
First, let’s talk supplies.
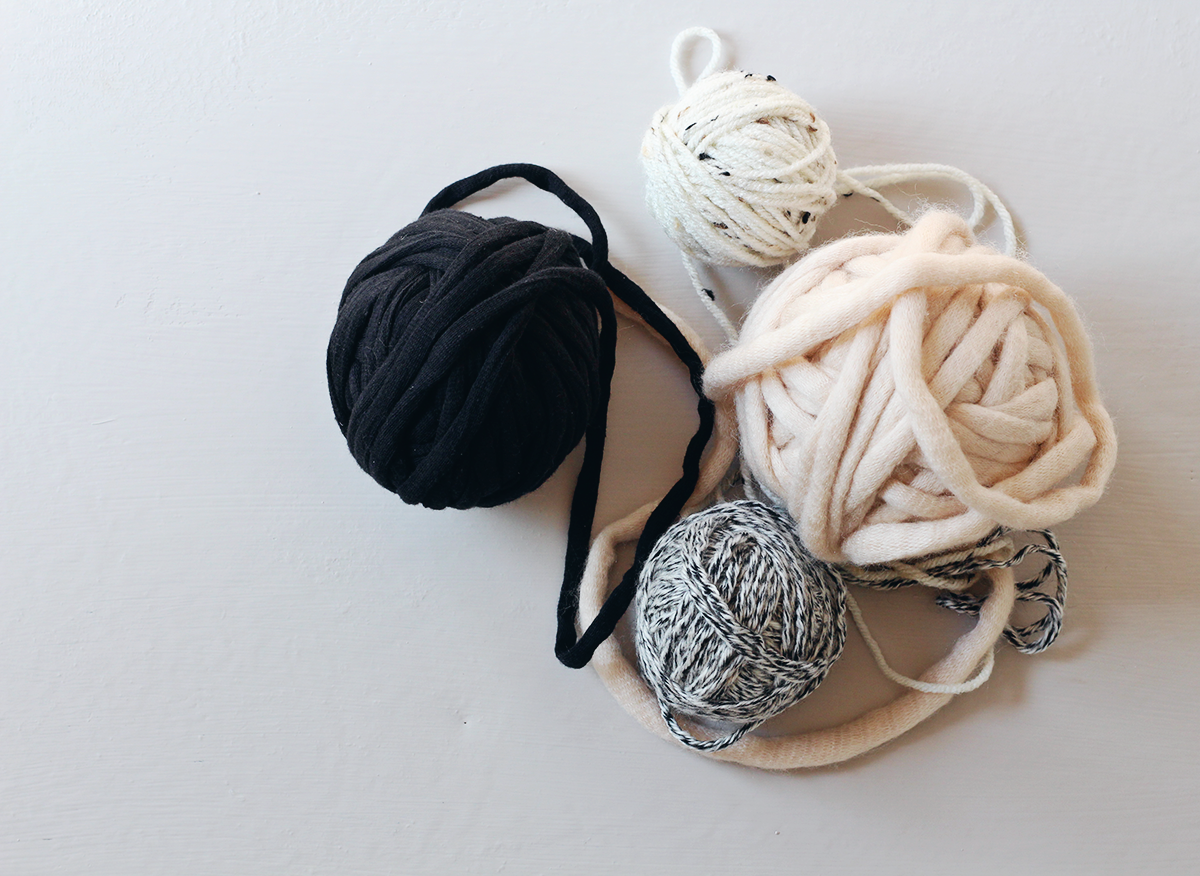
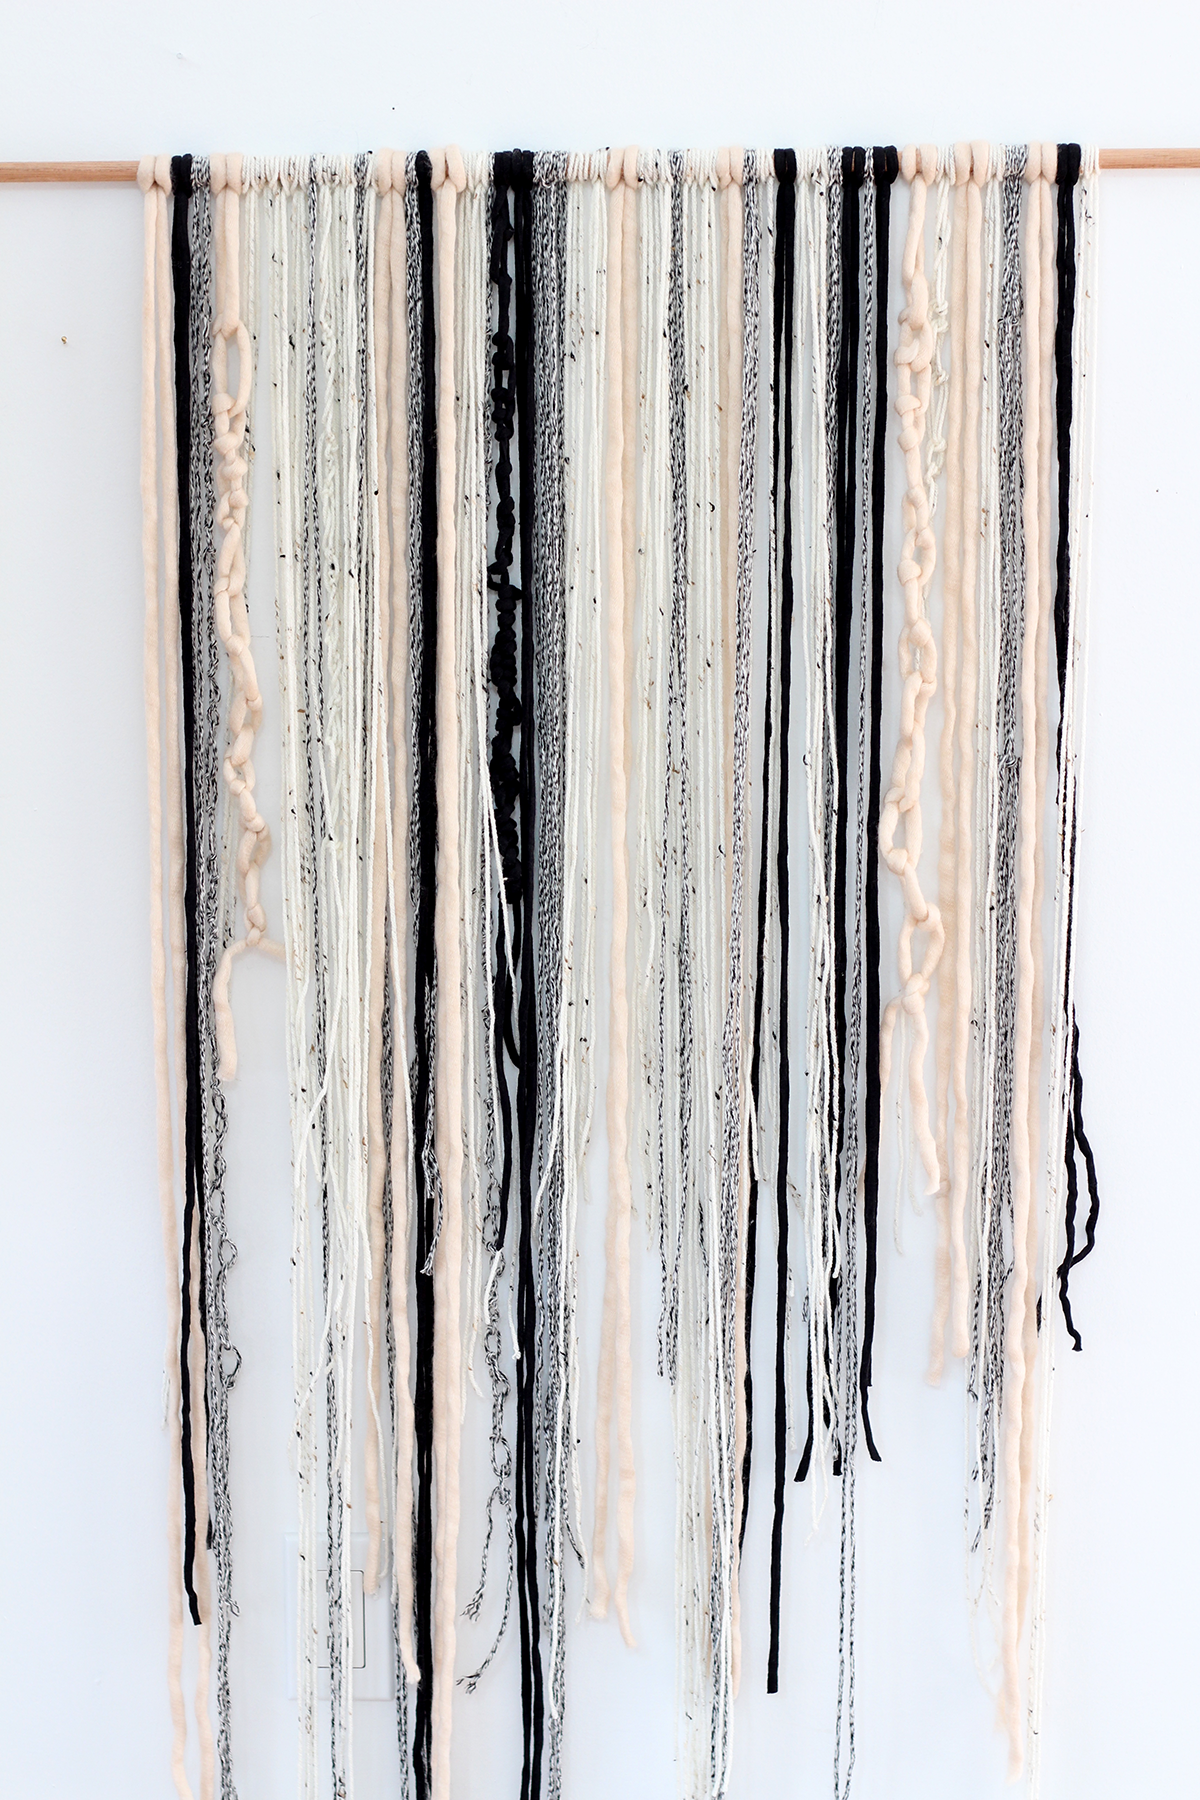
This wall hanging is simple, but the colors and textures you choose can make or break your overall design. Try to stick with a color-scheme of 3 or so colors. Keep in mind you can use variations of these colors all you want (ie. darker or lighter shades of pink)
Next, consider texture. I suggest mixing up the types of yarn you choose to at least 3 different textures and thicknesses.
For the example I created, I wanted to use bleige (blush/beige) tones with accents of black and white. Depending on how much you use of each color you will get a completely different result. This means a little experimentation is required.

Choose at least one “t-shirt” type yarn (the black), one super fuzzy soft yarn (the bleige…usually found with the “baby project” yarns), and at least one yarn with a lot of variation in the color or texture (the black and white). I added in this cream yarn because it had beautiful specks of brown, tan, and black. This gave my wall hanging a bit of cream to soften things up, without being too stark.
Basically, vary your texture and try to tie your 3 colors together as much as possible.
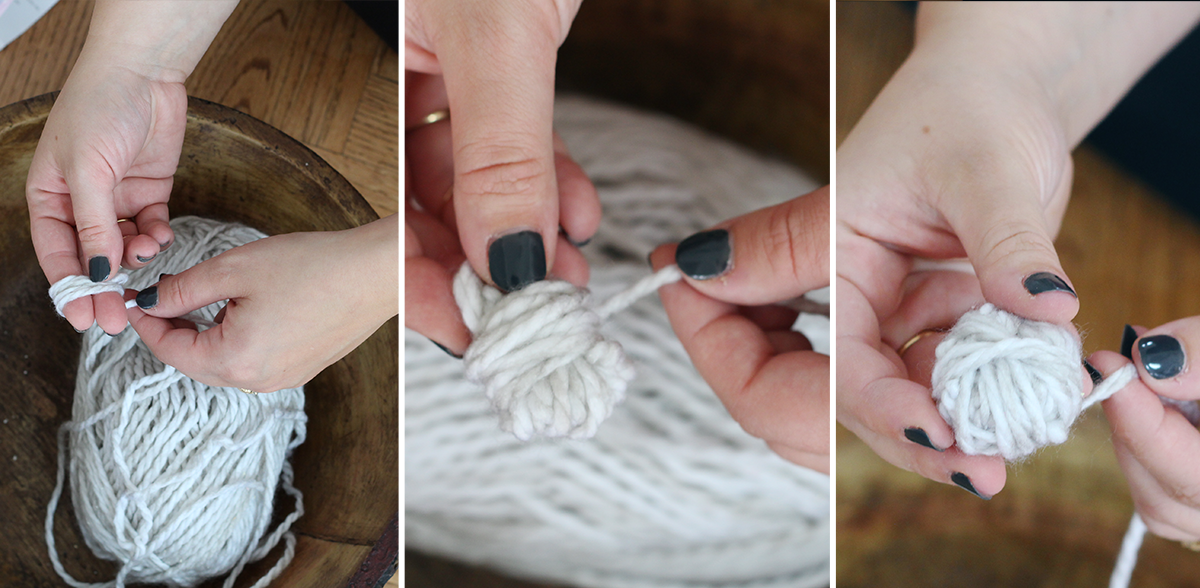
It’s best to roll each skein of yarn into ball. Begin by wrapping the yarn around two fingers. Once you have enough to hold onto, wrap the yarn around, constantly spinning the “ball” to wrap it as evenly as possible.
Now the fun part…
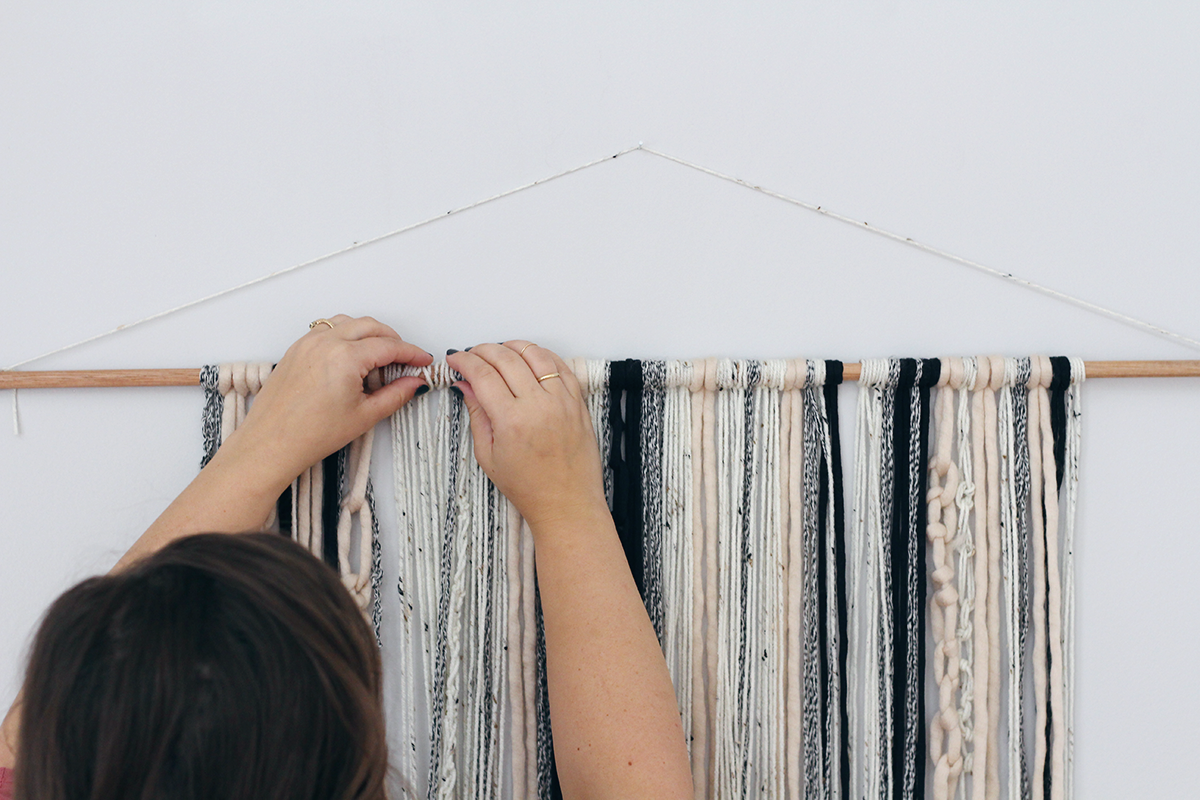
Get a dowel from your local hardware or craft store, and decide how wide you want your hanging to be. I decided to make a pretty large one, so I used the full length of a regular dowel rod.
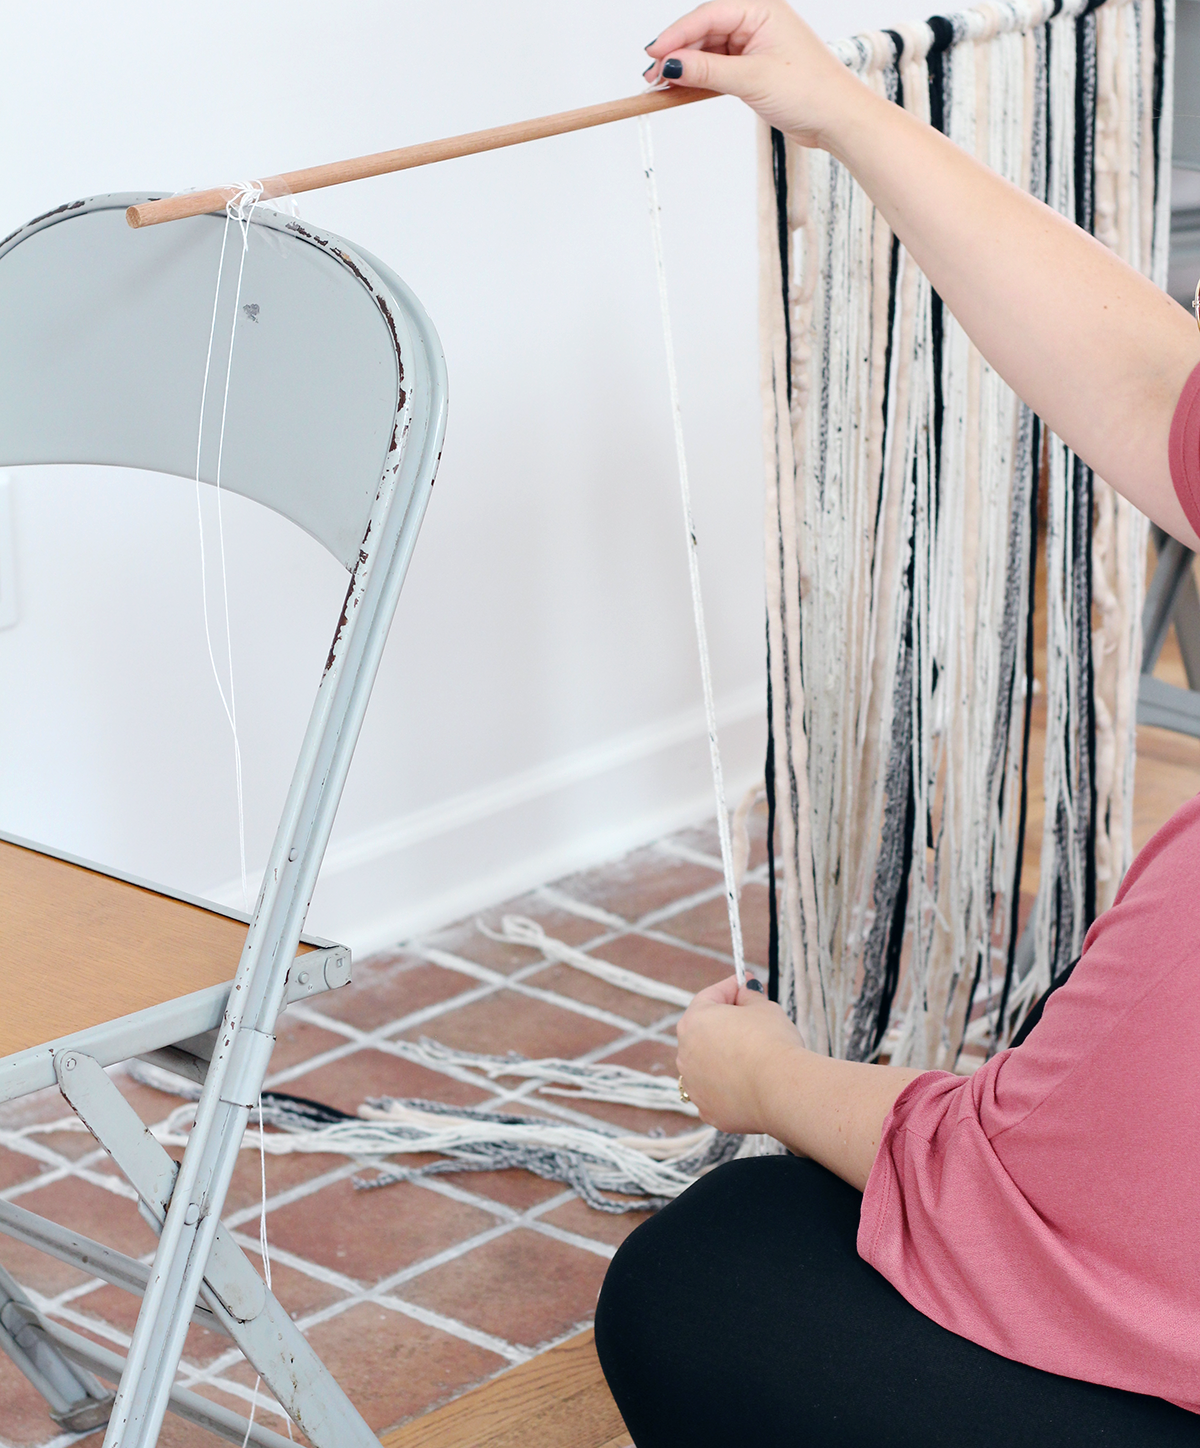
Now prop it up on 2 chairs or hang it somewhere that you can easily access both sides.
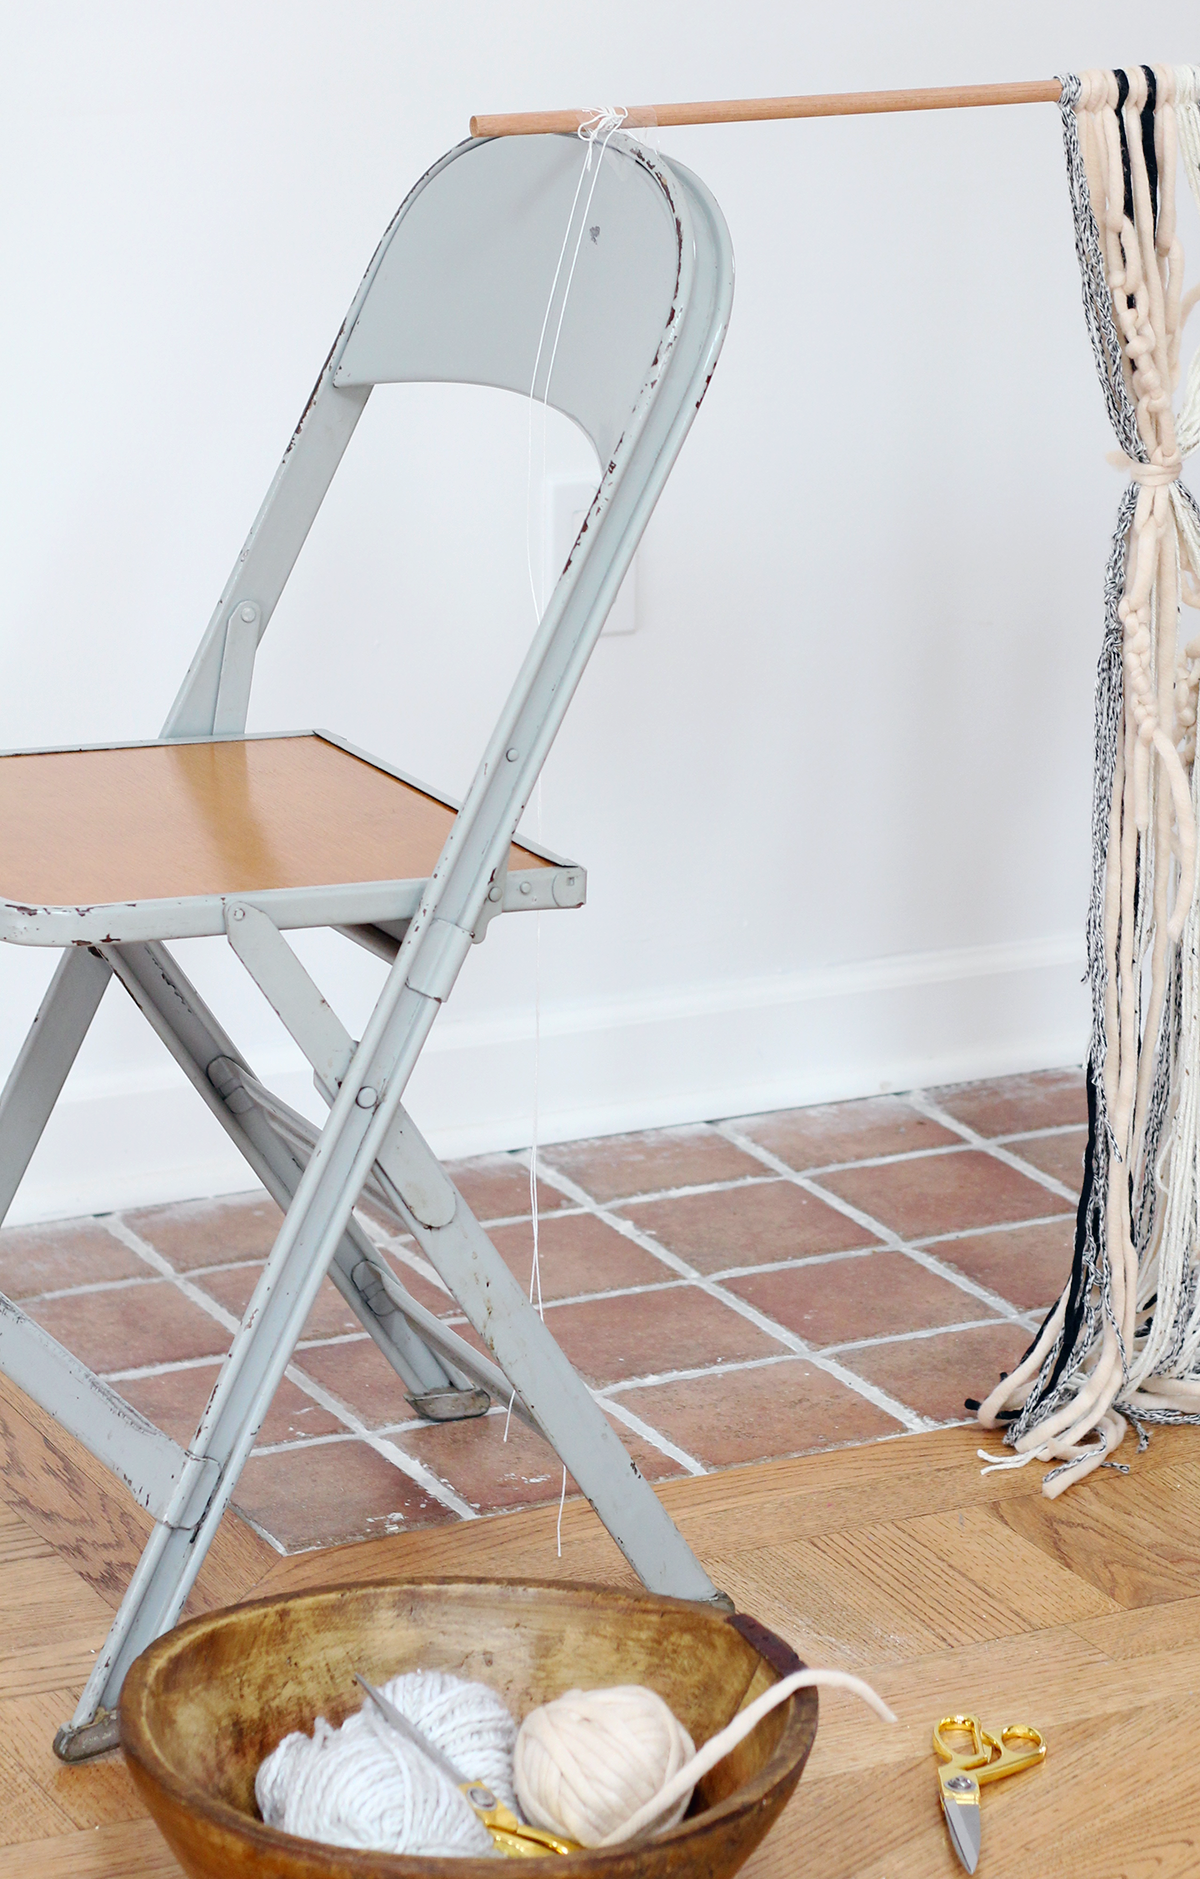
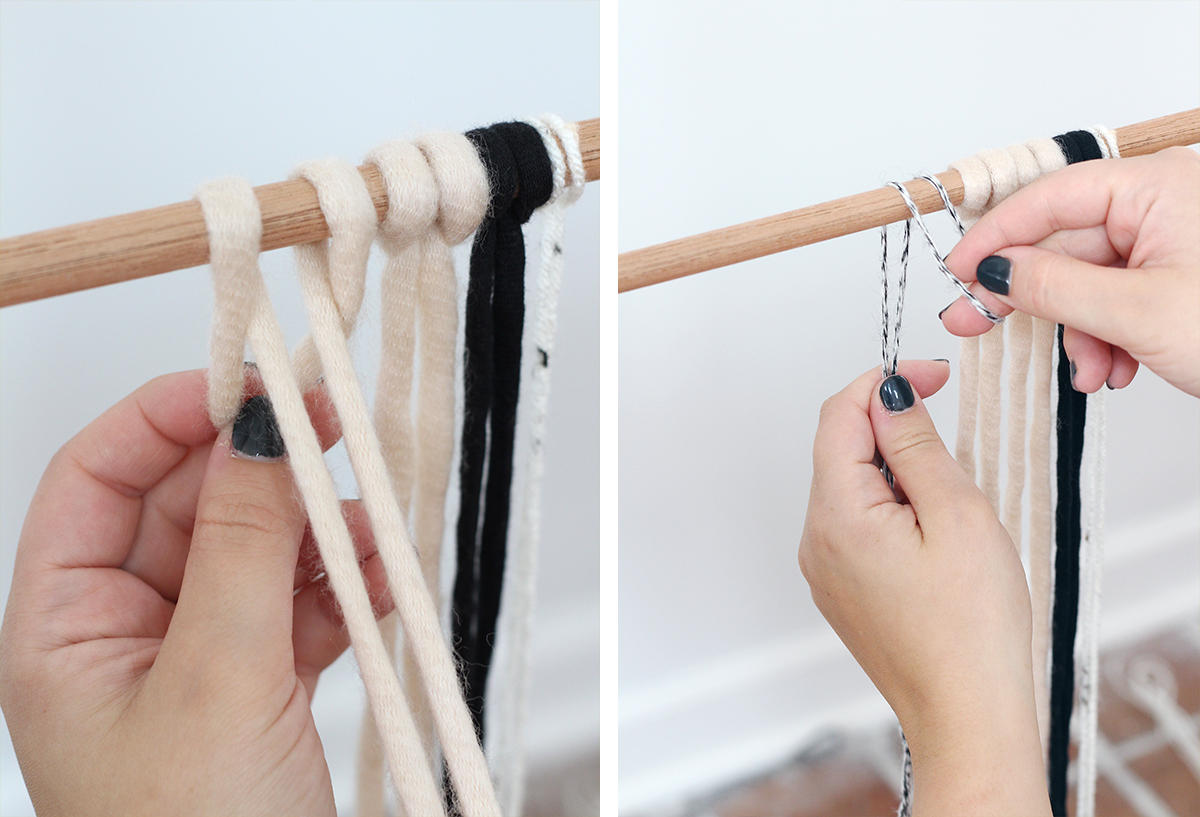
To attach each length of yarn, you will want to decide on the length you want. Remember to leave extra length for knotting, as this will make that row significantly shorter. Now, fold your yarn end to end, place the center of the fold over the dowel rod, and bring the two ends up through the loop you created. Pull snug and Voila!
Now do this a thousand more times!!!!!!
Just kidding… the beauty of this project is that you can make it with as many or as few rows of yarn as you like!
When you are getting all of your “rows” of yarn attached to the dowel rod, mix up the pattern. You can choose to keep things very steady by doing a specific count :
Example: 1 blush, 2 black, 2 black/white, 1 cream
Or you can be a bit more Laissez-fair about the whole thing like I did. For this, you will want to step back from time to time to make sure that your light and dark areas are balancing out the way you would like. If you decide that you have, for example, too many blush all together…just slide them apart a bit and add in other colors.
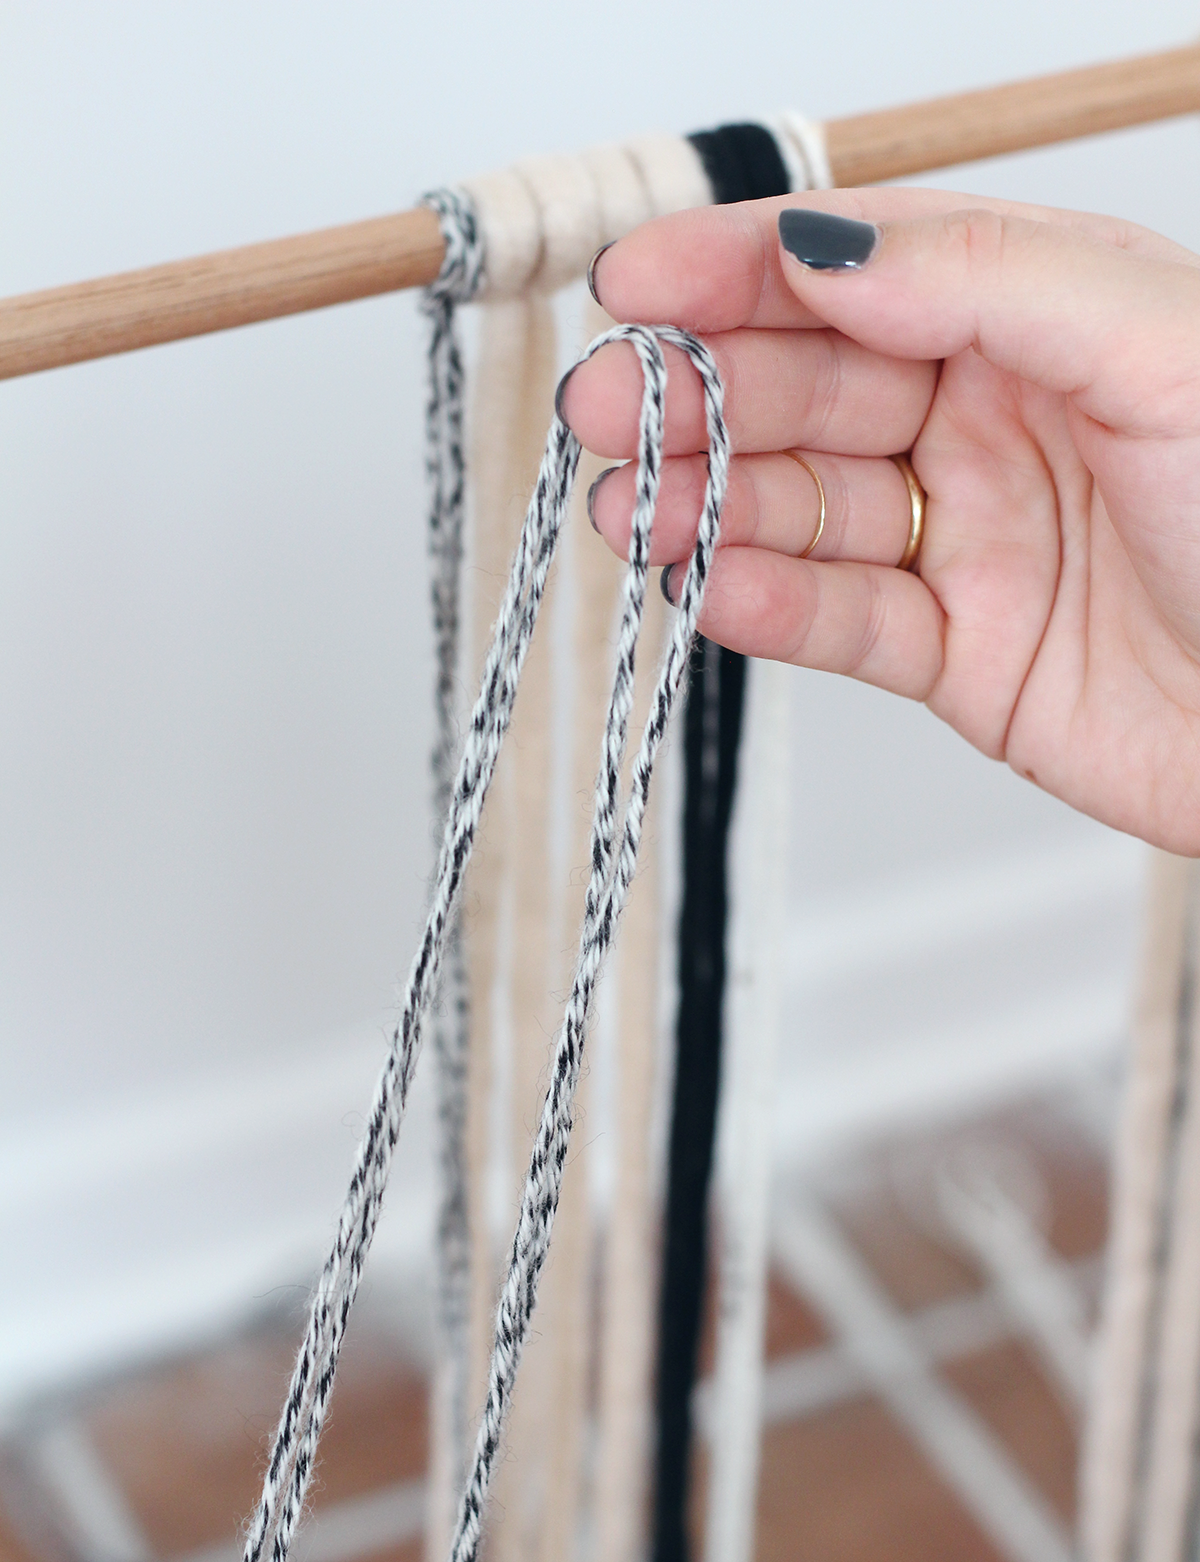
For even more interest and dimension, you can use 2 pieces of yarn at a time on some sections. this makes those rows a little thicker and helps the whole thing look more complex than it really is.
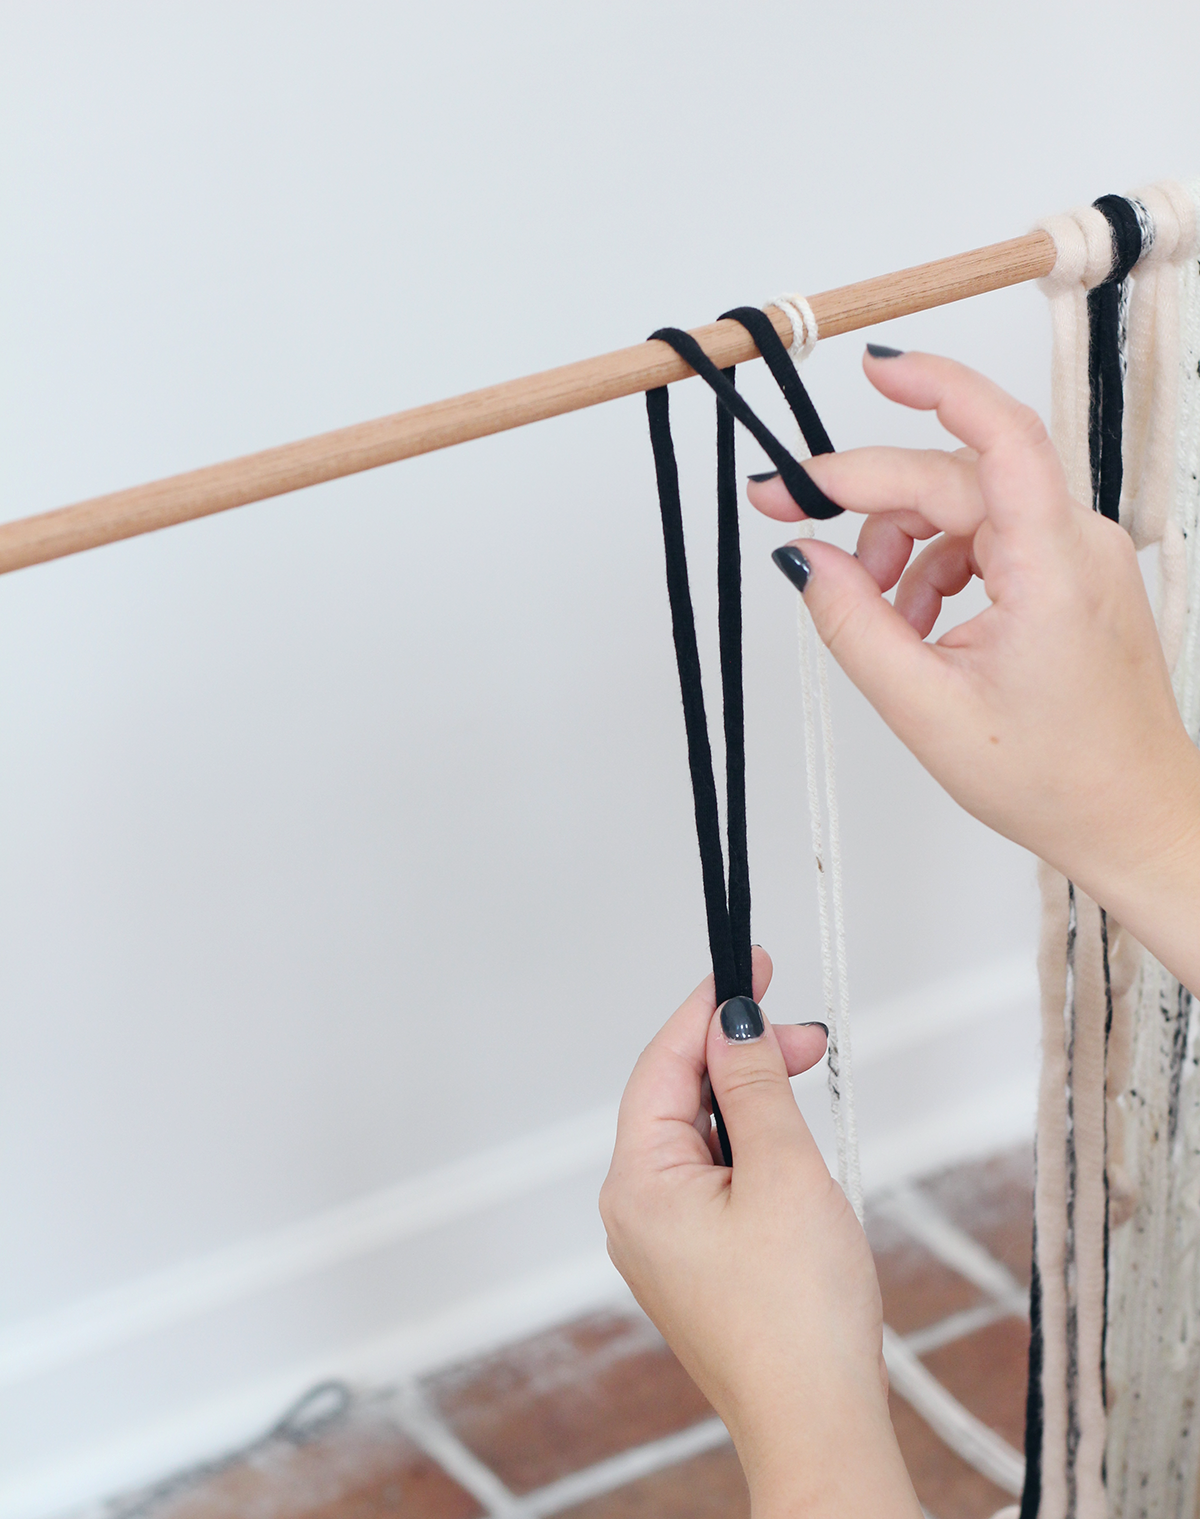
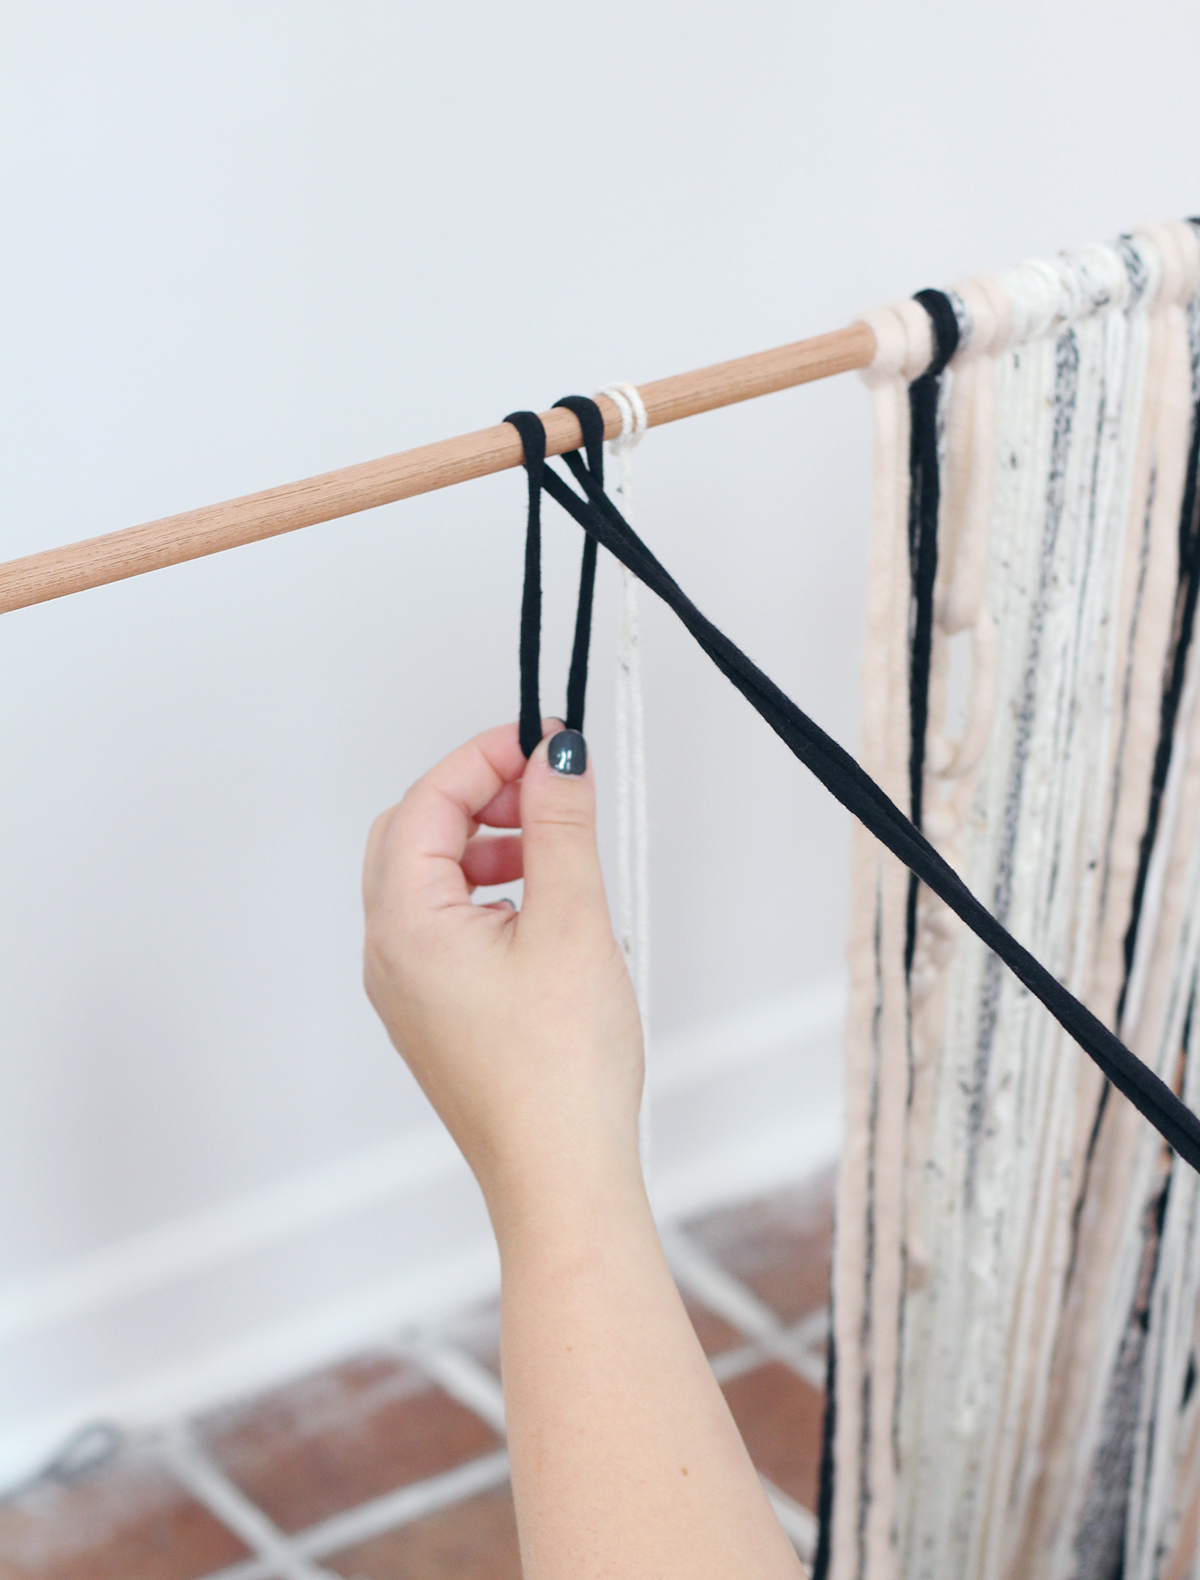
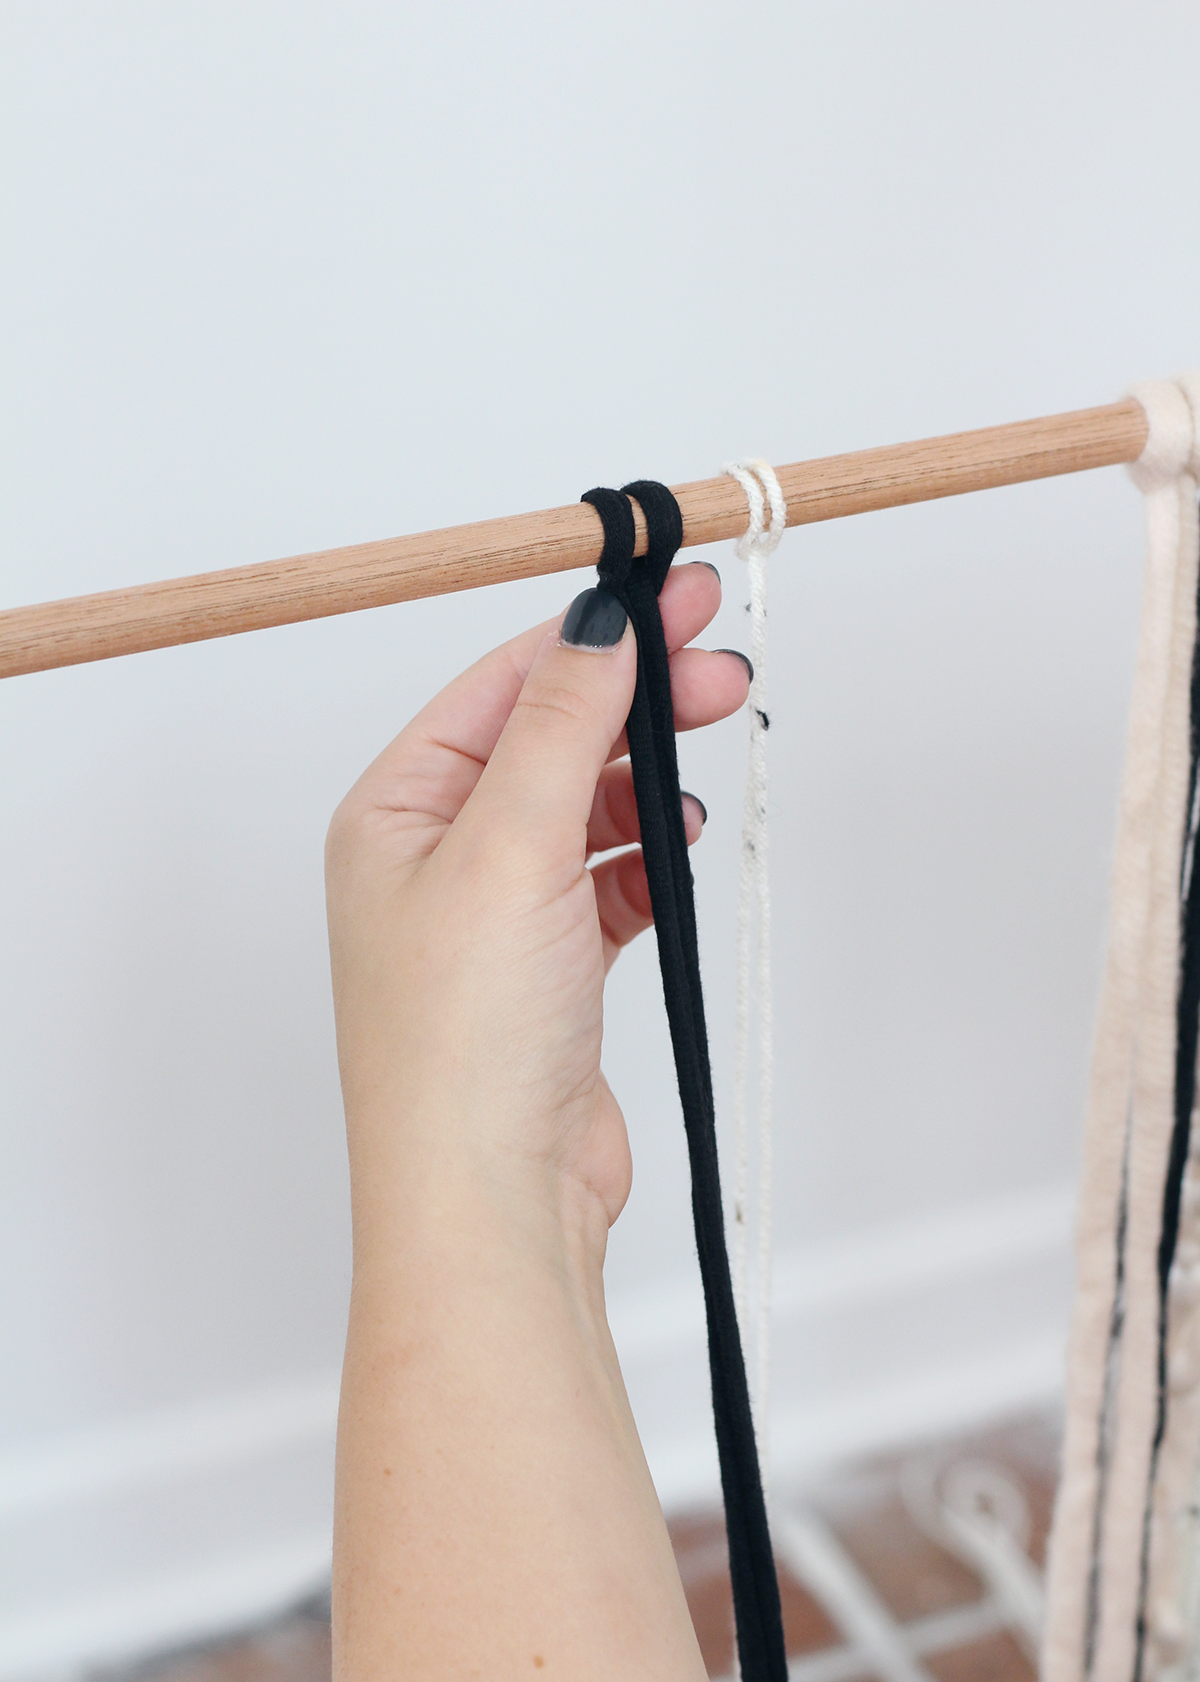
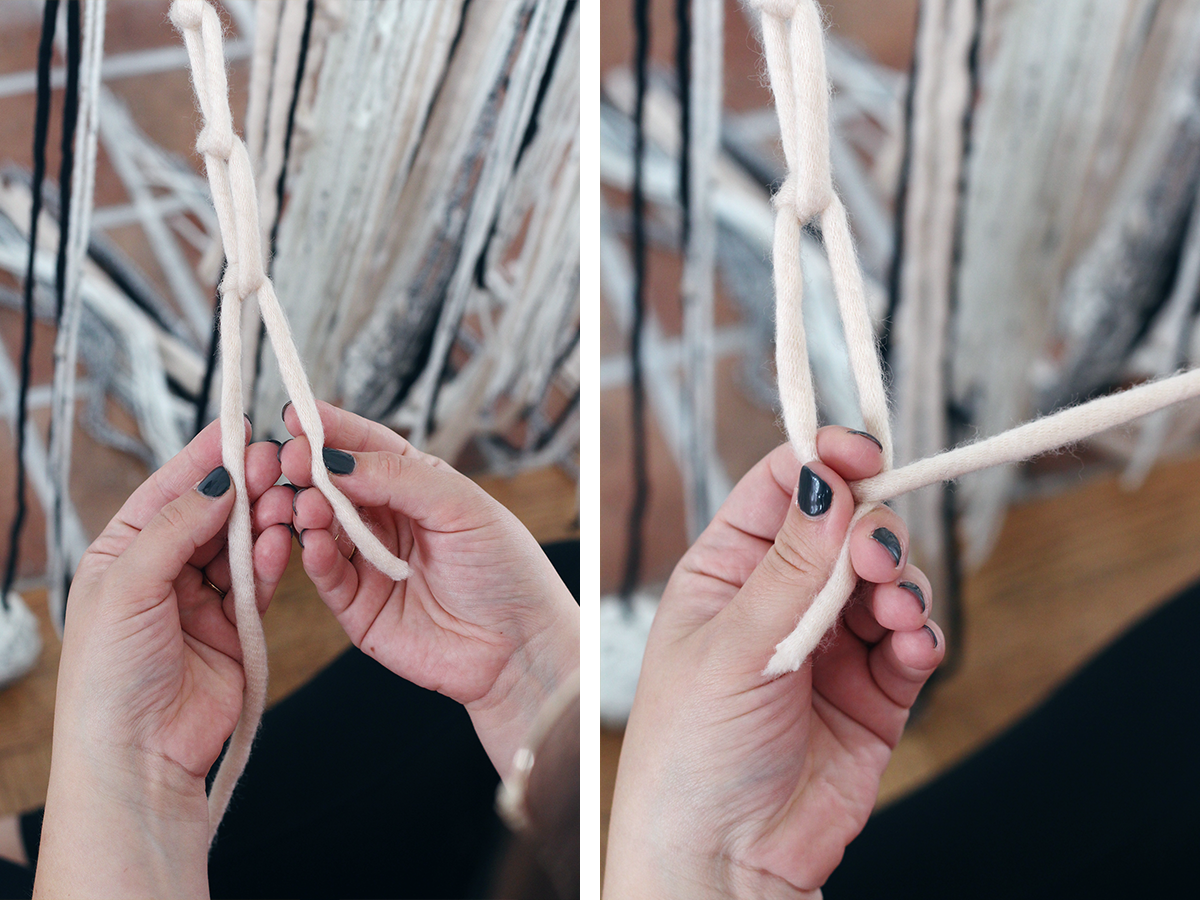
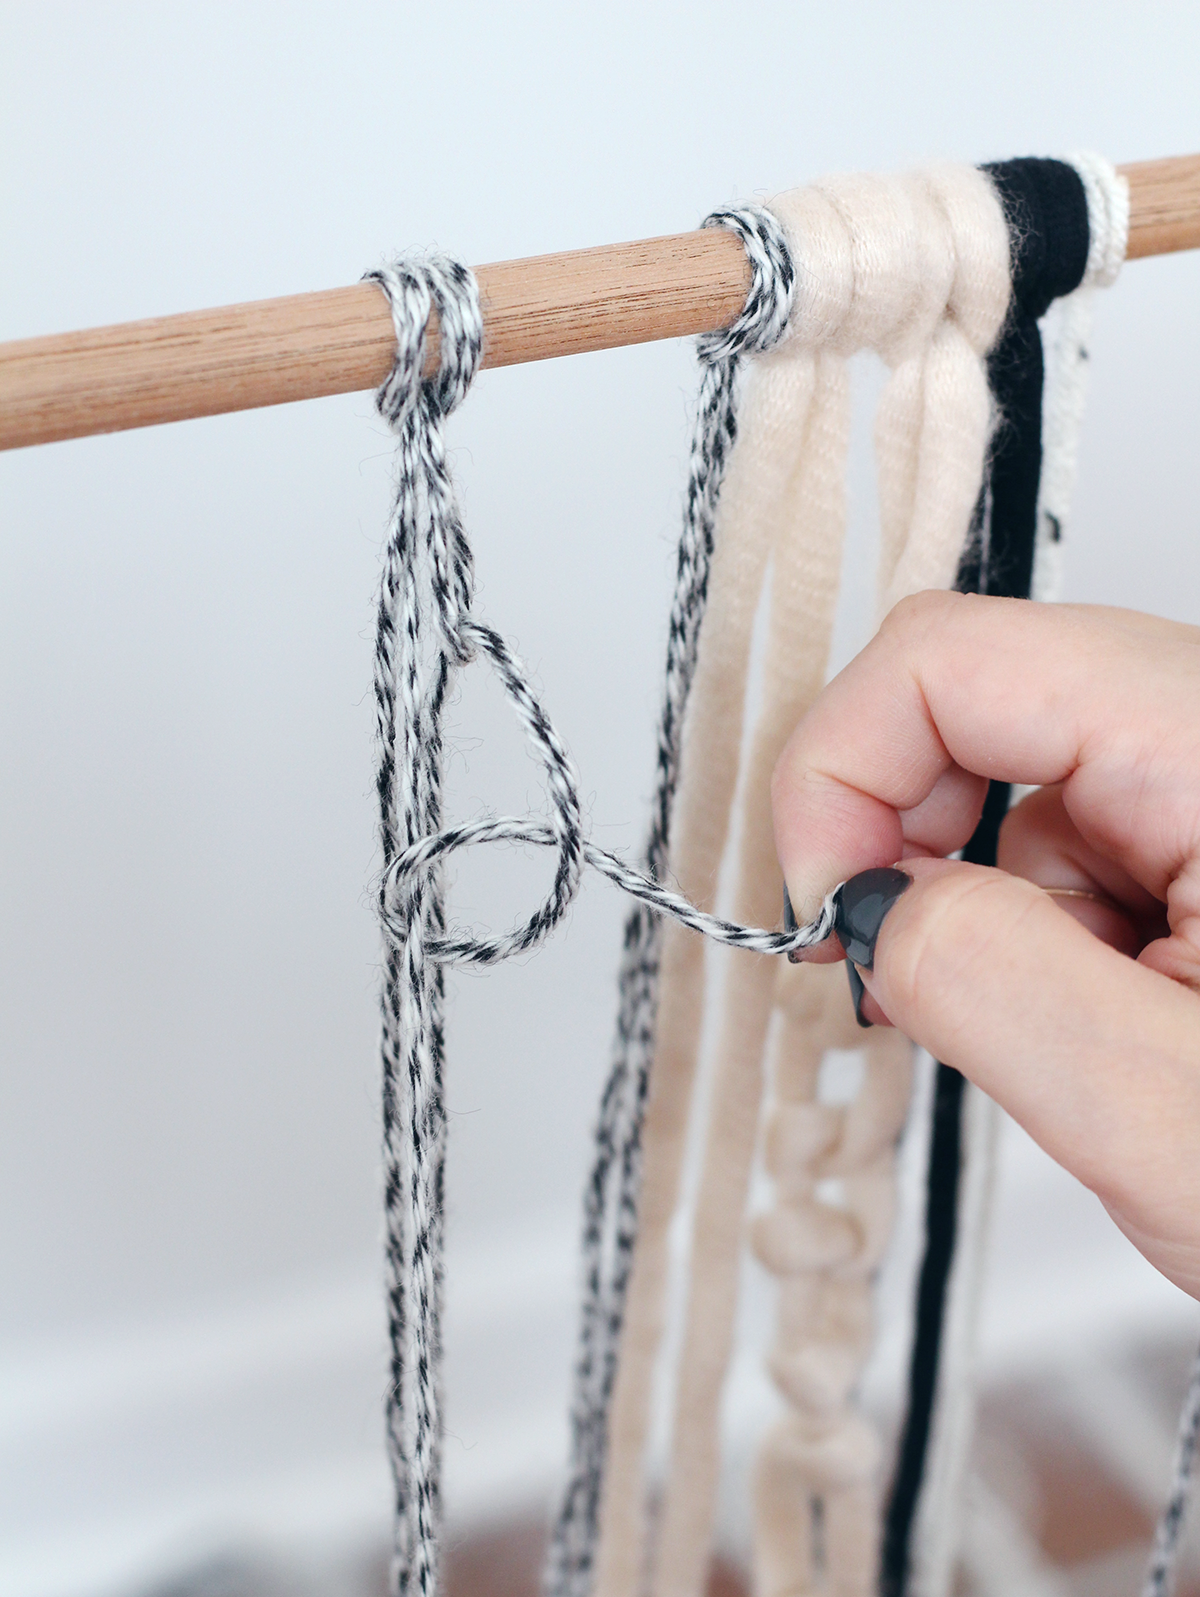
If you made those macramé friendship bracelets back in school, you will recognize this next technique:
Step 1. Choose one of your rows of yarn. Take one side in your right hand and one in your left.
Step 2. Cross the right strand over the left and hold it our making a “4” shape as you see below.
Step 3. Wrap the end of the right strand around the left and pull it through the opening of the “4” .
Step 4. Pull up to tighten as much as you like, then down to repeat this process.
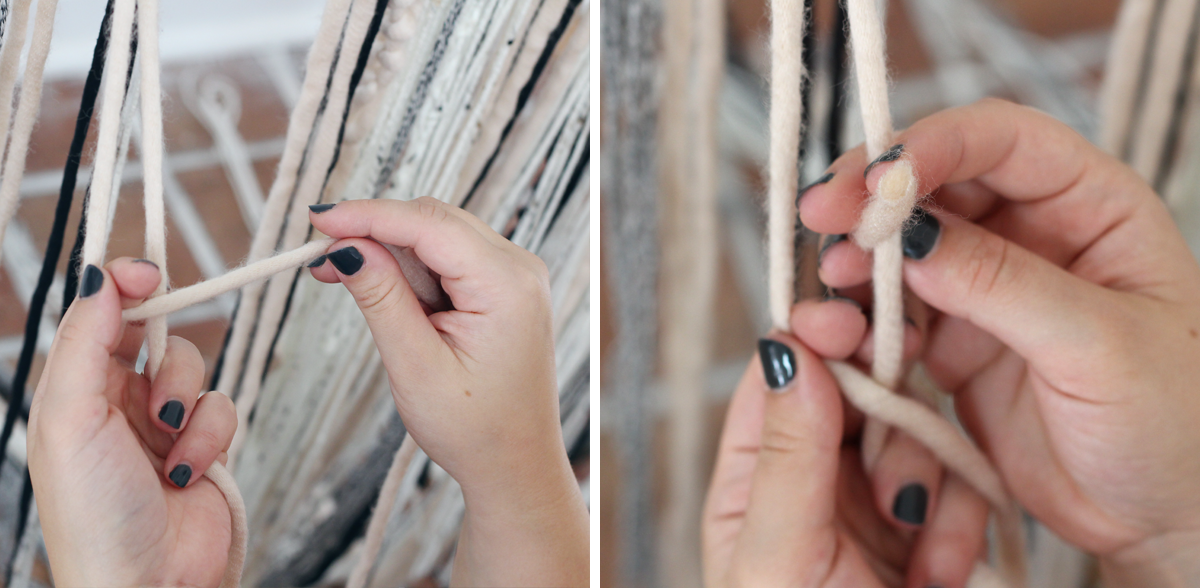
You can put these “knots” close together or farther apart. Mix it up.
The strand you started with (the right strand) will get much shorter as you go. If you want to continue the pattern in the row, just switch to using the left strand and repeat the same process of tying.
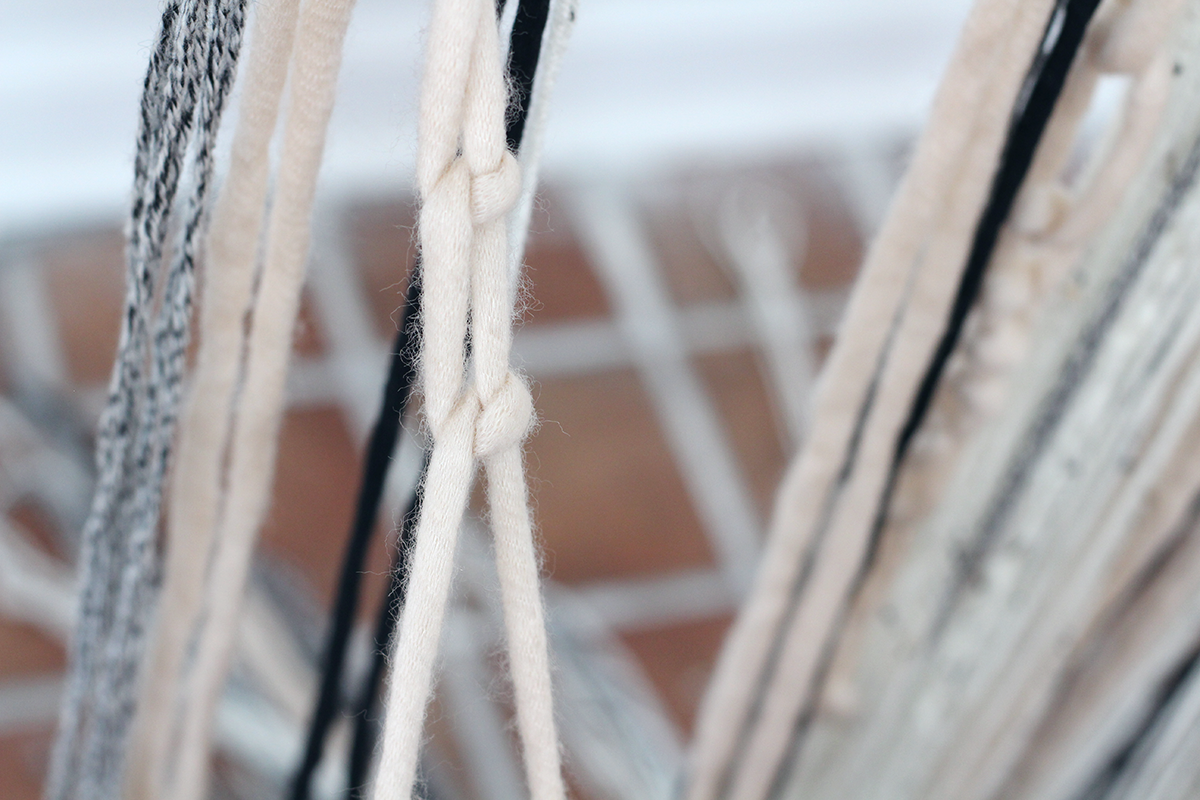
This next technique is just a little more complicated by uses the same process as above:
Choose a row in which you used double yarn. Separate the four strands into your hands as if you were going to braid.
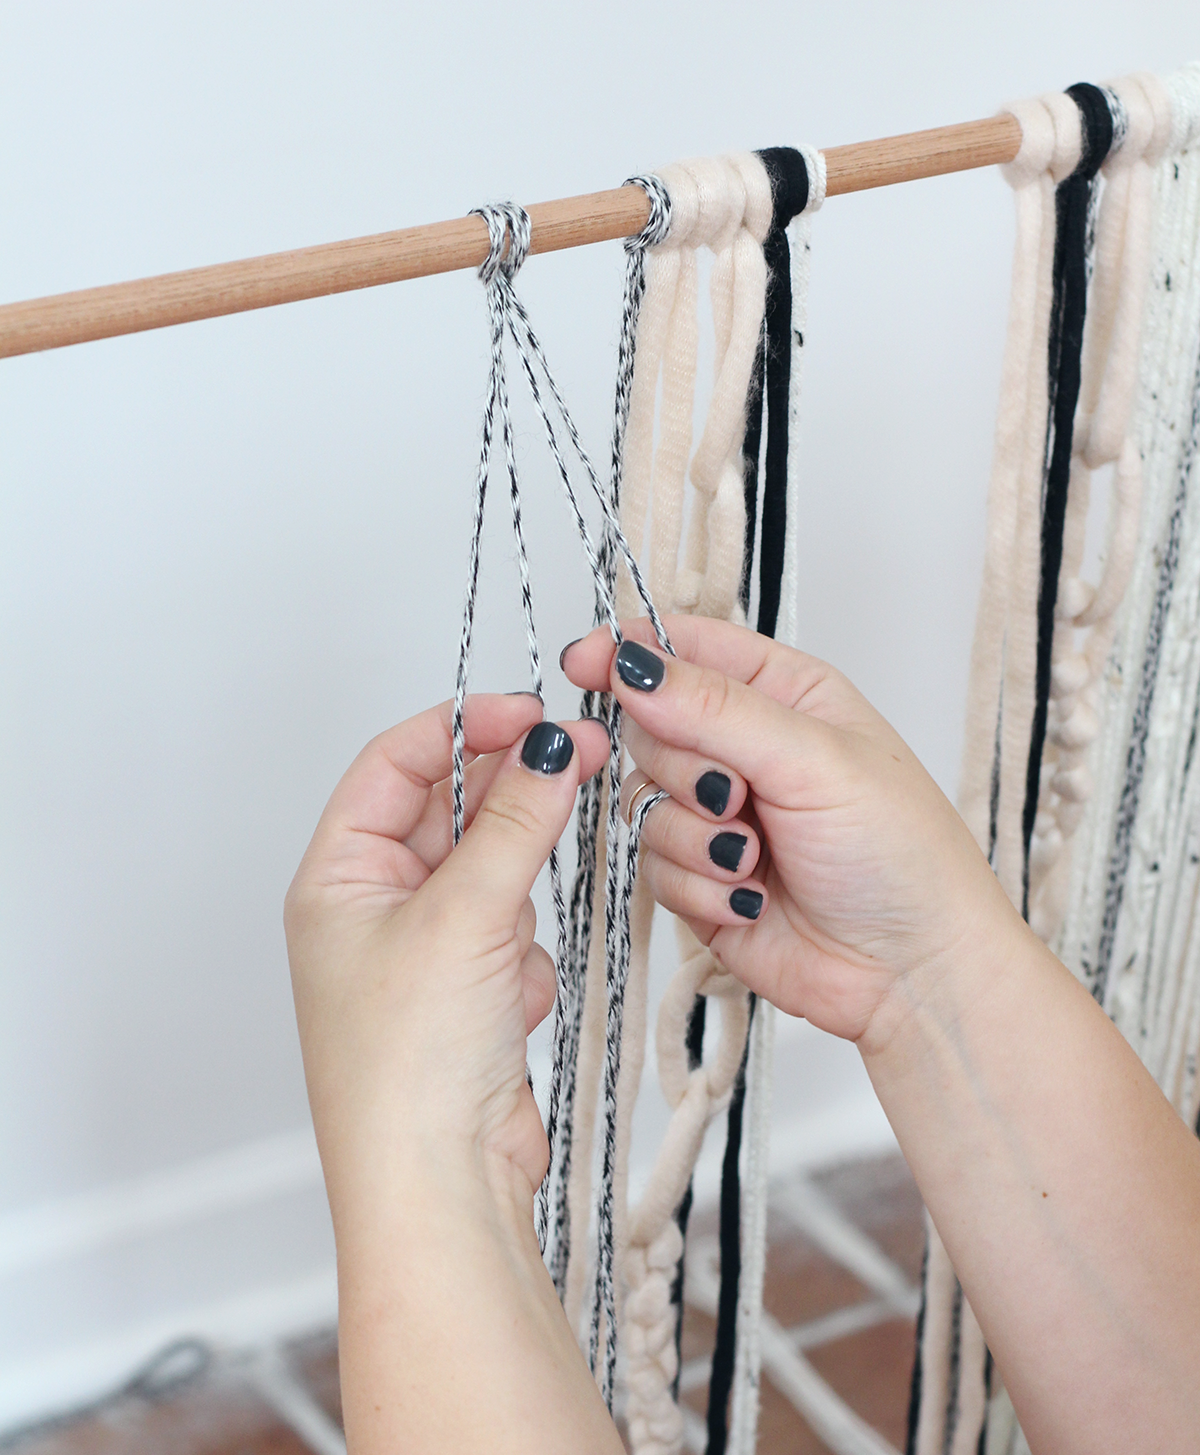
Cross the furthest strand to the right over the strand next to it, make the “4” and pull the end through the hole. (Try doing this 2 or 3 times before moving on!)
Now take the left strand in that knot and use it to make the “4” on the third strand (the next one to the left. Repeat the exact same process.
Lastly, use the “left” strand from that knot and use it to make the “4” on your last strand on the left. Repeat.
Basically, you just took the “macramé” knot and moved it across to the left. Now do the same thing coming back to your right and so on until you decide you like how that row looks.
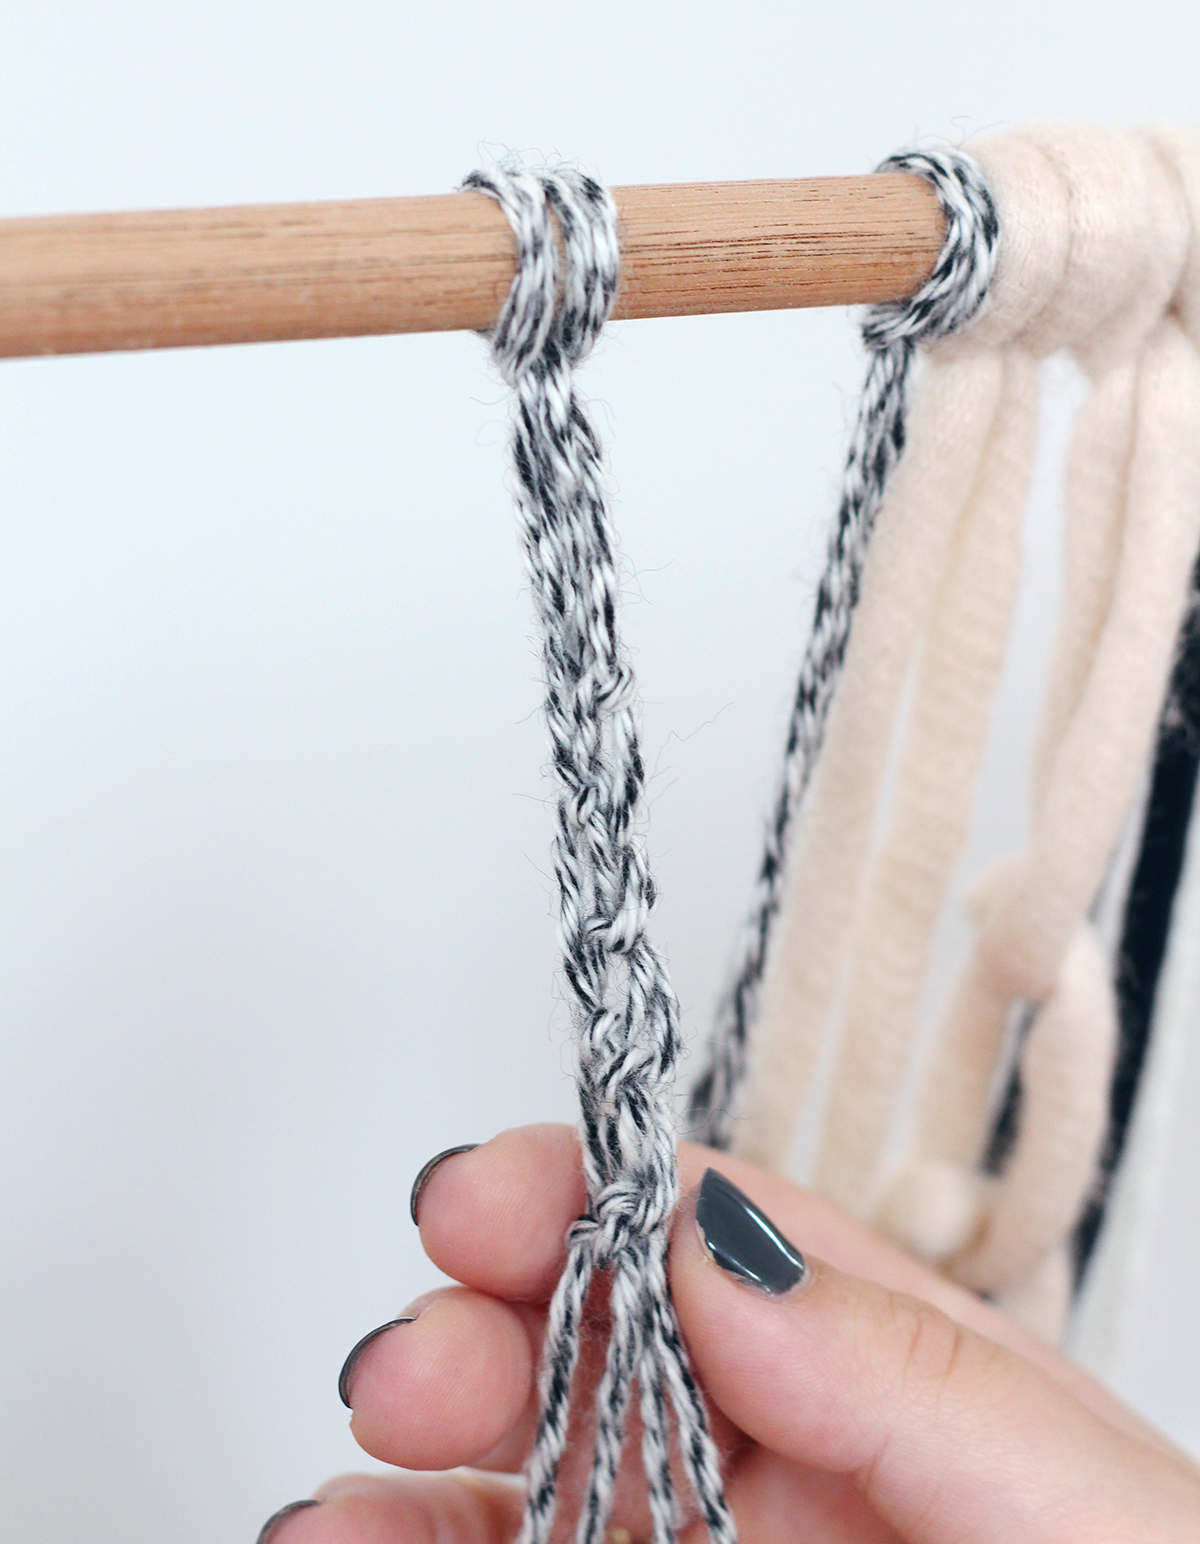
I did not “macrame” every row. You can do as much or as little as you like. I liked having places where you could see large open knots contrasted with small dense complex 4 strand knots. You can always change it as you go.
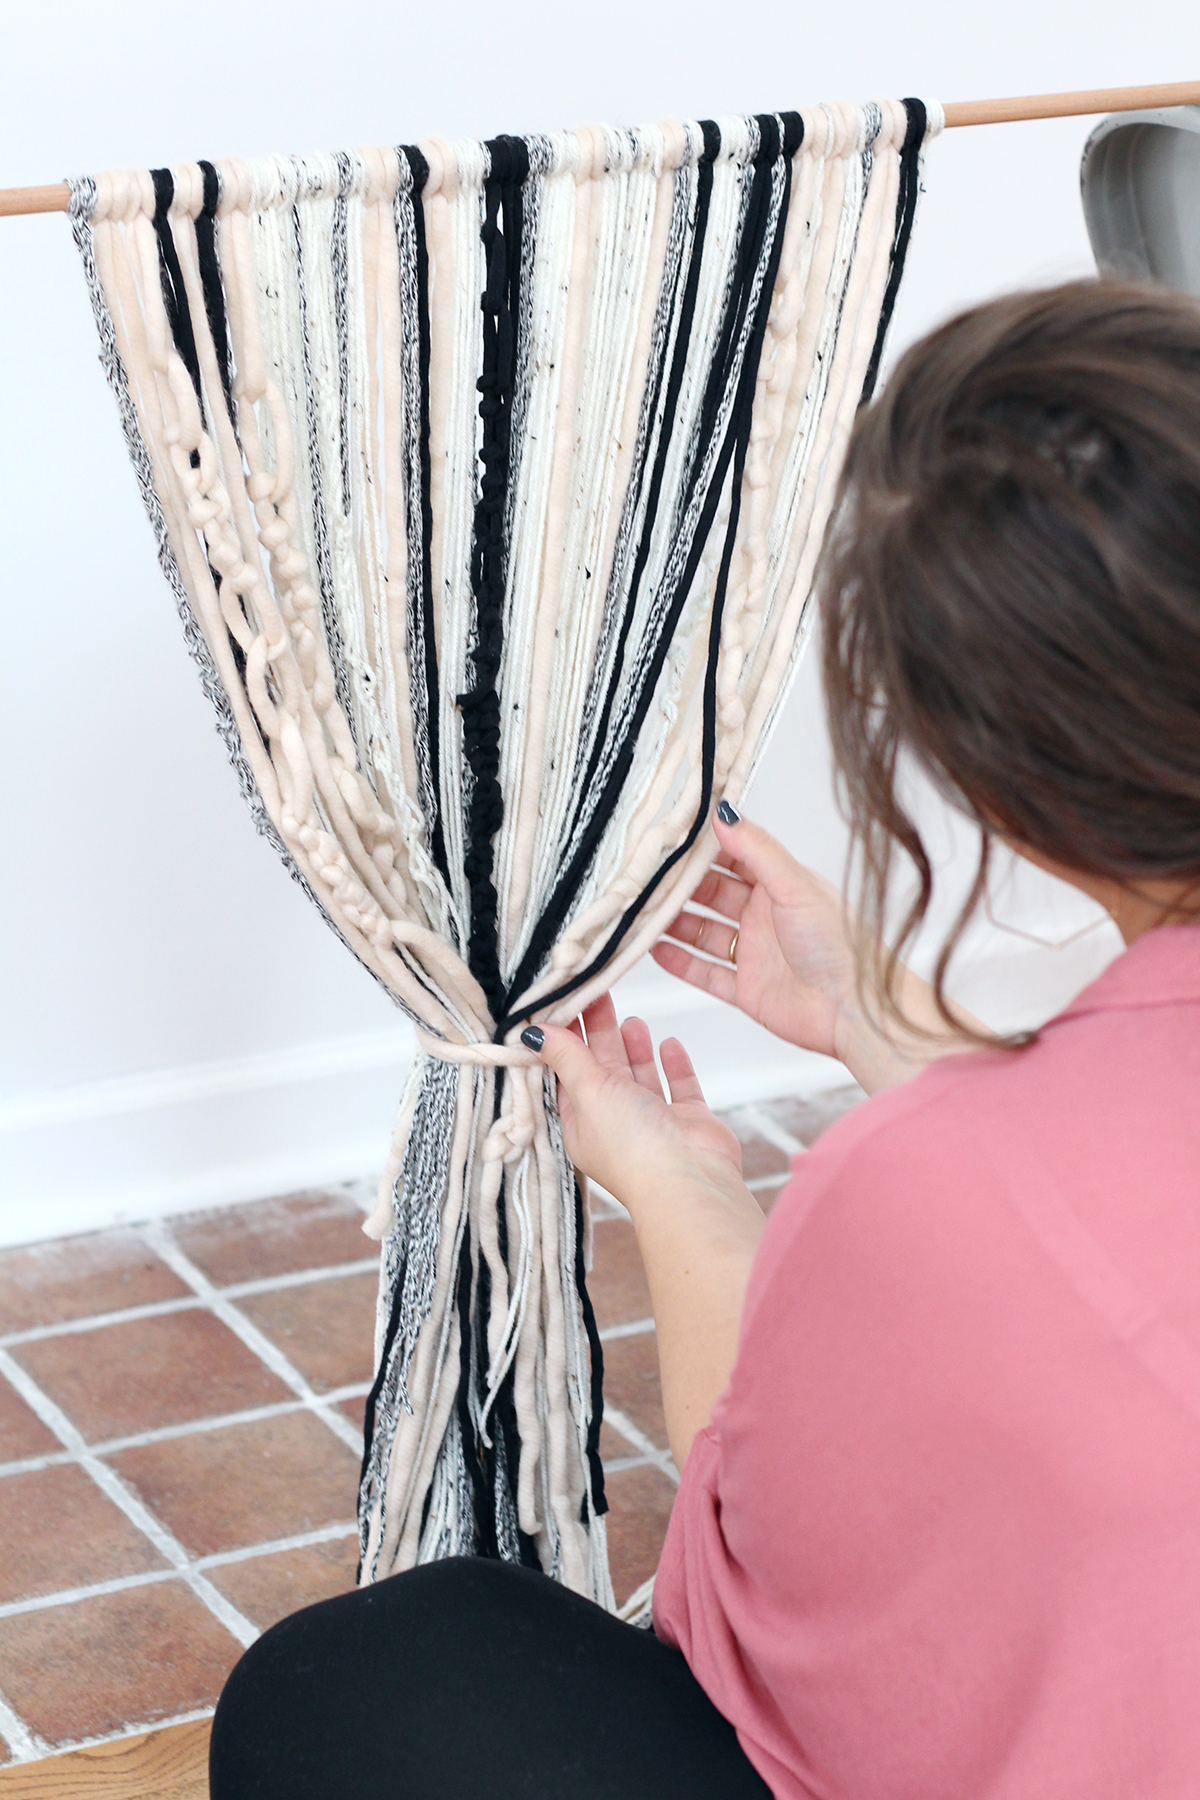
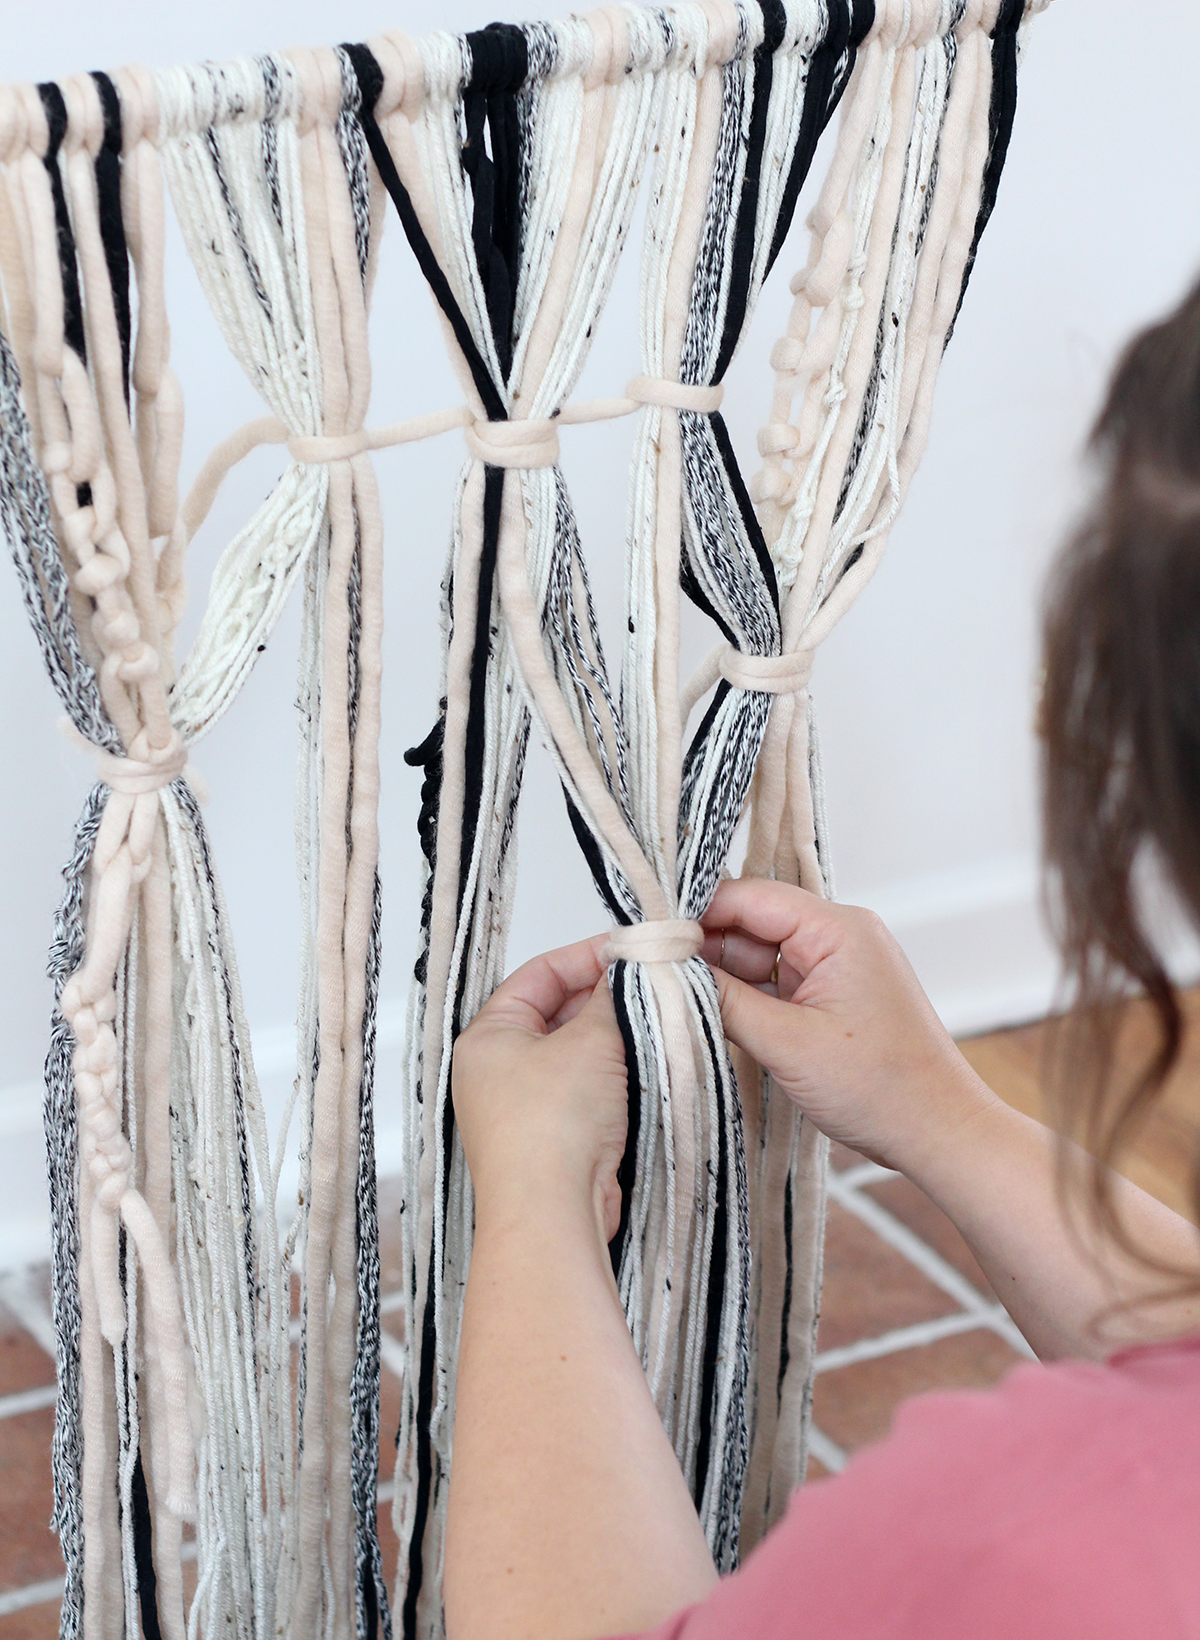
The last step is to consider how you want it to hang. Get creative! Gather parts or all of your hanging together and tie them loosely. Fluff them out if needed so you can see all those beautiful strands and textures!
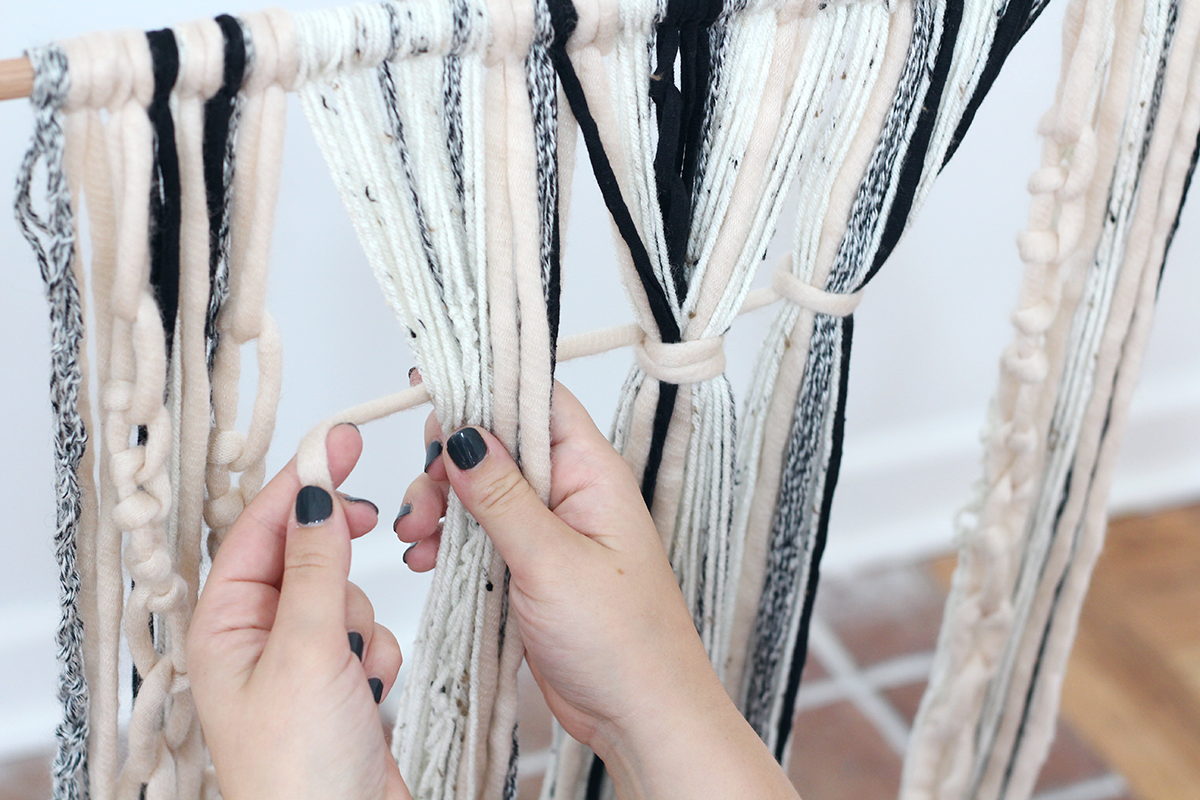
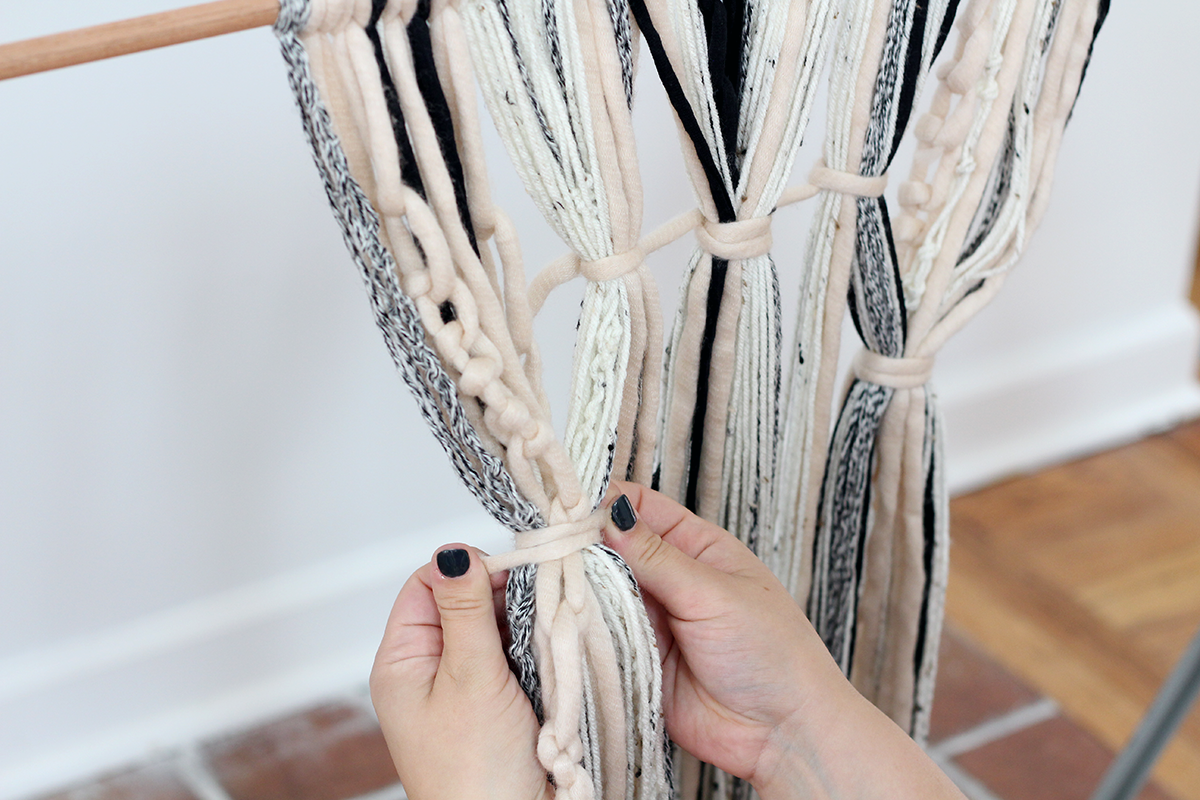
Here I used some of the blush yarn to make a pattern out of separating and tying different bundles over and over.
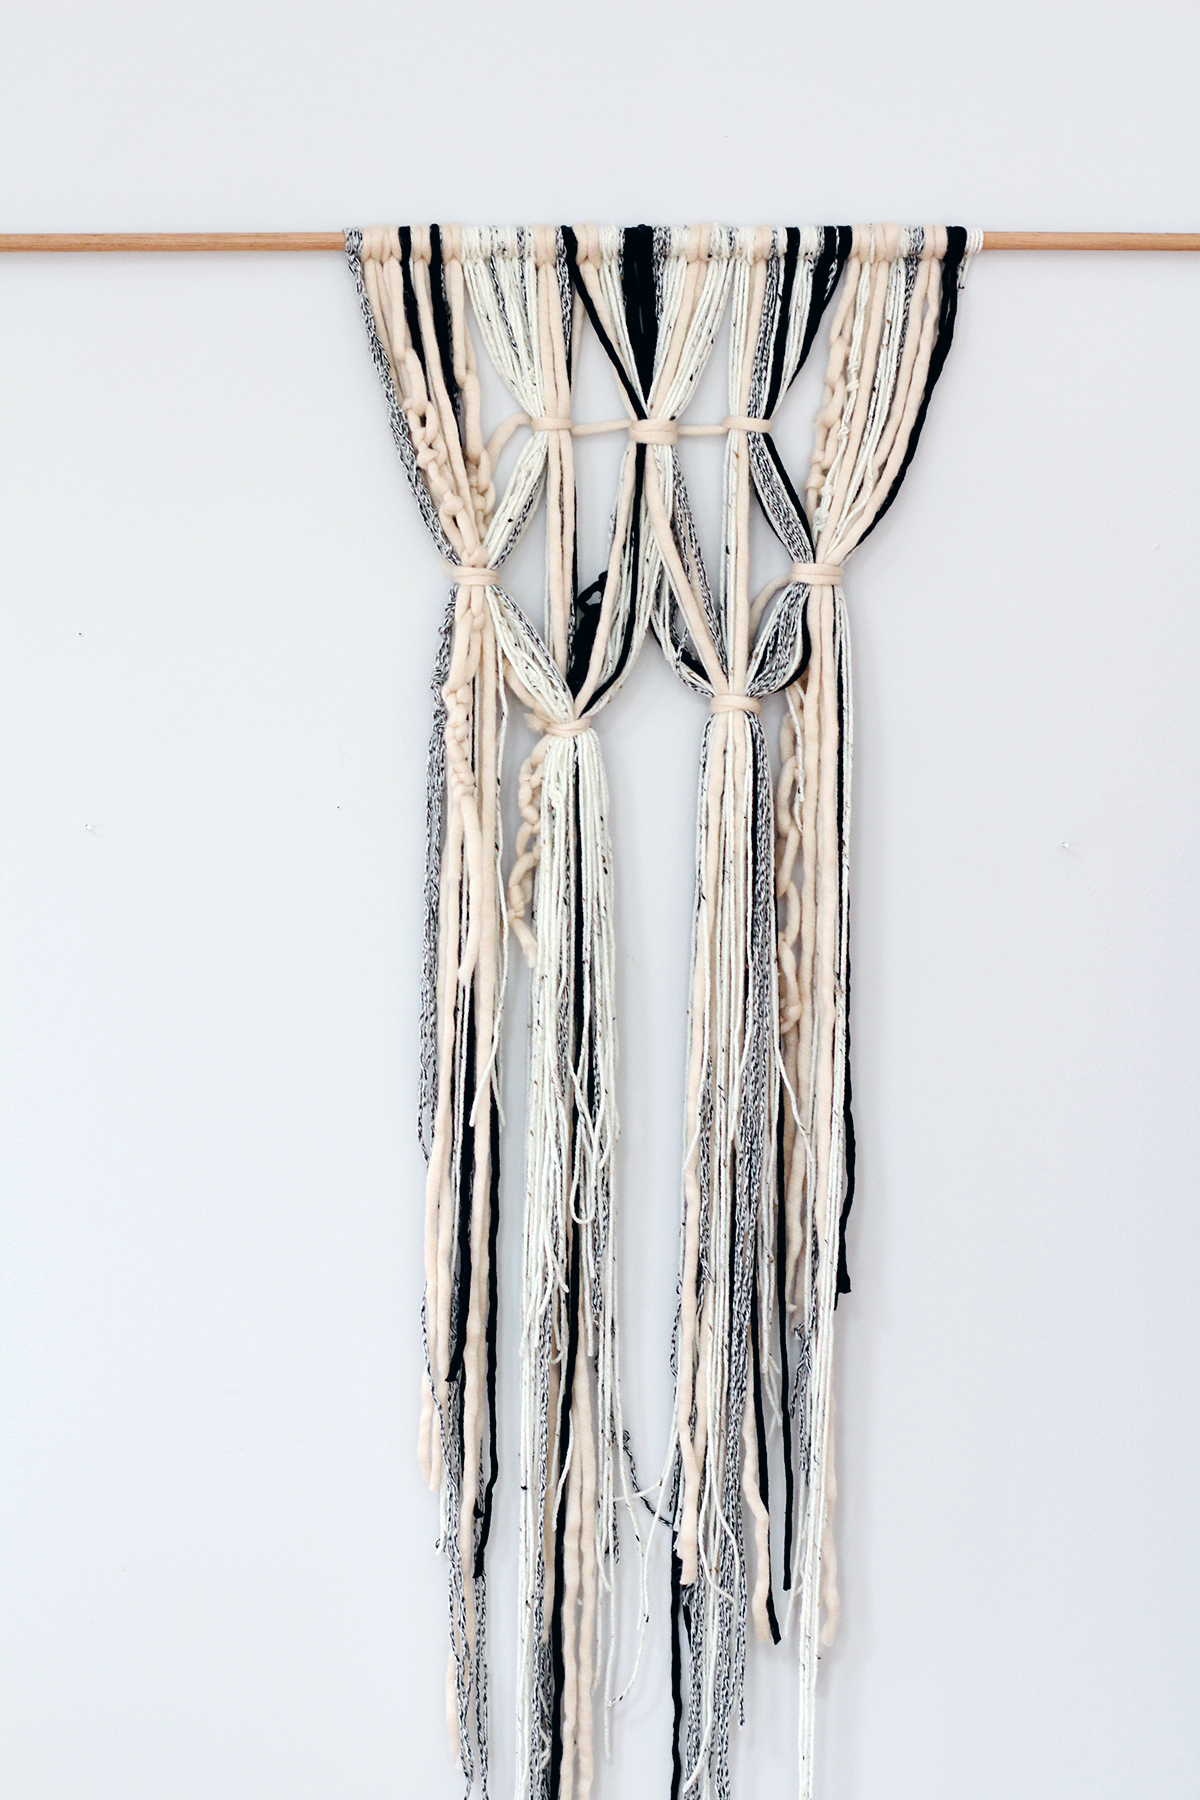
Another option is to let all those lovely strands hang loose. This is the best way to appreciate all of the colors, knots, and textures. Just slide them apart for even spacing and trim the ends to an even or uneven length if you desire.
Since I wanted a very deconstructed look to my wall hanging, I chose not to measure the strands or cut them evenly at the end.
Just remember…if you want your wall hanging to be even at the bottom, DO NOT measure all the same length or trim before knotting. The knots will cause those strands to be shorter than the ones hanging loose. Trimming at the end is best.
It’s so fun and strangely relaxing. When you feel done, you are done, it’s that simple!
This wall hanging also looks beautifully paired with the prints in the 2017 Lily & Val Fall Collection!
I hope you guys give this little project a try! Cheers!

7 Comments
I love this- thank you!! ❤️
Glad you enjoyed it! I’m making one for my house too!
Amazing!!! Love it!!!
So glad you all are enjoying this! Tag those pics! I would love to see what everyone comes up with!
I am really impressed with your recipe book and the memory book. Note cards are great. I plan on ordering some in the future. Thank you
[…] you are looking to start with create a simple wall hanging, this tutorial is for […]
Hi Emily. Thanks for sharing your lovely wall hanging tutorial. I know our readers will love it. I’ve included it in our latest craft inspiration roundup. https://craftylikegranny.com/fall-craft-ideas Cheers Jodie 🙂