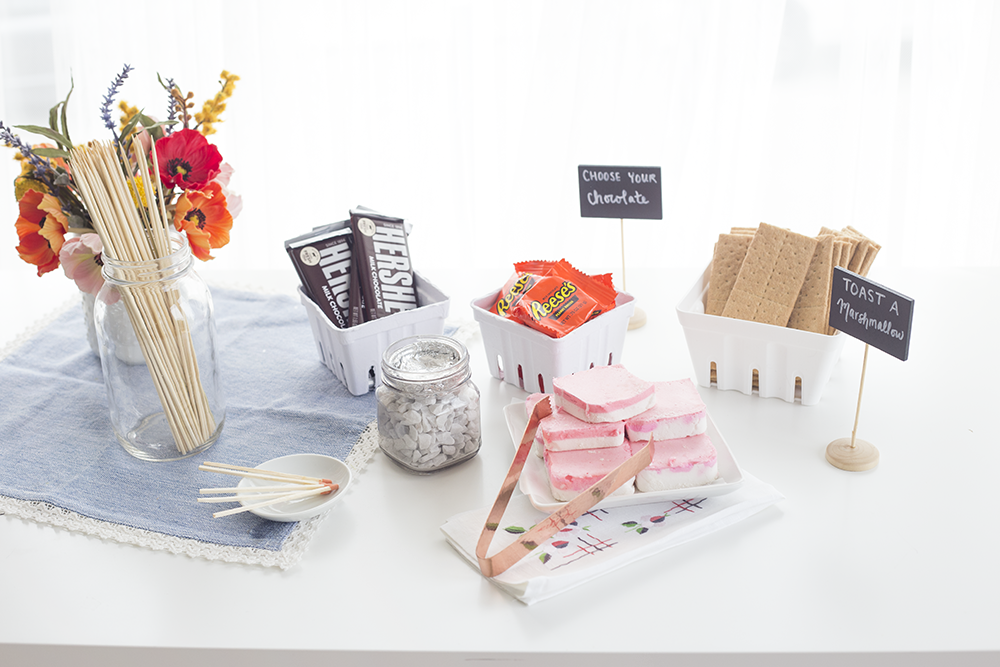
 Can you believe it’s already almost June? I just got done thinking it was still March. Oh well – June means summer (even if it won’t officially be summer quite yet) and summer for me means s’mores. To get you in the bonfire spirit, we created this adorable DIY s’mores bar to help you celebrate the unofficial start to summer!
Materials You’ll Need for your DIY S’mores Bar
- I want to preface this by saying that everything listed here is up to personal preference. But here goes –
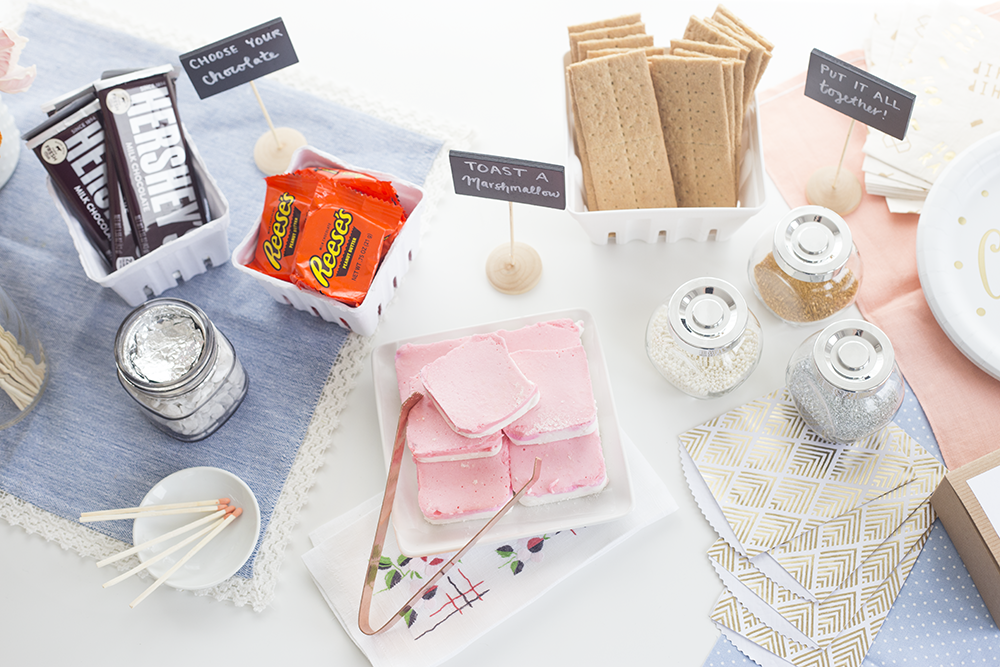
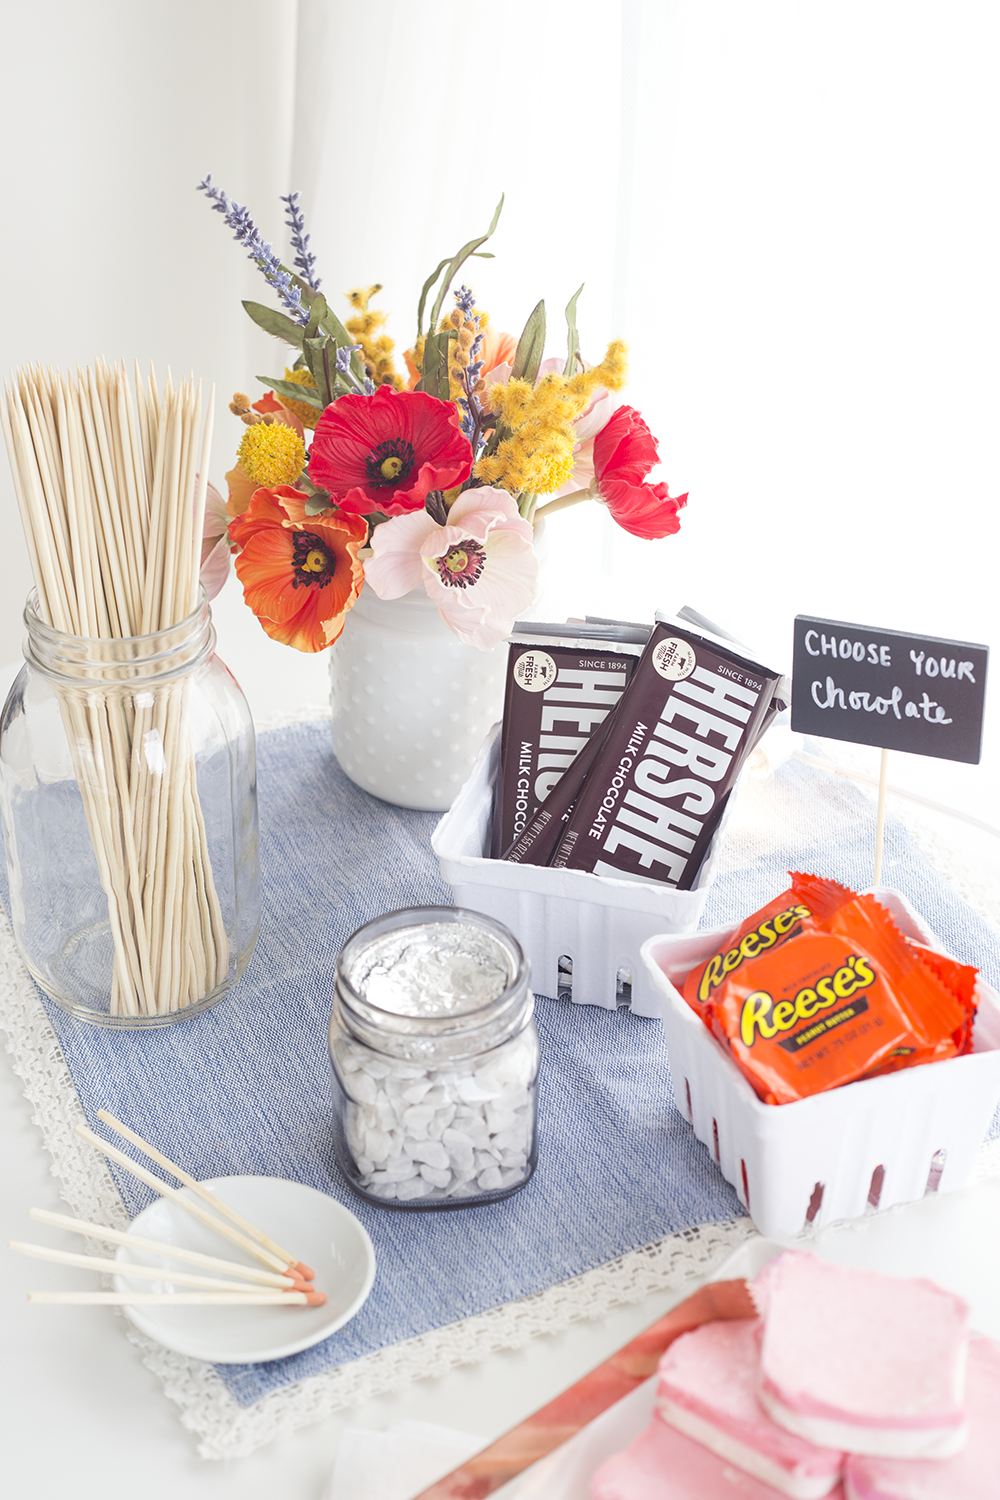
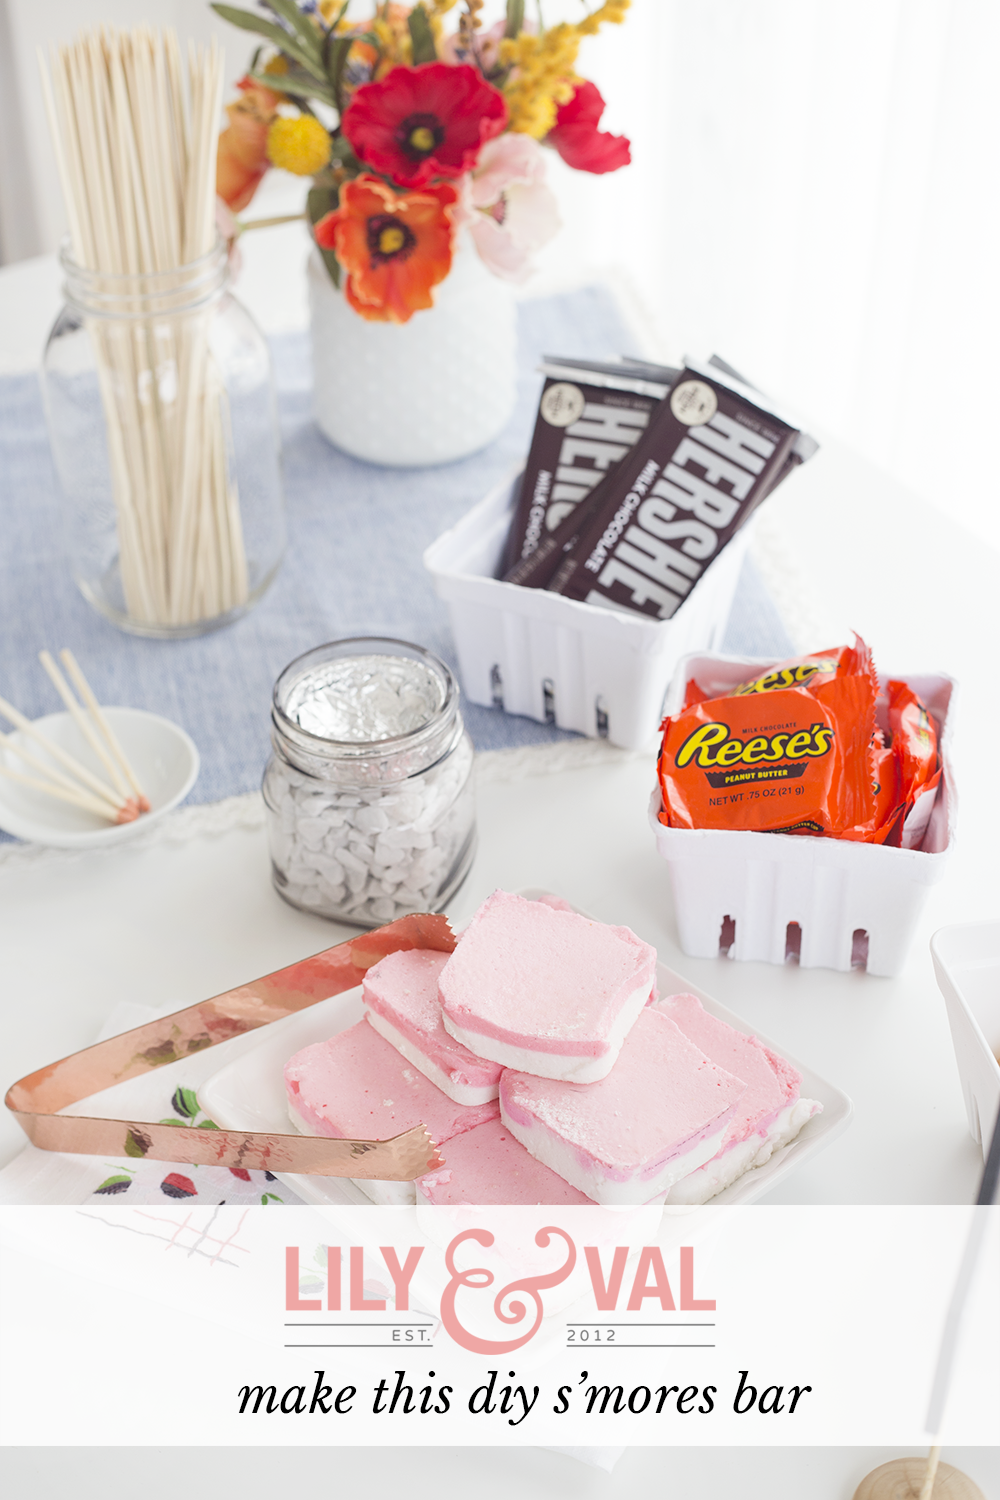
- Chocolate bars (mine were Hershey’s)
- Reese’s Peanut Butter Cups
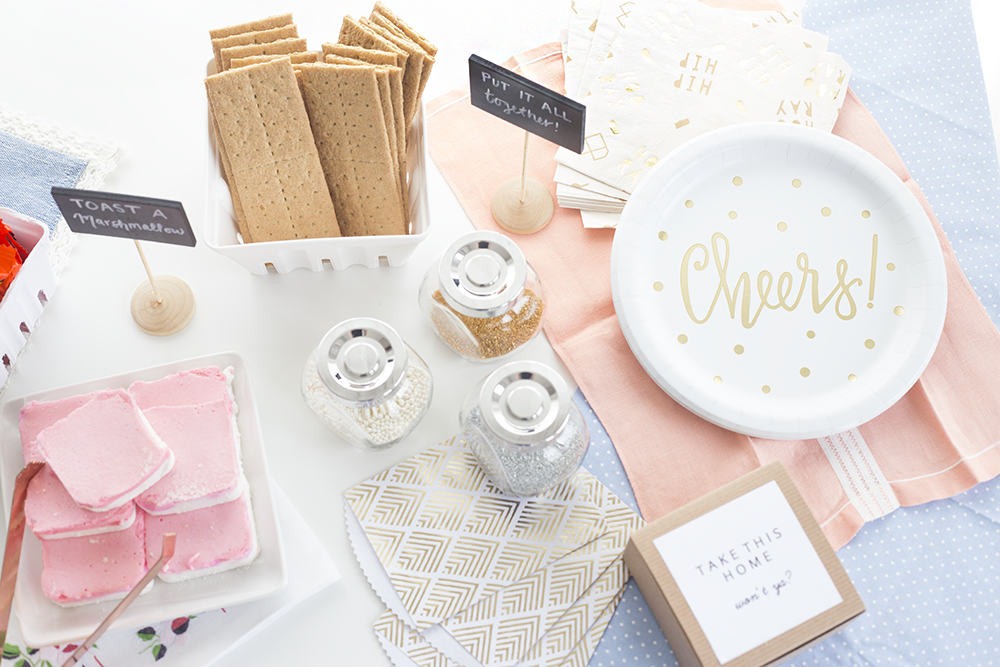
- Graham Crackers (I used honey golden, but feel free to try chocolate graham crackers, too!)
- Marshmallows (I made mine from scratch by adapting this recipe)
- Sprinkles or edible glitter
- Chalkboard signs or place cards
- Skewers or sticks
- DIY sterno roasters (more on this below) and matches, or a real bonfire
- Take home boxes or bags
- Plenty of napkins!
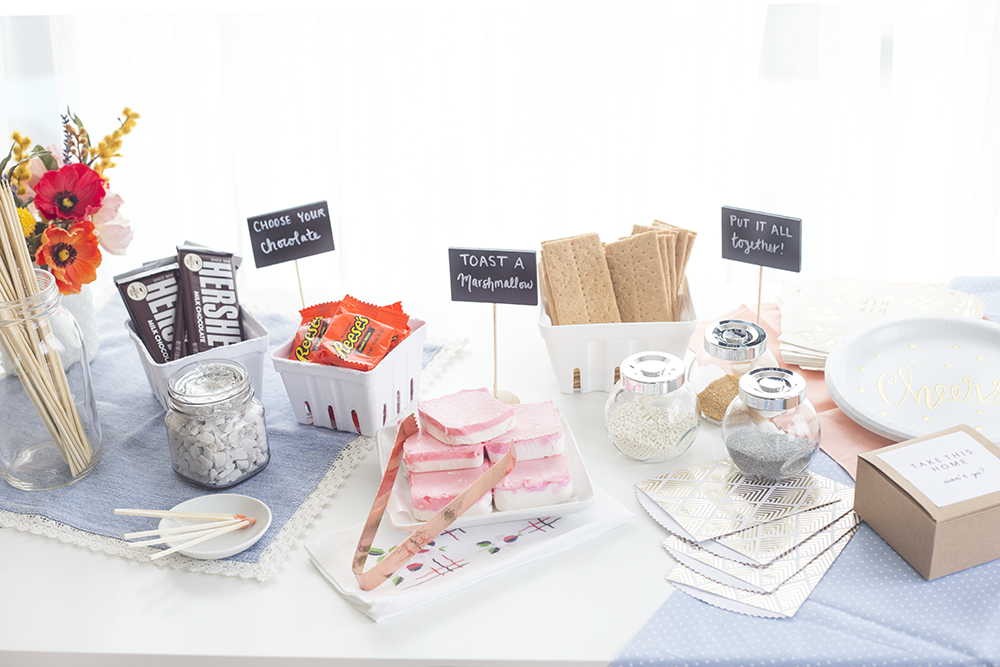
Arrange your S’mores Bar in a Way that Flows
In order to help with the feng shui of my s’mores bar, I wanted to create signs that organized and ordered the way guests came through.
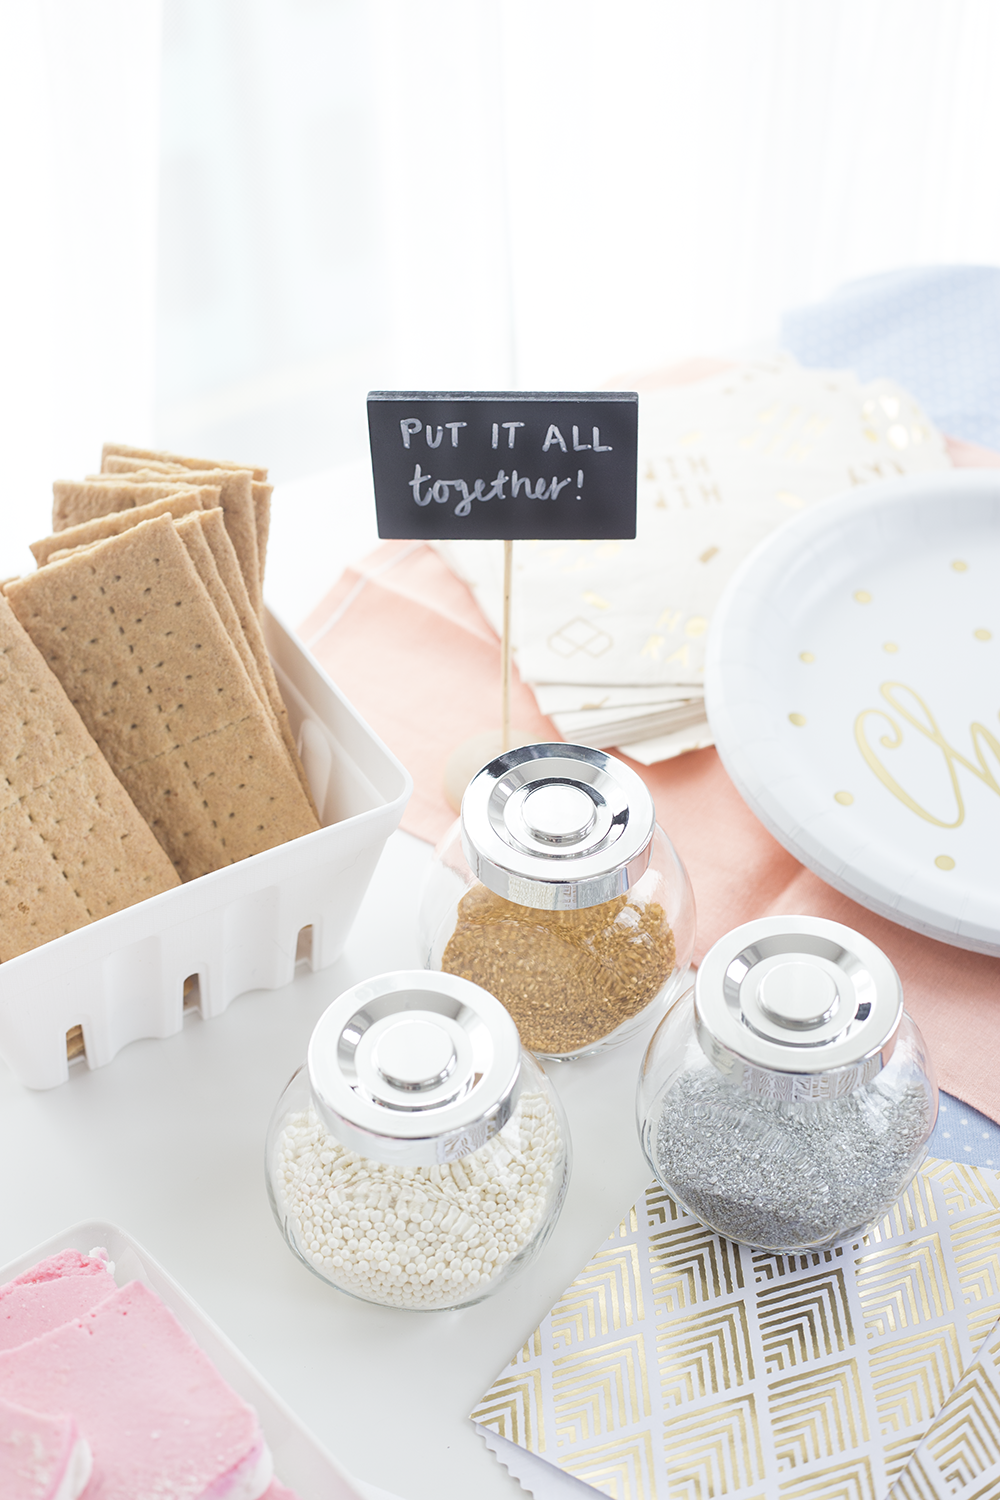
I used chalk board place card signs from Target (in the Spritz aisle, where dreams come true) and a white marker to make “Choose Your Chocolate,” “Toast a Marshmallow,” and “Put It All Together” signs.
A good idea would be to start with the “Toast a Marshmallow” station then flow to the “Choose Your Chocolate” station and end with the “Put It All Together” station.
Another way to make sure no one gets caught up at the bar is to have a mason jar filled with enough skewers or sticks for everyone – no waiting to share!
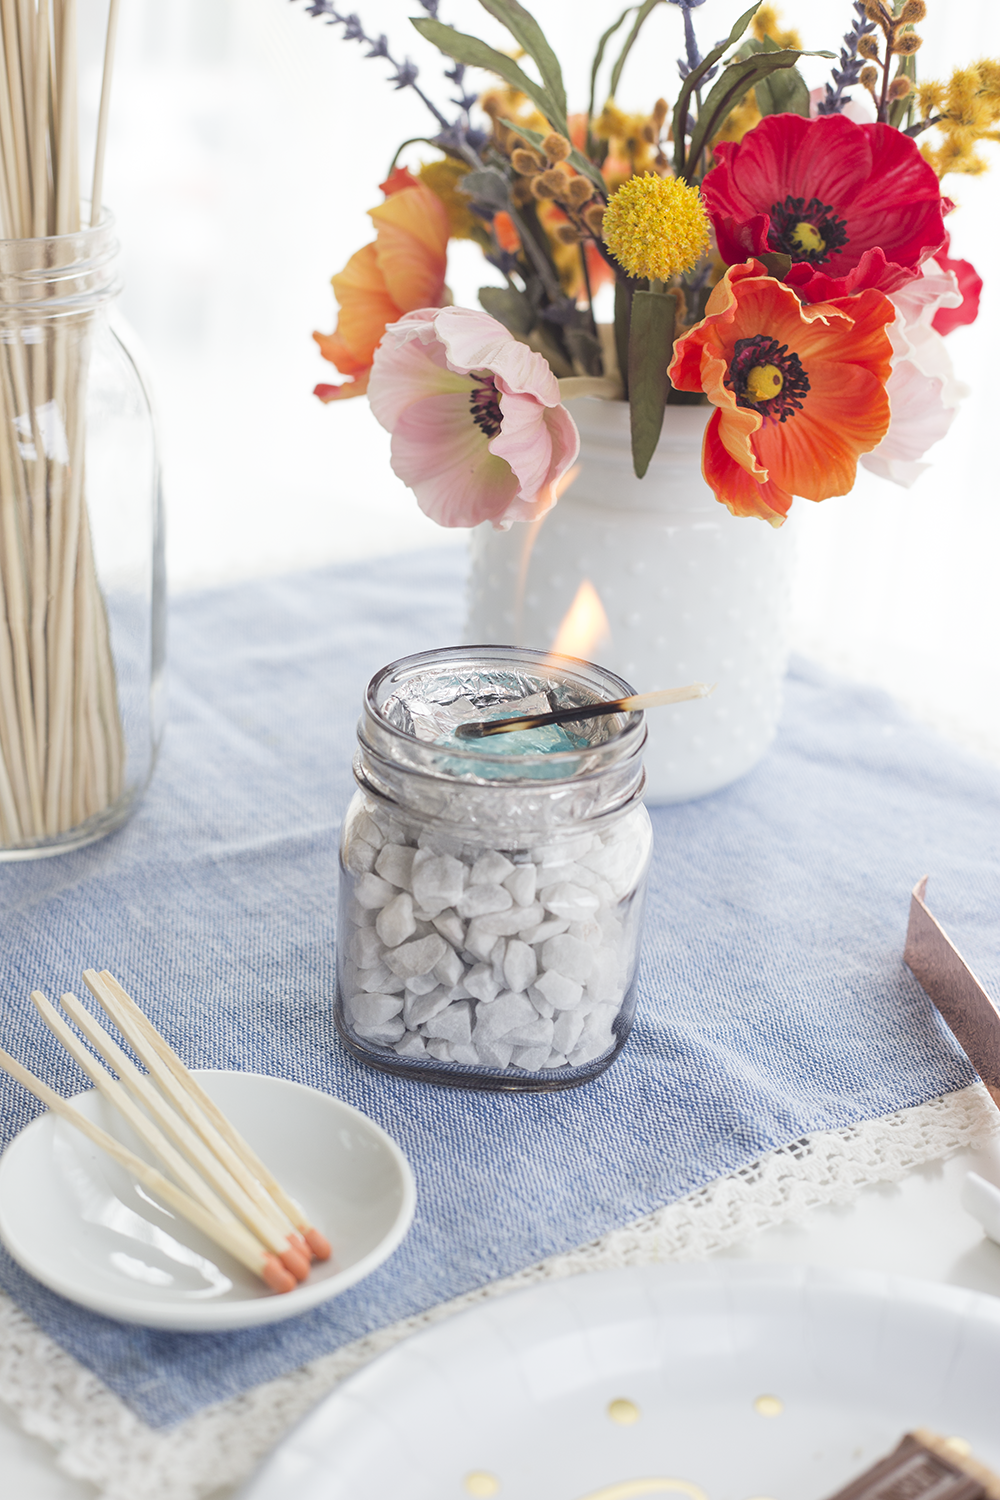
For an Indoor Party, Make This Sterno DIY!
Even though it’s almost summertime, not every day this summer will be clear and dry. On these days, you can still have a fun s’mores party inside with DIY sterno roasters!
Definitely have some patience and a fire safety mechanism nearby for making these. I learned this the hard way.
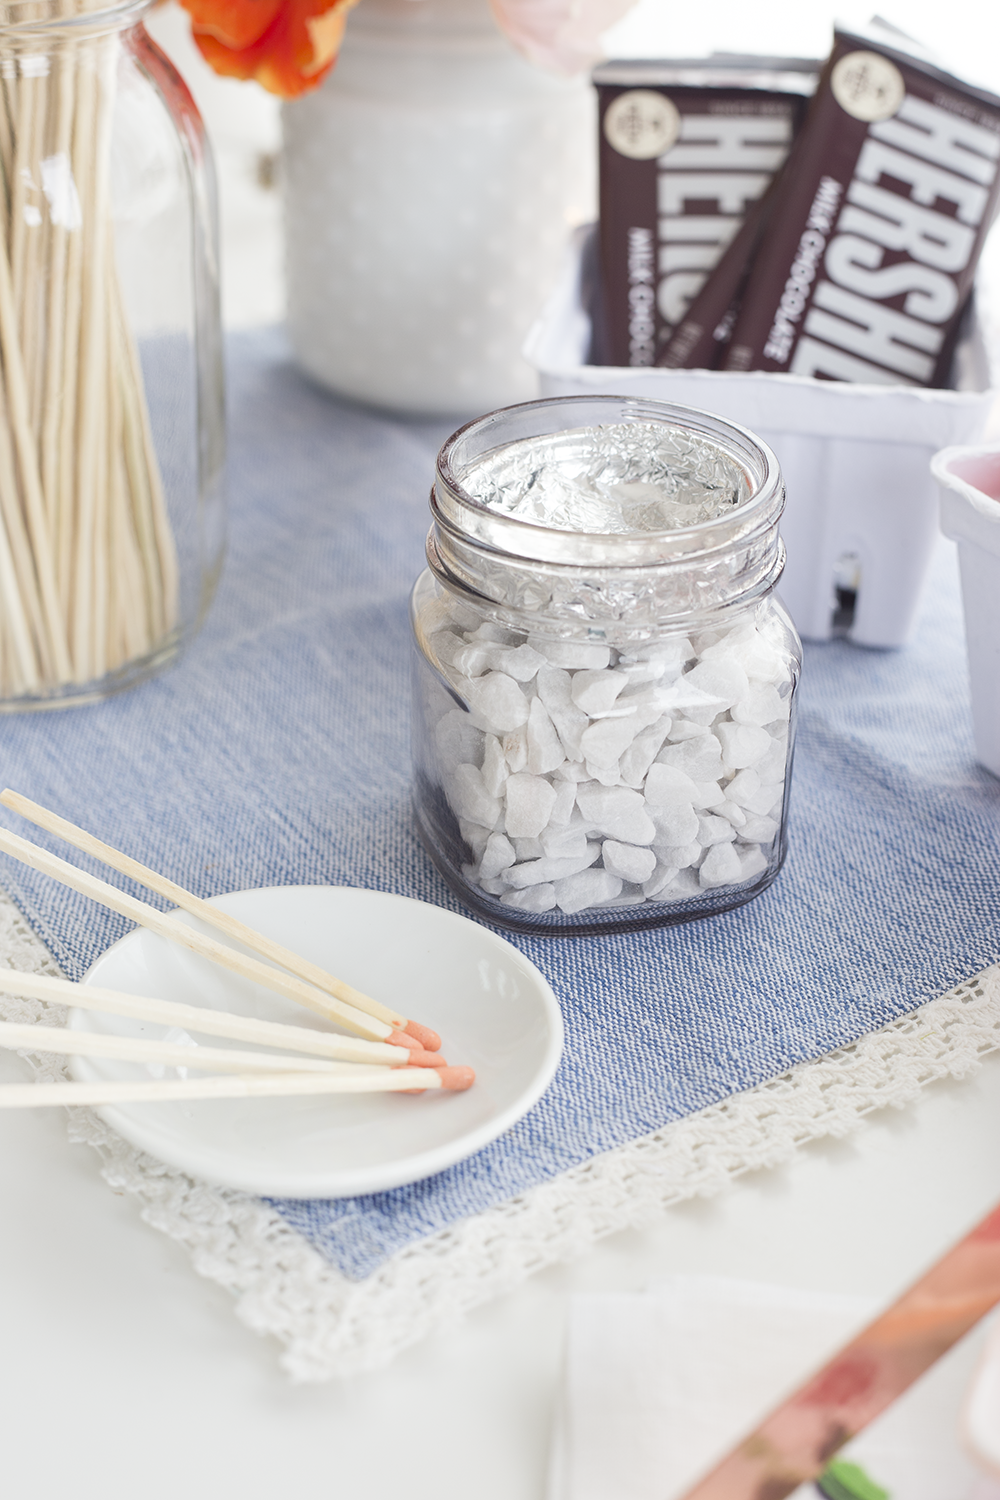
For the sterno roasters, you’ll need:
- Glass jar
- Decorative small rocks (in the patio section of Target or Home Depot)
- An aluminum or glass lid (no plastic!)
- Heavy duty aluminum foil
- Gel fuel (mine was from Williams-Sonoma, but Home Depot or Lowes should have similar)
I bought my glass jar from the Target dollar section and filled it 3/4 full with decorative rocks. This keeps the flame from being too close to your table linens.
I placed a small metal milk jar lid wrapped in heavy duty aluminum foil on top of the rocks and scooped about a spoonful of the gel fuel onto the lid.
If you have a lighter, that might be an easier way to light the gel fuel, but I used a match and let it burn on top of the fuel. It was after taking these photos that I realized a lighter might be a better idea…
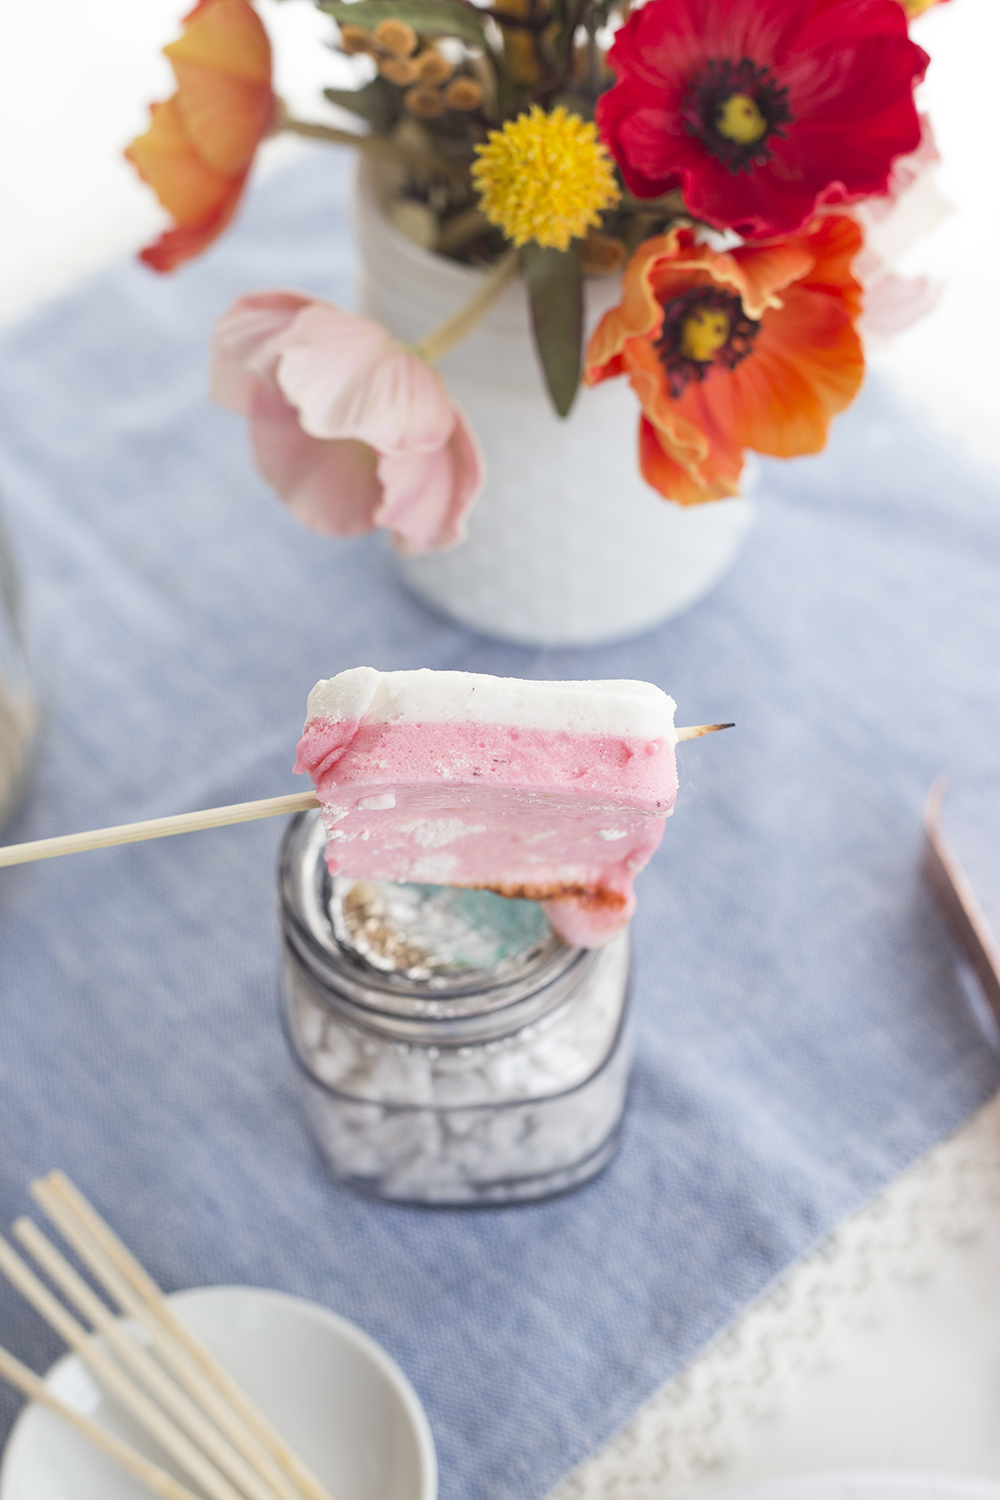
After you’ve lit your DIY sterno, grab a skewer and roast your marshmallow over top – you’ve got an indoor fire pit!
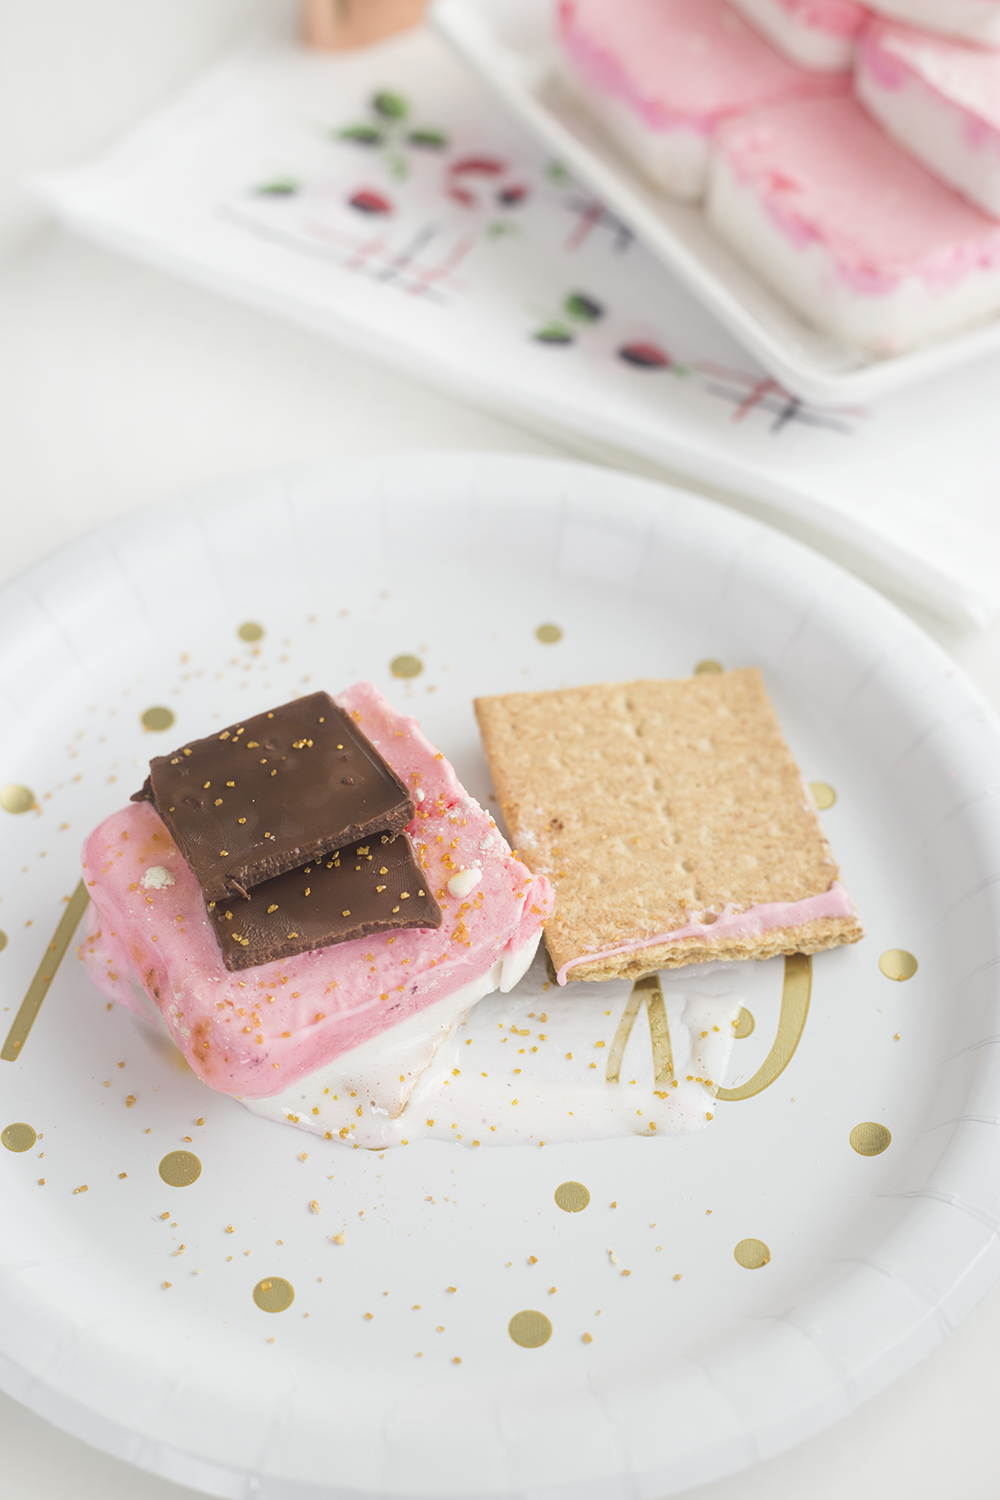
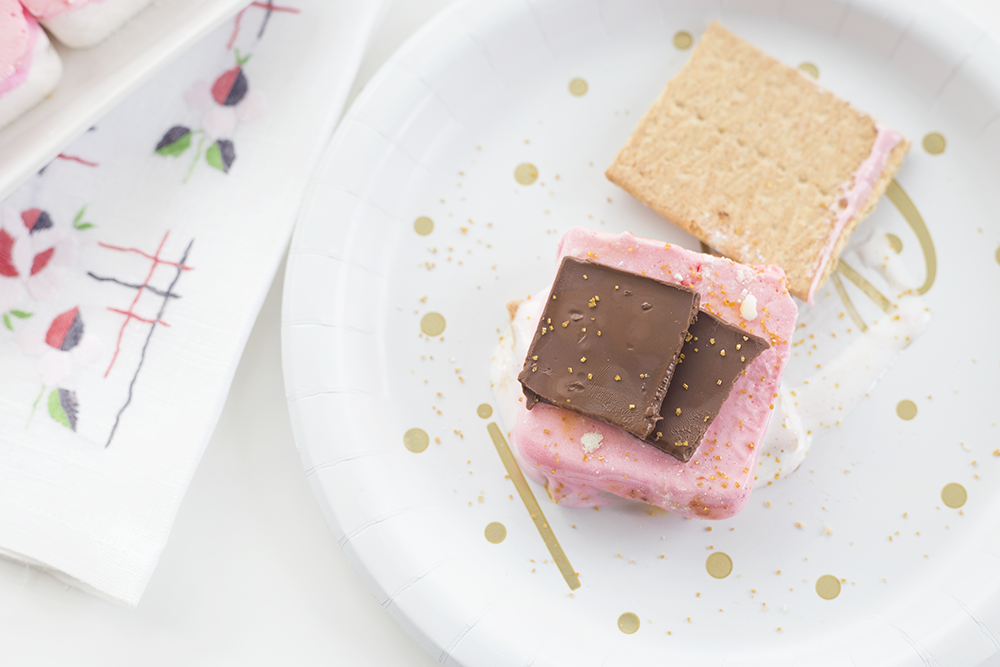
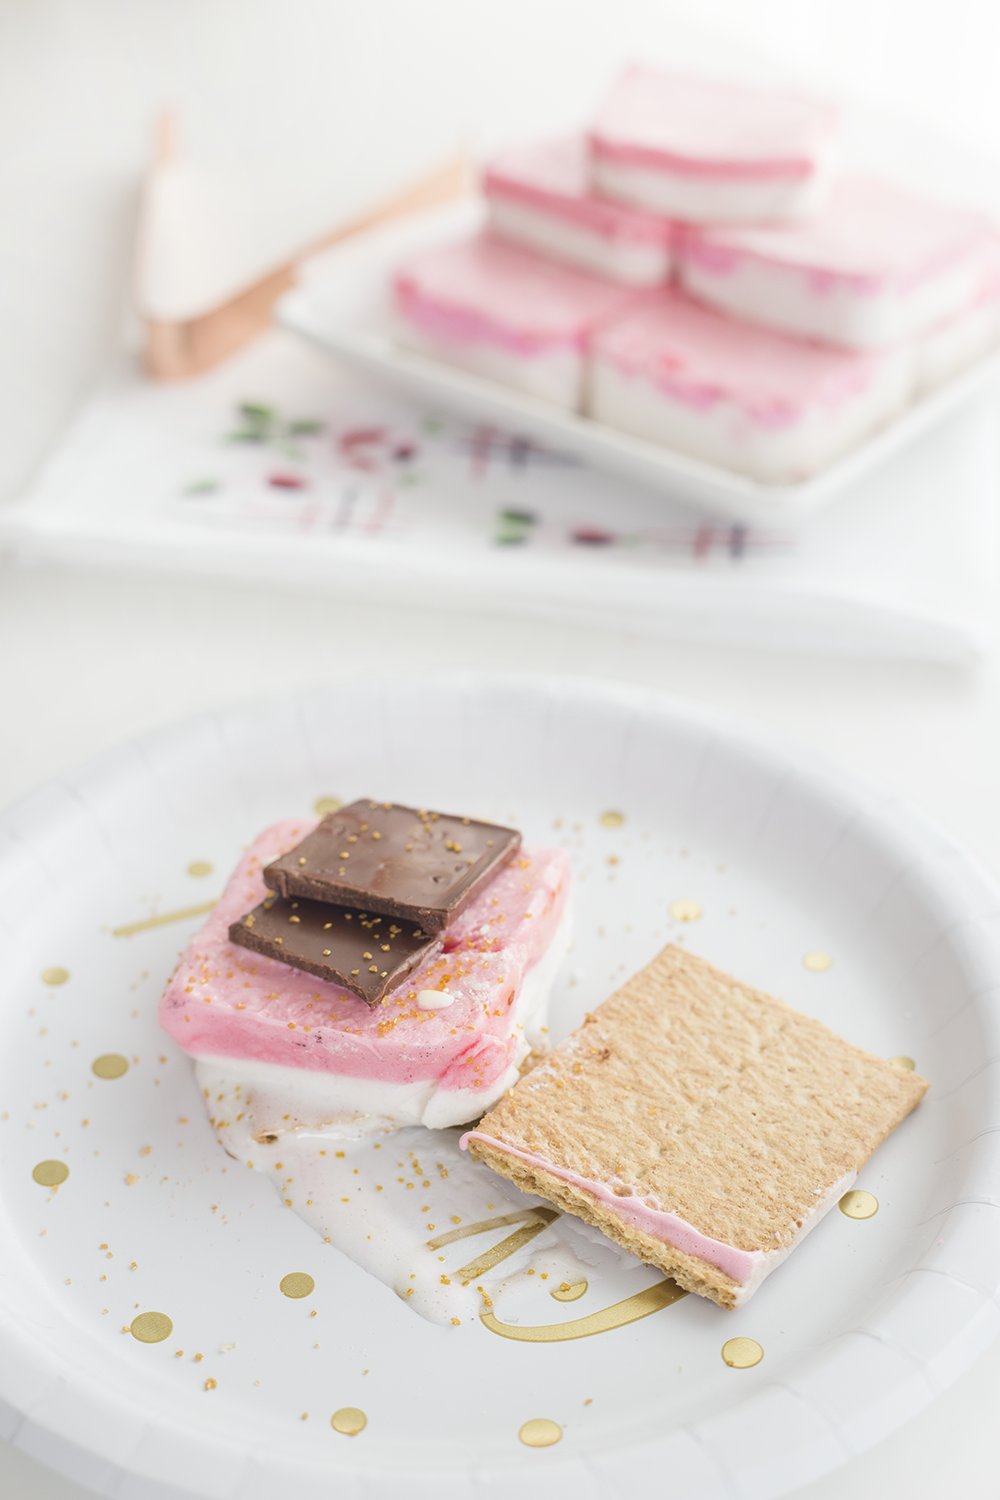
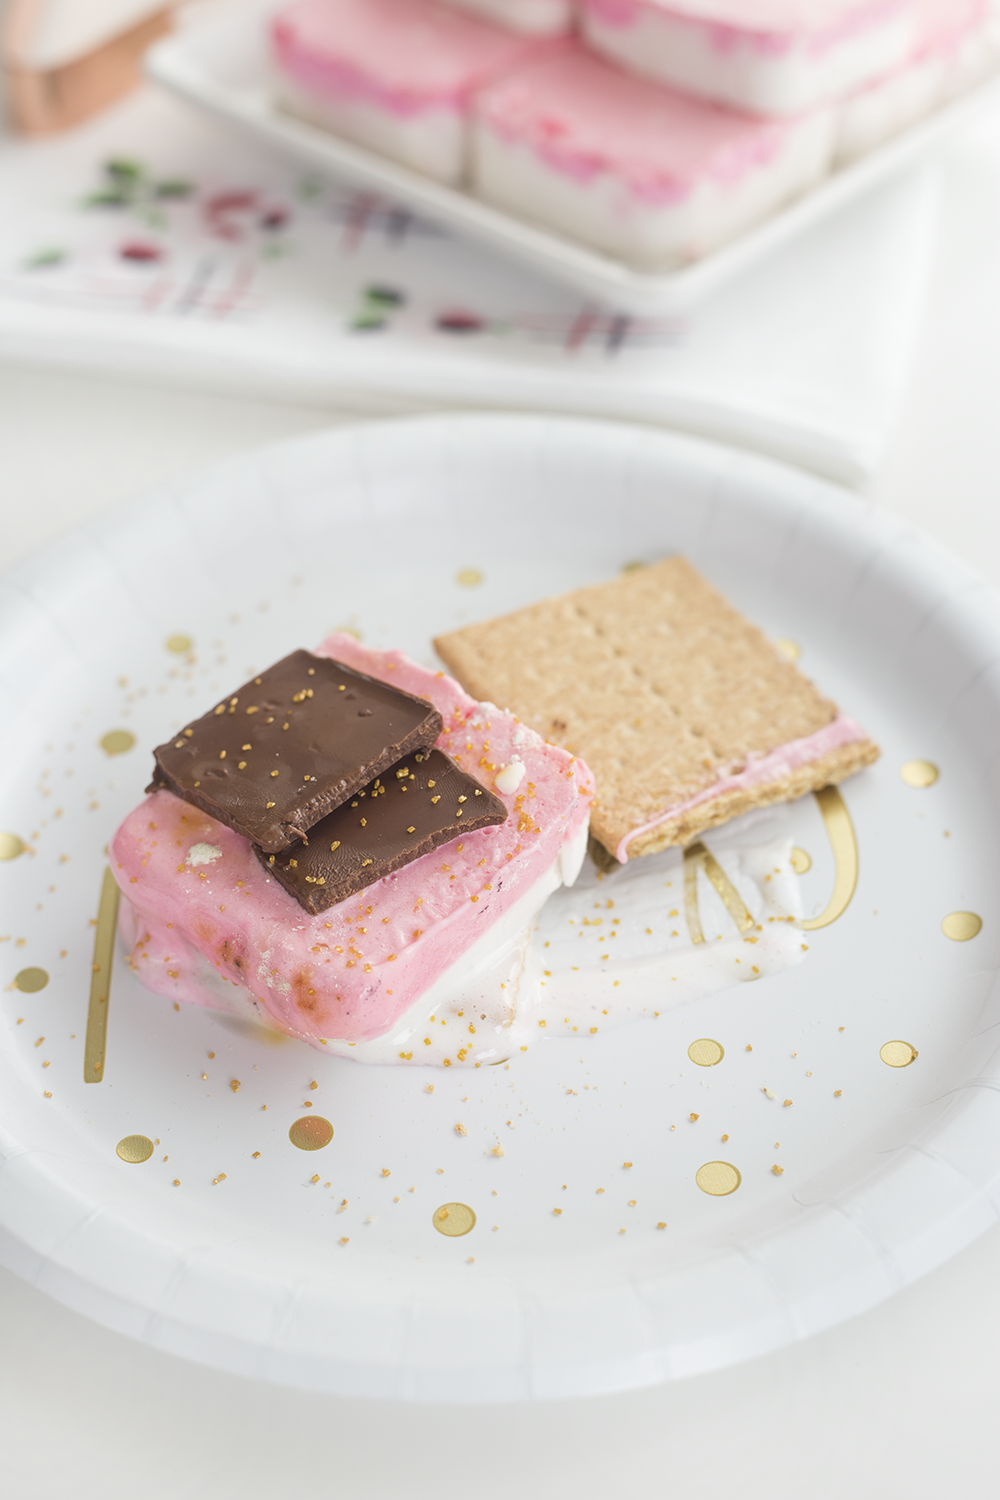
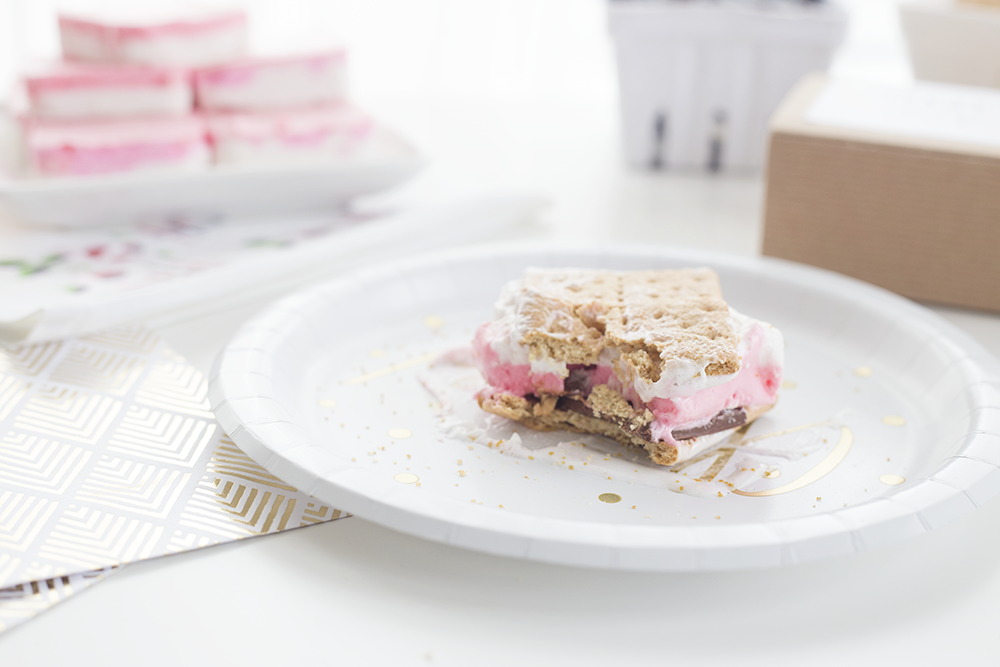
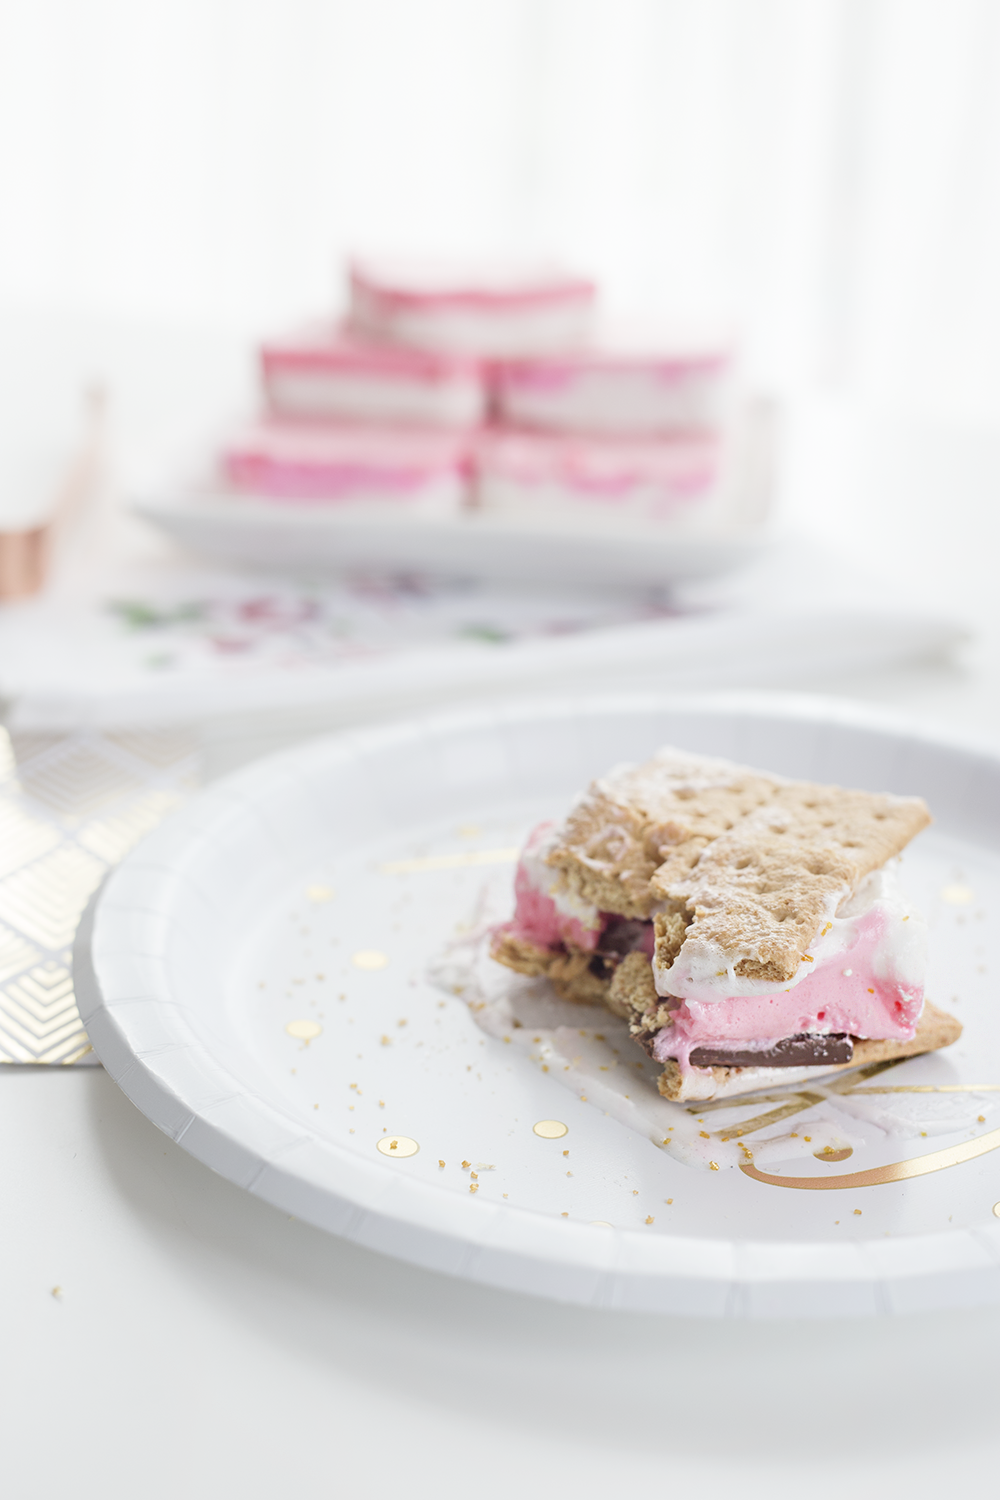
Add a Special Touch with Homemade Marshmallows
I made marshmallows from scratch awhile back for this hot chocolate post and it wasn’t the easiest but it was super worth it.
To make these two-toned marshmallows with Lily & Val pink, I followed the recipe from A Beautiful Mess linked above in the ingredients list and adjusted it slighty to form the colors.
After you’ve mixed the marshmallow fluff in the mixer and are about to pour it in the pan, separate the fluff into two bowls – one of these you’ll leave white and the other you’ll add a few drops of bright pink gel food coloring to (I used the neon color pack). Stir to combine but be sure to work quickly as the gelatin will begin to set.
A note about making marshmallows – to get a clean white color, be sure you’re using white sugar and not brown sugar or cane sugar. When I tried this with cane sugar, the slightly off-white color of the granules turned into a light brown fluff.
Pour the white marshmallow batter into your pan first, spread it into an even layer and let it set for a minute or so to make sure it’s stiff enough to hold up the next layer. Once you’ve done this, pour the pink batter on top. Cover with powdered sugar and a sheet of parchment paper and let sit overnight.

Have Fun with New Combinations
I got a few looks when I suggested trying to sprinkle edible glitter on top of my melted marshmallow. But I still did it and it was delicious.
Throw a couple jars of sprinkles or edible glitter on your DIY s’mores bar and watch your guests have a lot more fun than you’d expect.
Other different combinations include trying Reese’s Cups instead of Hershey’s, using chocolate graham crackers, or even forgoing the graham crackers and putting chocolate between two pretzels! It sounds crazy, I know, but it’s so good – just a little bit messier.
 Prepare for a lot of photos of these pink and white marshmallows. I couldn’t get enough of how adorable they looked with the edible gold glitter on them.
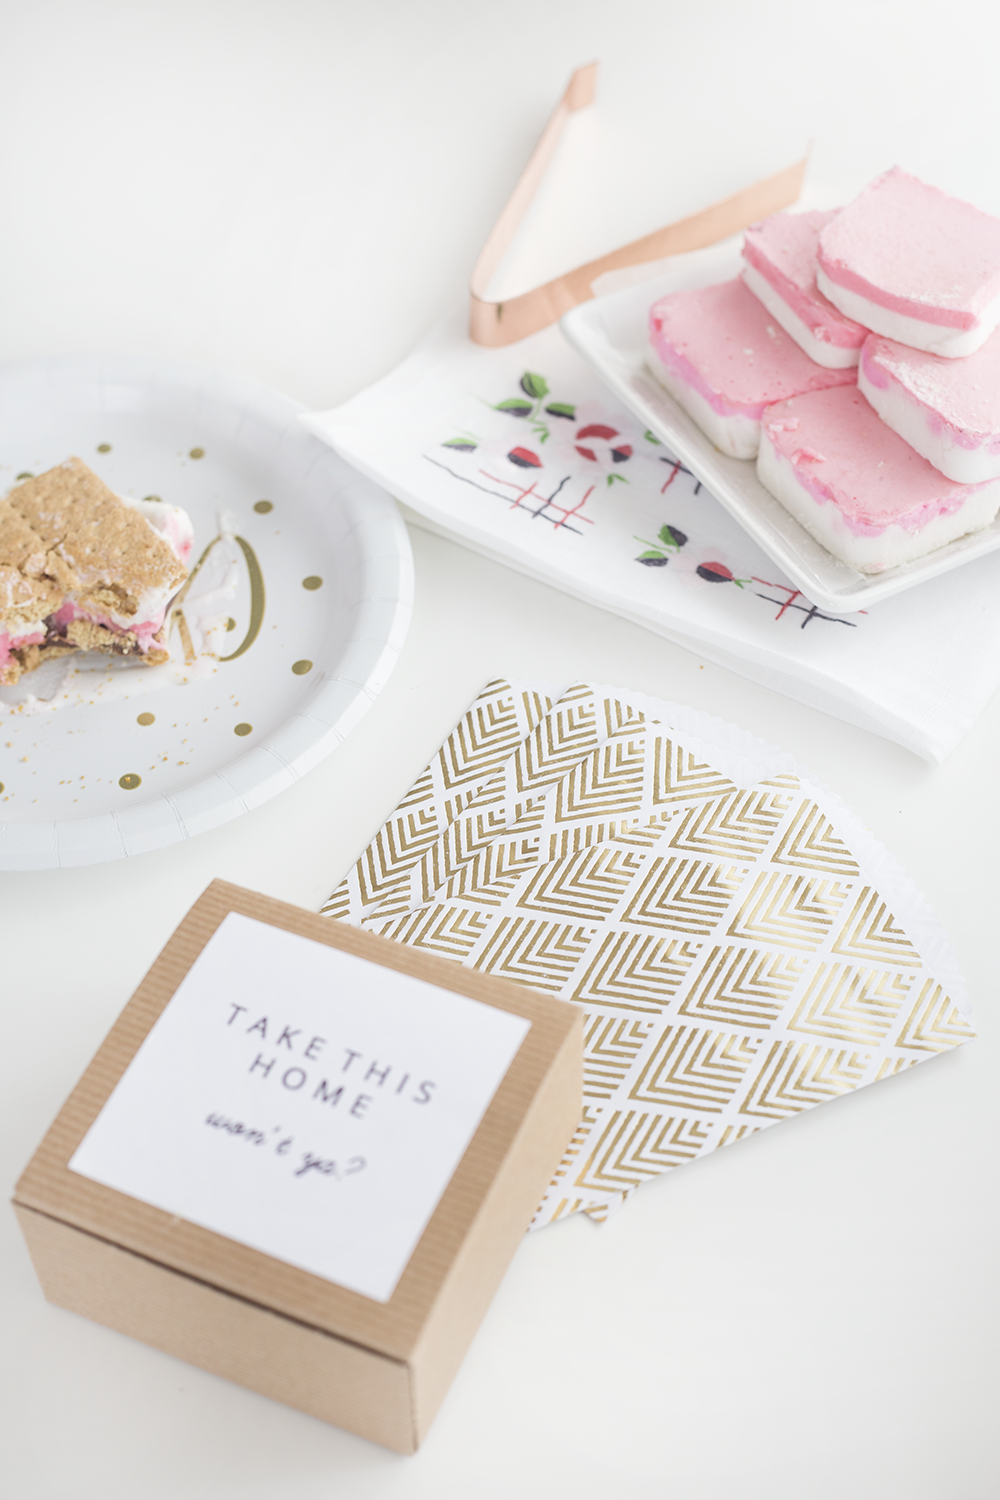
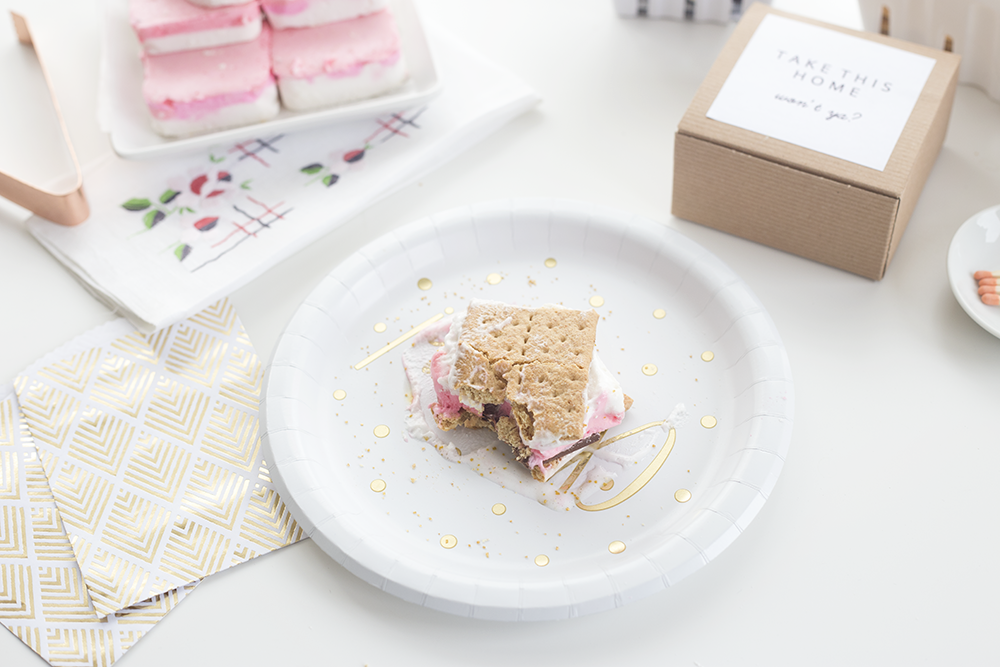
Give Your Guests a To-Go Option
If you’re going to have an Instagram-worthy DIY s’mores bar, you need to have an equally cute option for your guests to take home their goodies in.
I picked up some to-go paper bags from the Spritz section at Target and also made a couple of custom to-go boxes based off of this DIY from Almost Makes Perfect.
Maybe your friends want to eat more s’mores at home but are too embarrassed to have a third at the party (this is exactly something I would do) – take home boxes are a perfect solution to this.

The most important thing to remember with your DIY s’mores bar is that it’s supposed to be imperfect and fun. Once the marshmallows get a’roasting, everything is going to be messy and sticky and silly anyway.
We love a good excuse for a bonfire around here and with the unofficial start of summer right around the corner, throwing a s’mores party for a few of your besties is the best way I can think of to celebrate.
See more s’mores DIYs here and try adding a little liquid fun to your party with a Tropical Rum Punch via the recipe here.
We’d love to see photos of your DIY s’mores party! Tag us on Instagram with #lilyandvalliving and, as always, pin the above image to share with your friends!
Happy unofficial summer!

No Comments