 Hi there! Can you believe it’s December? Somehow I lasted this long without listening to Christmas music, but that’s about to change with this DIY. Honestly, there’s no way to make this project without at least whistling Let It Snow. Or better yet – try Marshmallow World sung by Barbra Lica. It was the song that inspired Val to create L&V’s winter collection and it’s perfect inspiration for this adorable felt stocking.
I love handmade touches for the holidays – they add to the spirit of the season with my own personal dose of adult magic. Because it’s for sure magical that I managed to complete this project without stabbing myself. And as stockings are quintessential wintertime decorations, I thought a fun and easy DIY to deck out your mantle was more than necessary. If you’ve never sewn before, don’t fear!
Are you ready to make a hand-stitched stocking? Let’s get to it!
Here’s a list of what you’ll need to complete this project:
– Felt in various colors (My final stockings were made from sparkly white, maroon, dark grey, and ice blue felt. You can buy these in sheets from any craft store for around fifty cents)
– Scissors or a rotary cutter (I used a rotary cutter because it’s easier to go around curves)
– An embroidery needle
– Embroidery floss in colors that correspond with your felt
– Straight pins or clear tape
– Embellishing details like pom poms or letter stickers
– A cutting mat or cardboard surface you don’t mind scratching up (I learned this the hard way)

 STEP ONE: Cut Out the Pattern
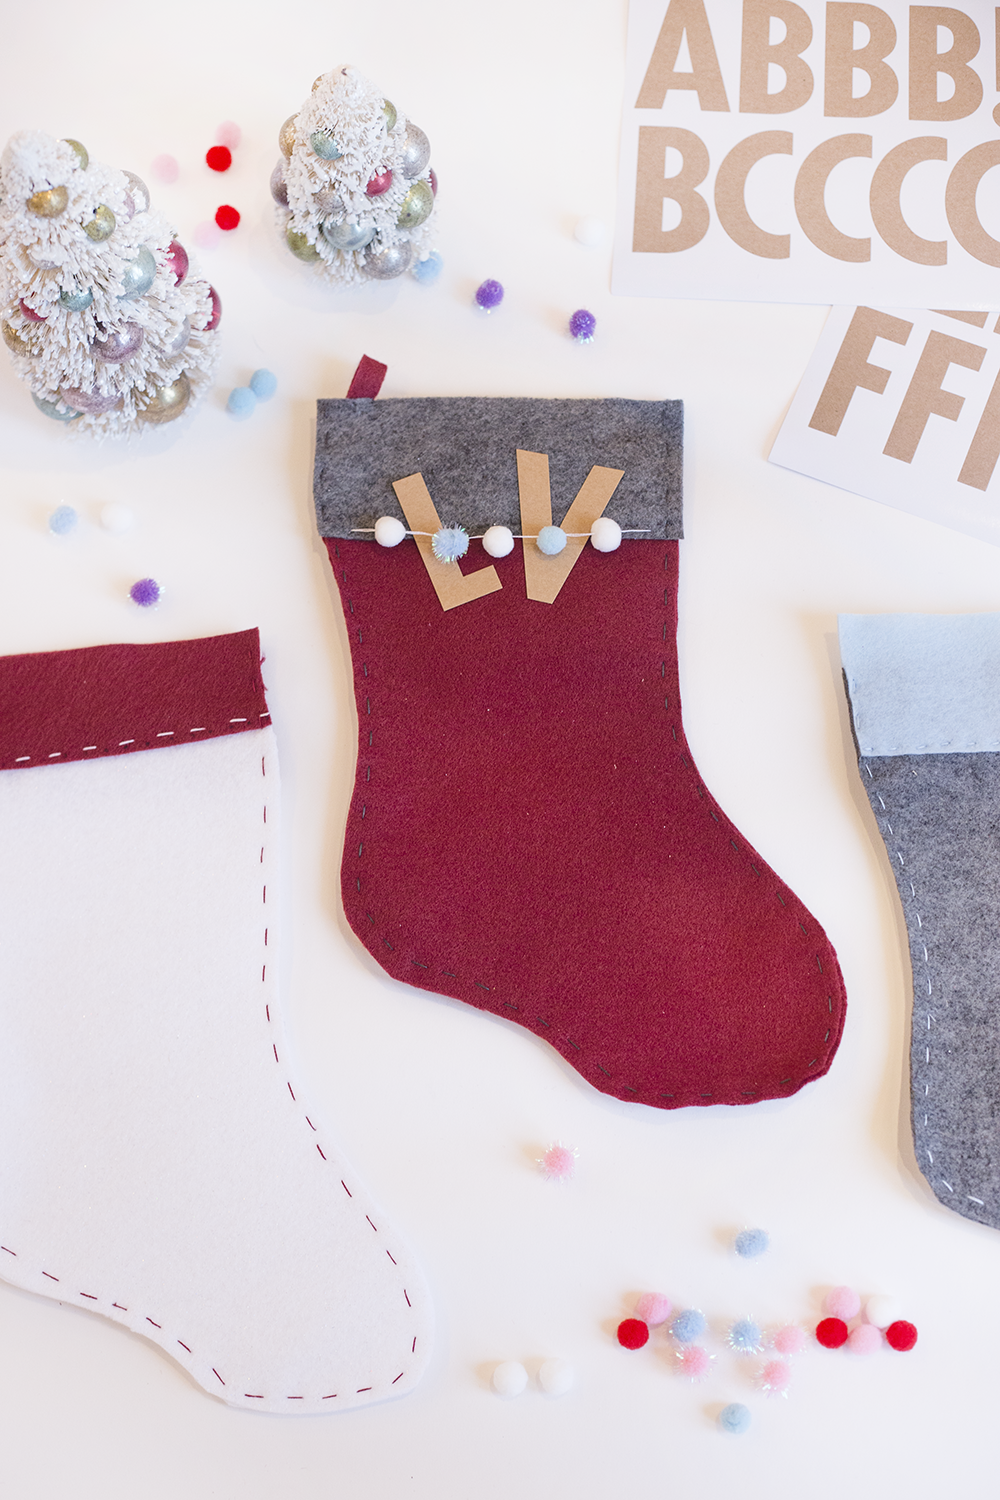
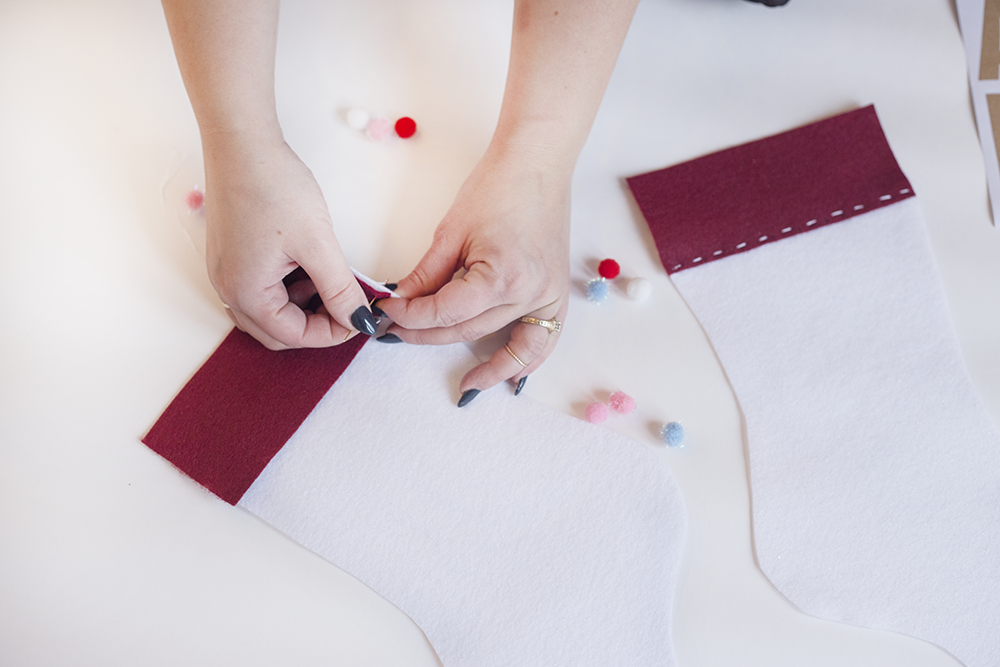
Find a pattern you like that will fit an 8×10 sheet of felt. I used this one that I found on Pinterest. Cut two of the pattern out of the felt colors you want for the body of the stocking. In the below photo, I used sparkly white felt for the body and maroon for the trim. If you’re using felt that has a different texture or pattern on only one side, be sure that you cut the pattern pieces out to mirror each other so that you don’t end up with one visible side sparkly and one visible side plain (again, learned this the hard way).
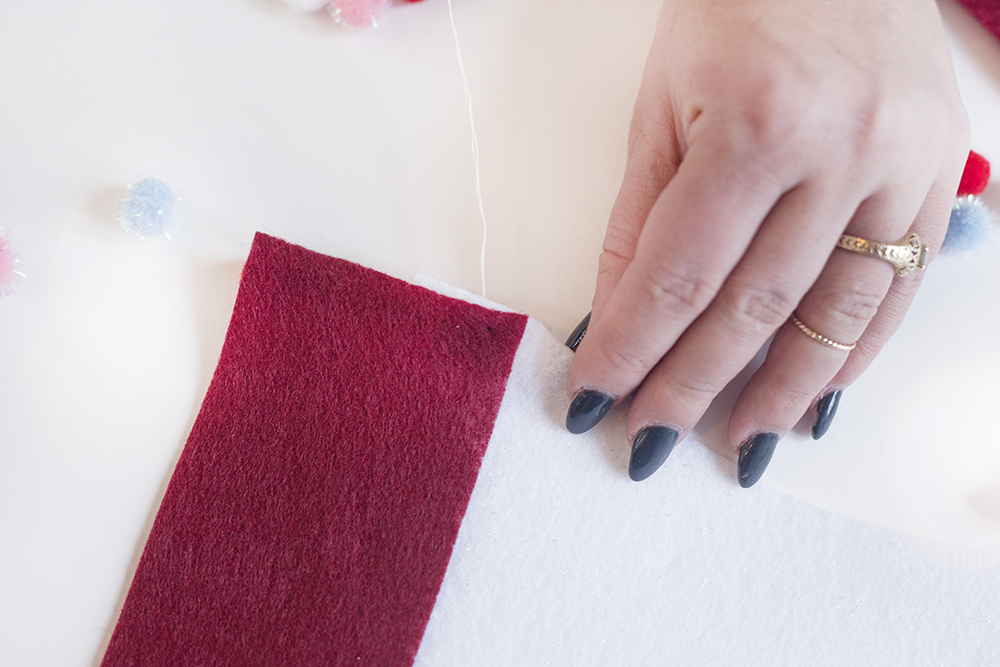
STEP TWO: Cut Out Your Trim
Cut out two rectangles from your preferred trim felt color that measure approximately 3” tall and fit the width of the top of your stocking. Lay your trim piece on top of your stocking body so that they overlap slightly. About an inch and a half should be overlapped (see the below photo). Once you have the pieces lined up, use straight pins or clear tape to hold them in place. Don’t worry – the tape will pull off the felt easily.
STEP THREE: Thread the Needle
Okay, time to thread! Pull out an arm’s length of embroidery floss and cut. While this will look like a lot of thread, we’re going to separate it into individual strands (five of these make up one cut of floss). The best trick for doing this successfully is to hold your floss bunch with one hand and pull an individual strand upward with your other. Once you have your single strand, put the ends together so it forms a loop at the bottom. You’ll thread both ends into the eye of the needle and pull them so about a quarter of the floss has been threaded.
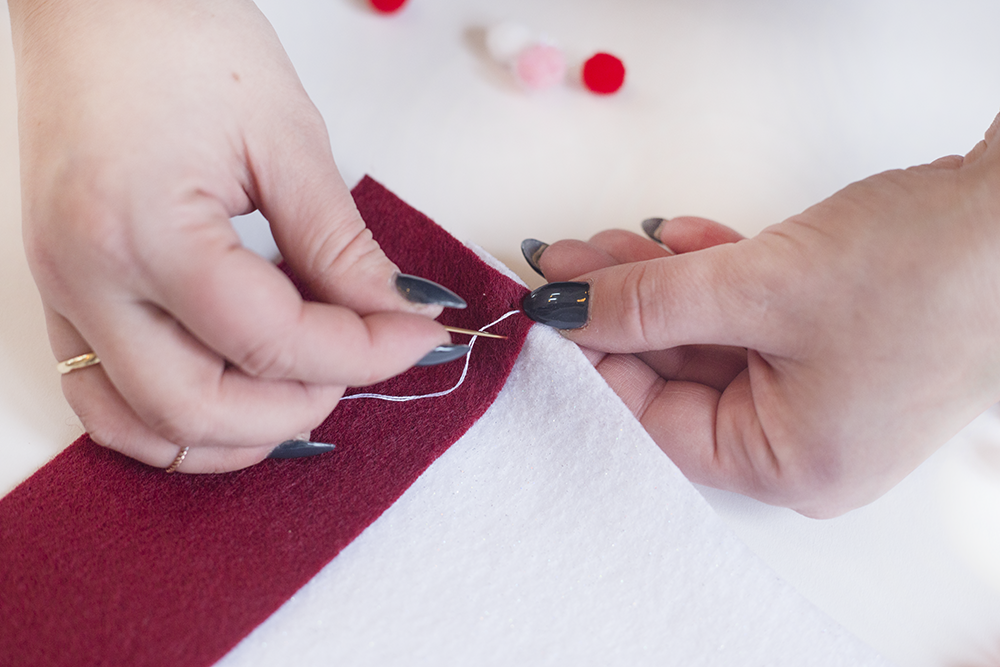
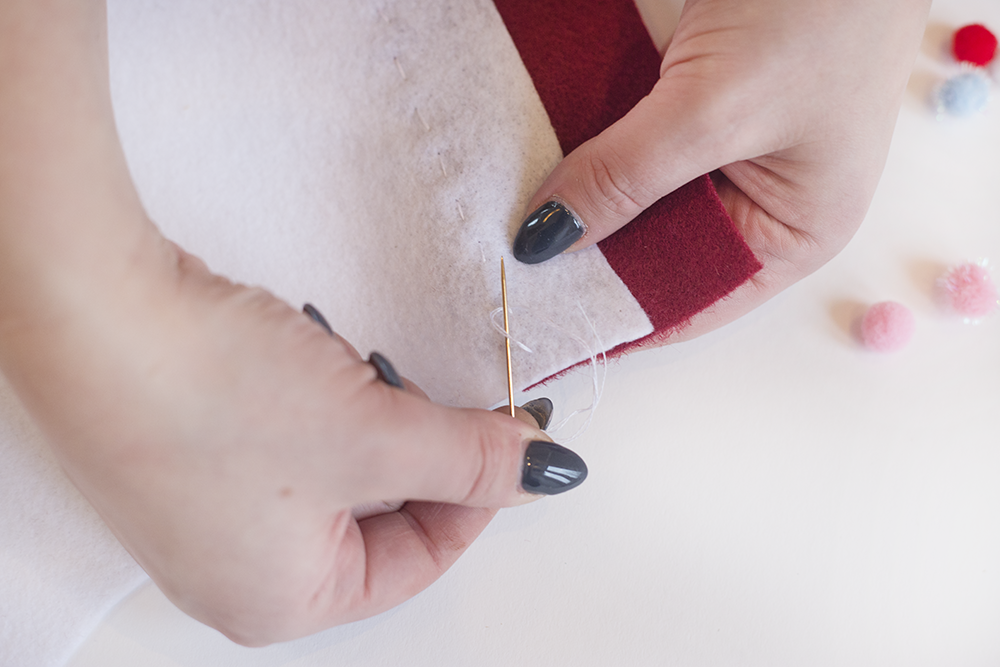
STEP FOUR: Make an Invisible Knot
Take your needle and poke it upward through the bottom of your felt where the trim and body overlap. We’re going to start by sewing the trim and body together for one side of the stocking at a time. Pull the thread partially through but do not pull it entirely through the felt. We want to leave the loop end of the floss on the underside of the stocking. This is going to make an invisible knot which will secure our stitches.
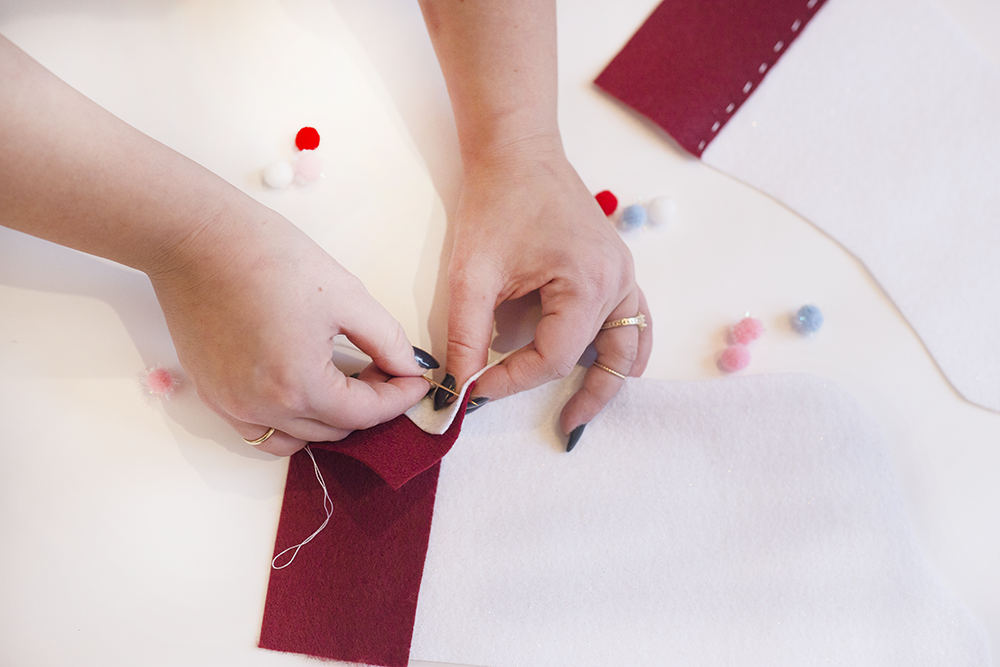
 Since we have left ourselves a loop on the underside of the felt, we can take our needle and poke it very close to the hole we just made back down through this loop. The closer you are to your original hole, the more “invisible” this knot will be. Be sure not go through the hole you just made or there will be nothing for the thread to grab on to. Once you’ve threaded your needle back down through the felt and into this loop, pull tightly and the floss will knot. Now we can start our stitch!
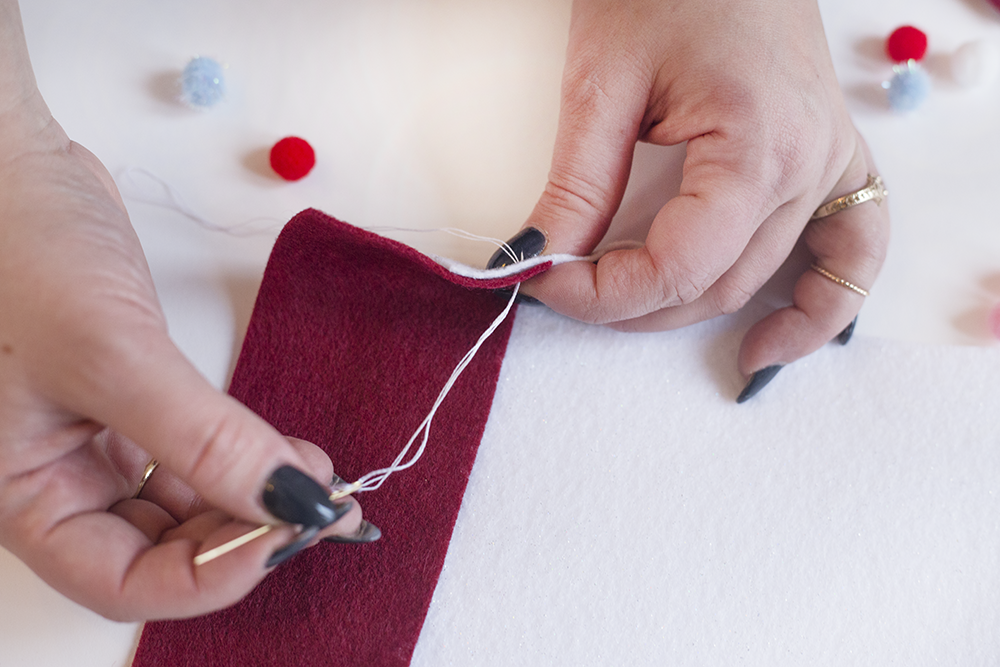
 STEP FIVE: The Running Stitch
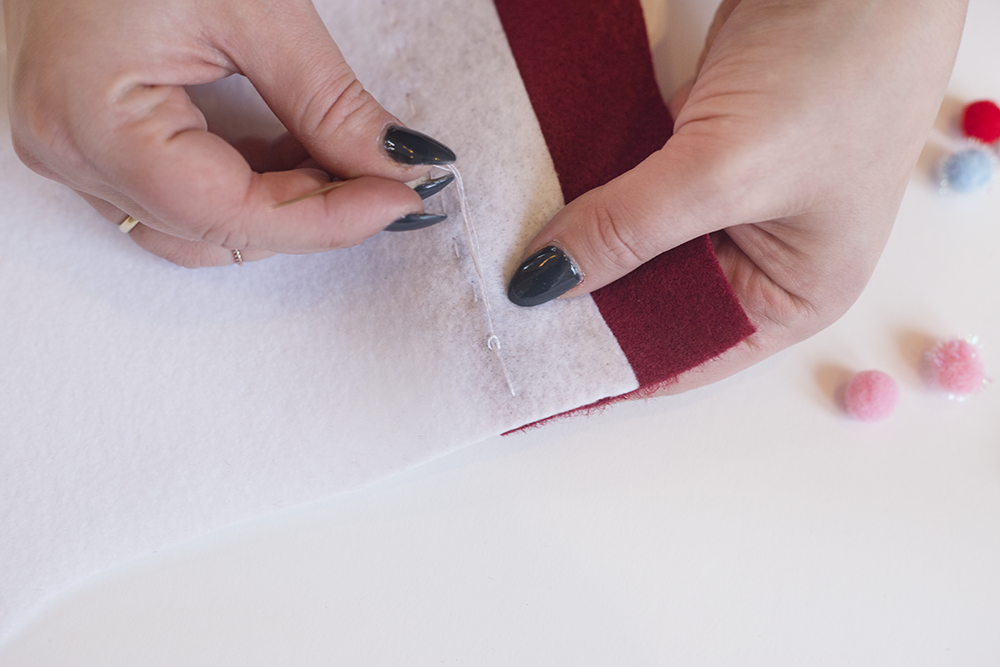
Great work so far! Since we made our knot and we’re once again starting on the back side of the felt, we’re going to poke through to the front side again. I like to start slightly behind the invisible knot so that the stitch will cover the small hole made and it will truly be invisible.
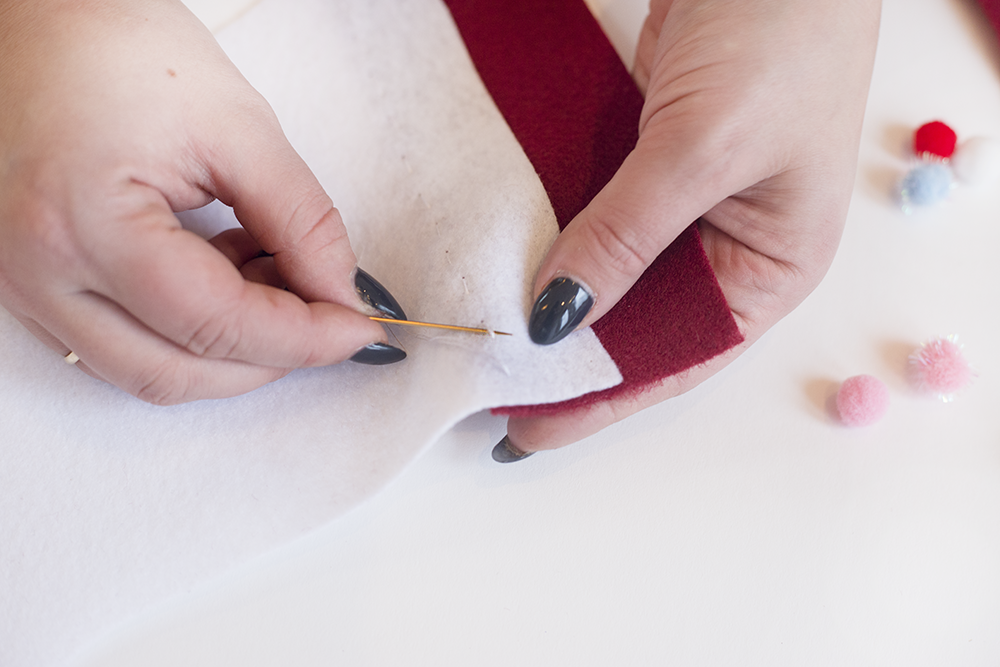
Once you’ve poked through to the front, decide your stitch length and poke your needle down through the fabric to the underside again, making your hole where you want your stitch to end. You can eyeball this – I did! I estimated my stitches to be roughly a quarter inch long.
 Once you’ve made your hole and your needle is on the underside of your felt, pull tightly. You’ve made your first stitch! Continue this way, poking up through the underside about a quarter of an inch away from where your previous stitch ended, until you have sewn across the stocking.
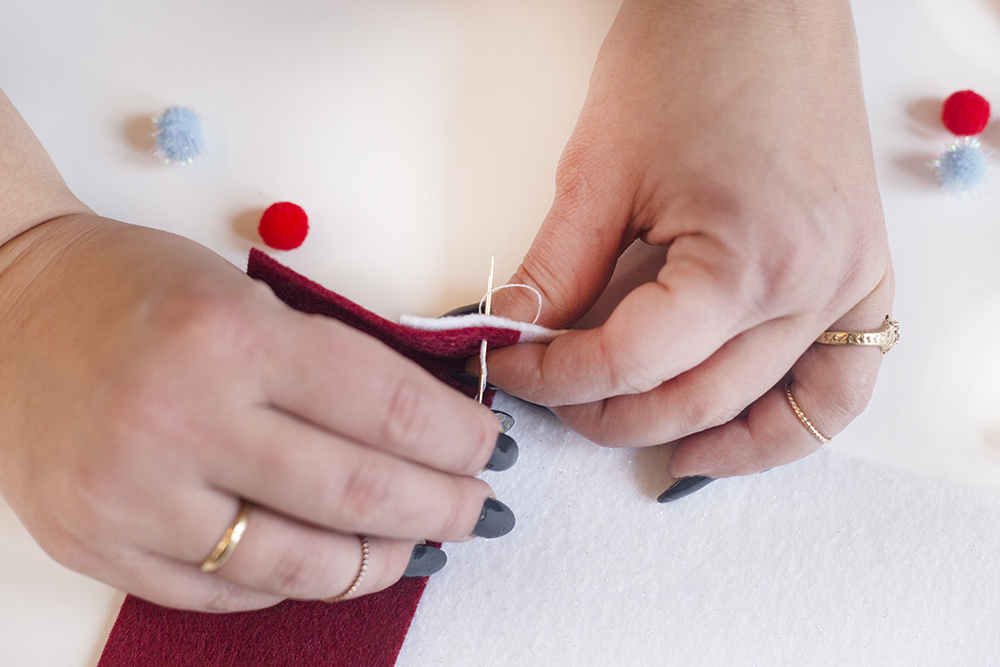
 STEP SIX: Tie Off Your Stitch
Now that you’ve sewn across your stocking, securing the trim to the body, it’s time to tie off the stitch so it doesn’t come out. To do this, make sure your needle is on the underside of the felt. You should see the back of your stitches. Near to where you left off, pull your needle under a stitch and around, creating a loop. Threading your needle through this loop will create a knot, which you will pull tightly to secure. Cut off the end of the thread and you’re done!
Do Steps 3-6 for side 2 of your stocking, making sure that the sides will mirror each other.
 STEP SEVEN: Sew the Sides Together
Time for a sigh of relief – there is nothing new to learn here. Yay! Place both sides of your stocking together with the sides you want to be visible facing out and pin or tape them for stability. Start with an invisible knot in the top left corner of your trim in whatever color embroidery floss you’d like to use for the entire stocking. Take your running stitch the whole way around the edge of your stocking (rethreading as necessary) until you tie off your stitch at the top right corner of the stocking trim. You’ve done it! Easy now, right? Learning the stitch is the hardest part.
 STEP EIGHT: Embellish!
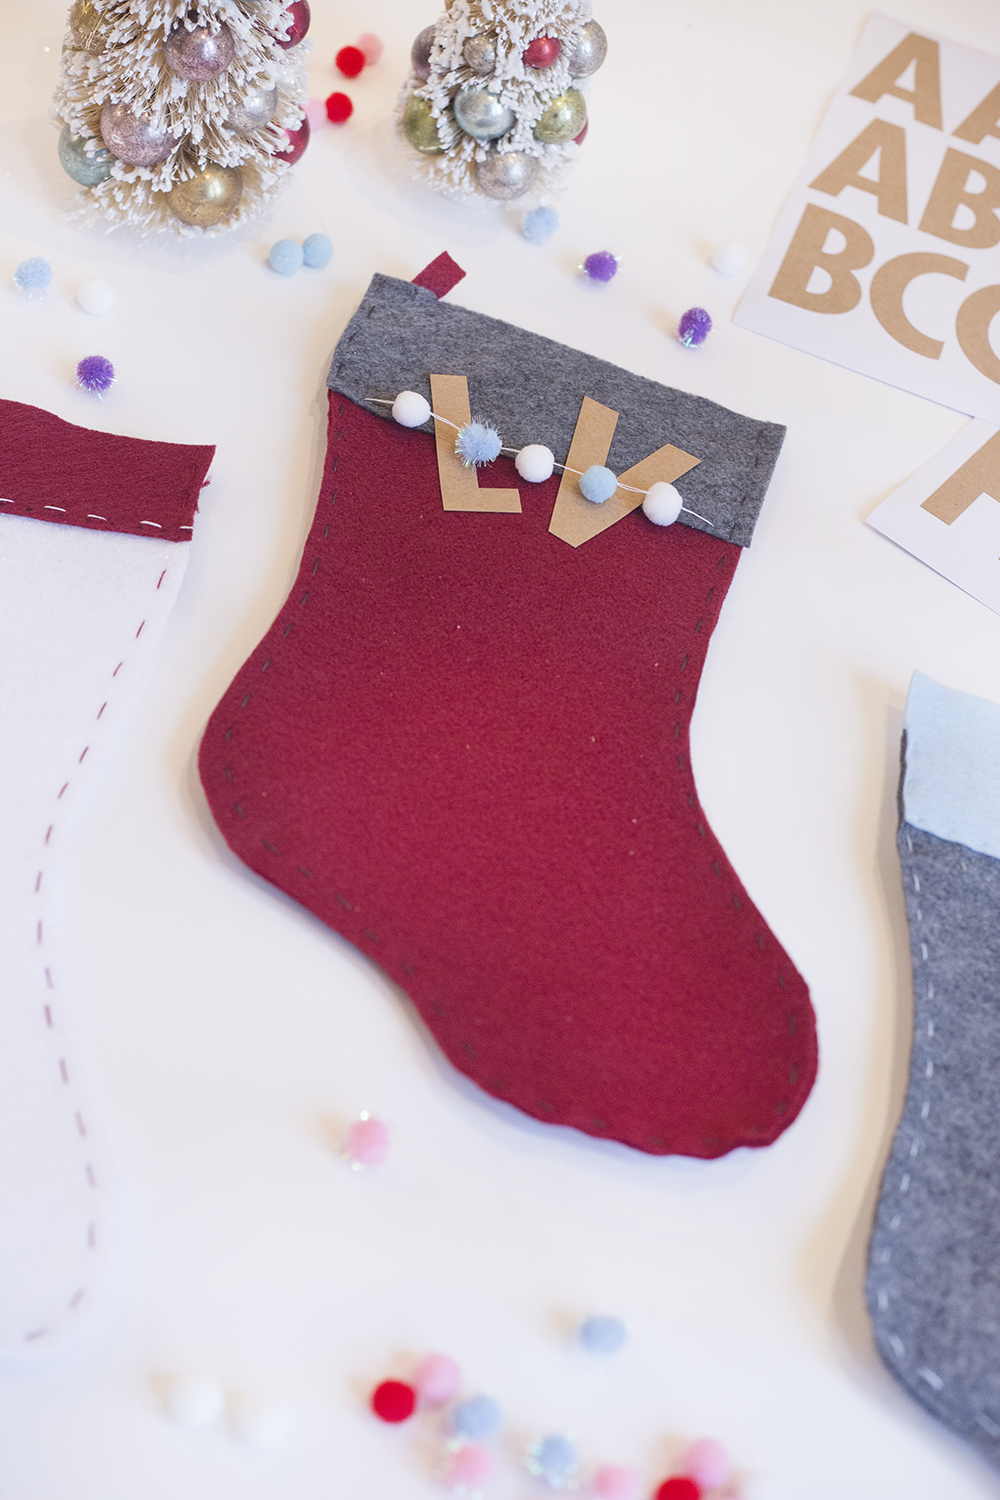
Arguably the best part of this DIY – decorating your stocking! I found this set of Kraft sticker letters at JoAnn Fabrics and thought it was perfect for personalizing. If you’d like to get your floss back out, try making a pom pom garland! I threaded my needle as per Step 3, leaving myself a long strand of floss, and made an invisible knot on the left side of my trim (without any pom poms at this point). Next, I poked through the center of each pom pom to string them up and finished with another invisible knot on the right side of my trim. It’s important to leave yourself a long enough strand of floss to have room for two invisible knots. Cut the excess thread and voila!
I hope you enjoyed this DIY! Leave a comment letting me know if you made this project and how it turned out. I’d love to see what you make! Post your creation photos on Instagram and tag them #lilyandvalliving.
PS – Special shout out to L&V’s Merchandising Director Emily C. for being an excellent hand model!


2 Comments
This is amazing!
This post is beautiful Kristin!!