Hello, Darlings! It’s been a while since I have checked in here on the blog, and I’m happy to be showing you all something I love to do! Making a pretty cake can seem intimidating…layering, icing, decorating. But these simple steps are the most basic elements to making a lovely multi-layer cake. Have Fun!
 10First, I usually start by freezing my cake layers. This makes them easier to manage and helps your icing to stick well without causing your cake to crumble too much.
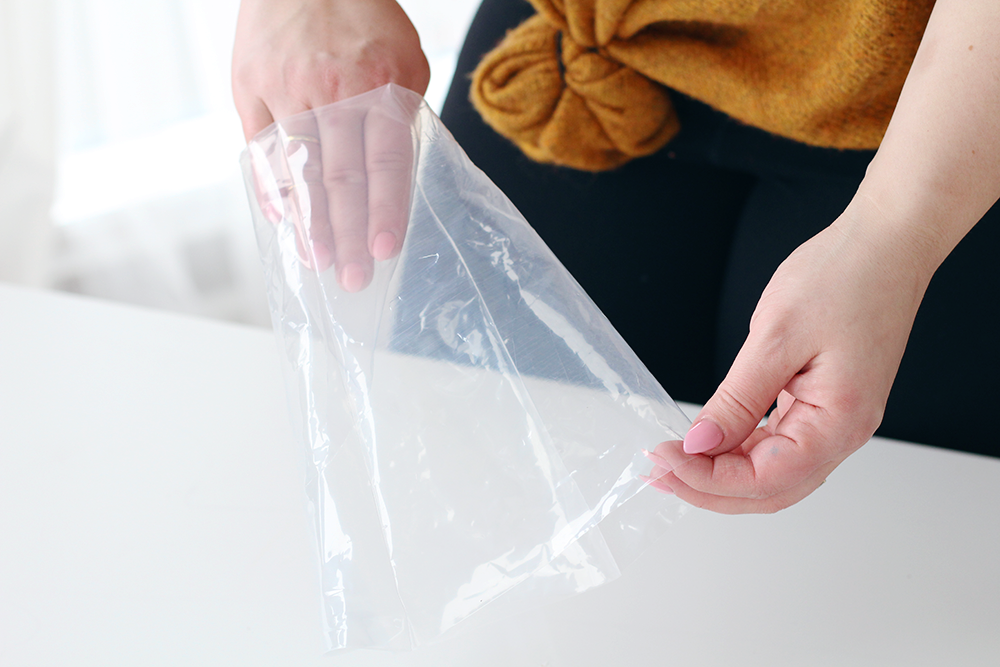
The first item you will need is a piping bag. Just the disposable plastic ones from any craft store will do. (You can get fancy and use parchment paper and cloth bags, but let’s K.I.S.S.) Start by putting your hand inside the bag and pulling the top down over the outside edge. Move your hand to the pointed part of the bag for filling. (Folding the edges over helps keep the top of your bag and your hand clean when filling.)
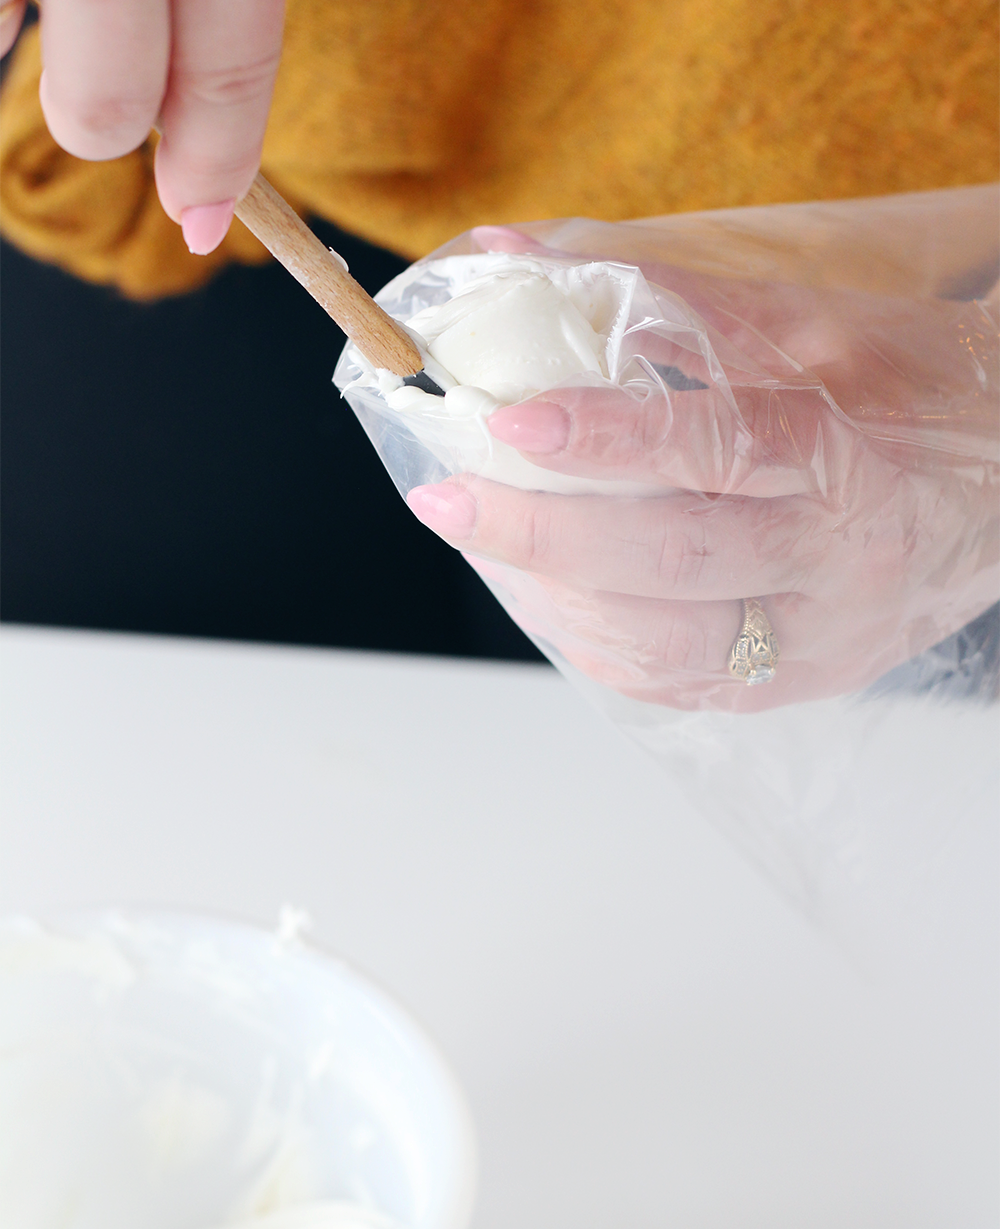 Next, Use a small spatula or spoon to push scoops of your frosting into the very tip of the bag. Use the hand you are holding the bag with to pull the frosting off of the spatula.
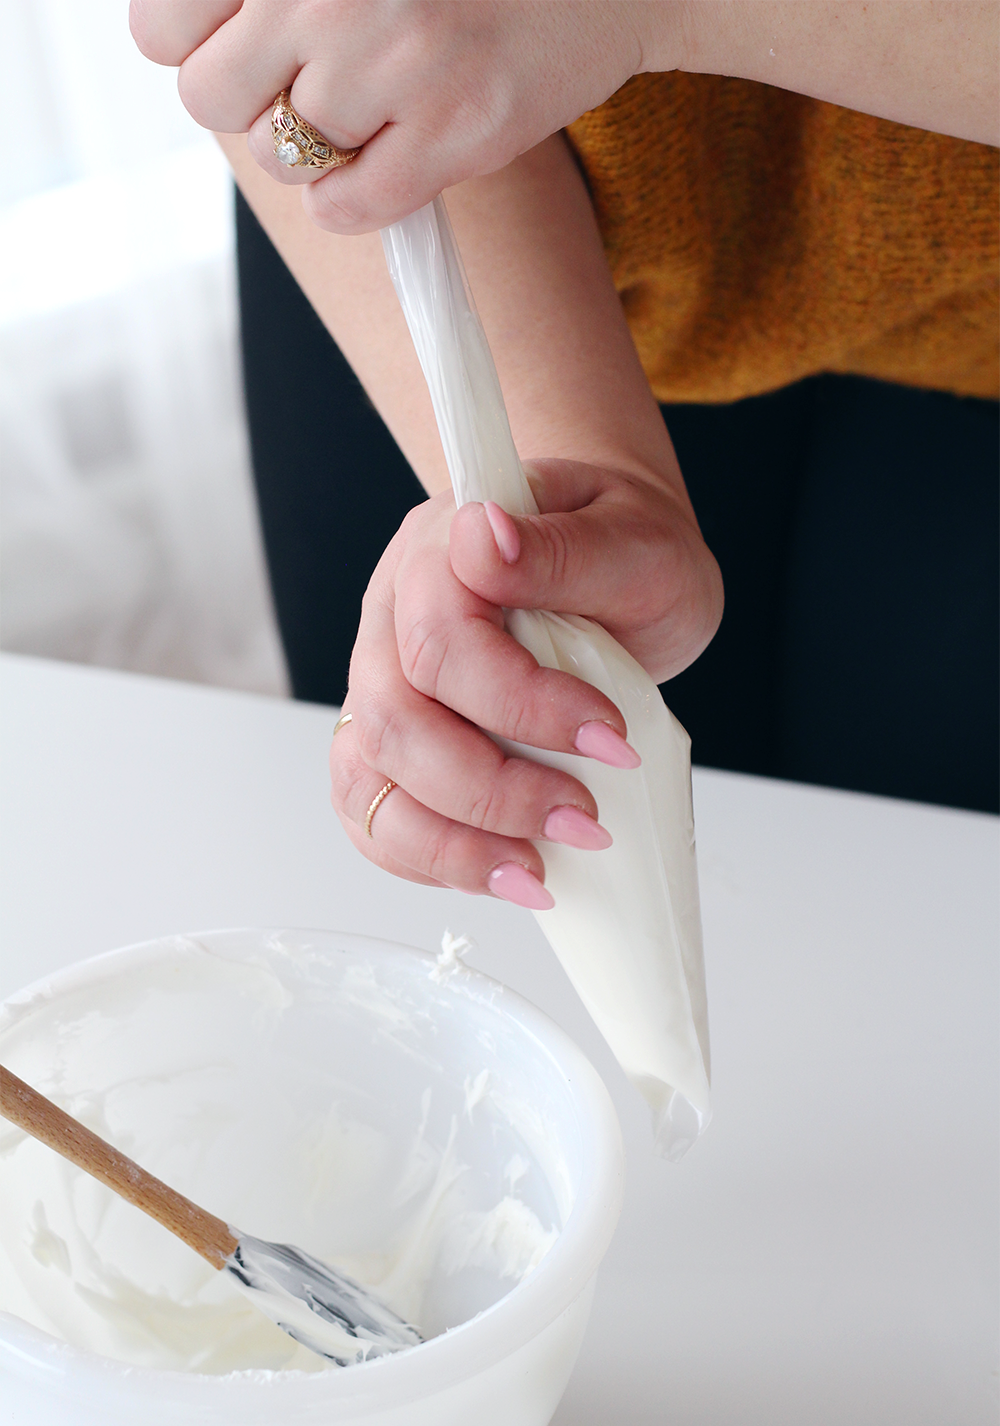 Once your bag has enough frosting in it (a little over half full), then you can push all the frosting down toward the tip.
Note: You will have air bubbles in the tip until you cut the bag…but wait on that until you have pushed the frosting down well.
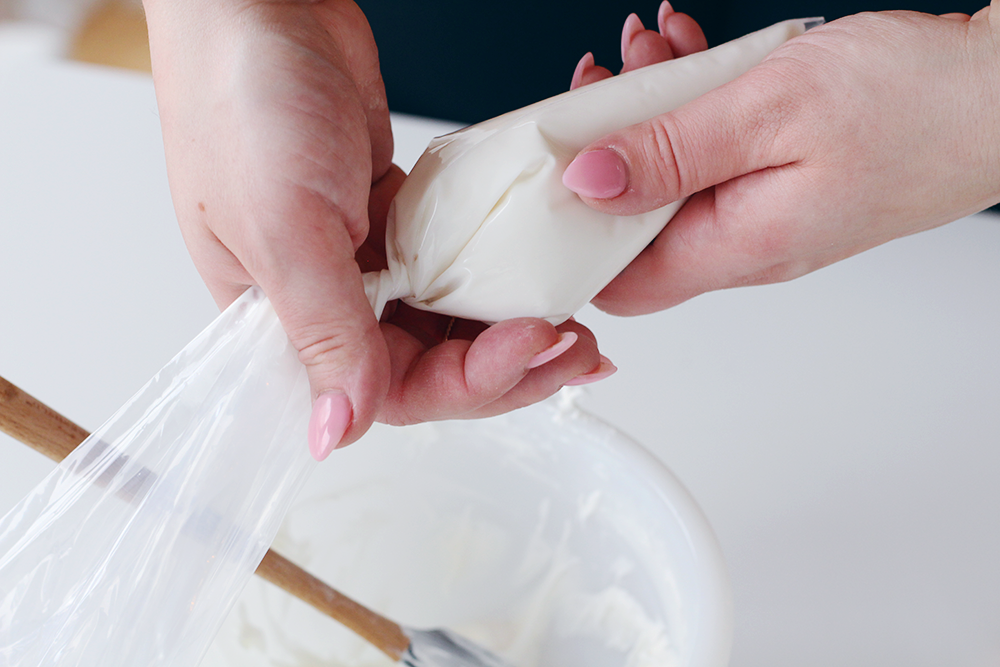 Now you can cut across the tip of your piping bag. Start small because you can always cut a bigger hole if you find that the icing is not coming out fast enough or in your desired shape. Once you have cut the end of the bag, twist the top of your piping bag so that the frosting is secure and fills the bag to the tip.
 Place a little icing on your cake round or cake plate, then press your first layer onto it.
Now the fun part! Start at the edge of your cake and apply even pressure to the top of your twisted piping bag using your palm.
(The twist of the bag should be held between your thumb and index finger. You will need to continue twisting the bag to keep the pressure even as you use the frosting.)
 Starting in the center of your cake, use a spatula (or flat spatula) to push the frosting into an even layer. If you have a spinning stand like I do here the spin it slowly as you sweep the frosting toward the edges.
Keep in mind…You never want to pick the spatula up abruptly off the cake. This will cause the icing to pull away from the cake, making a mess! Always use smooth strokes to keep things even.
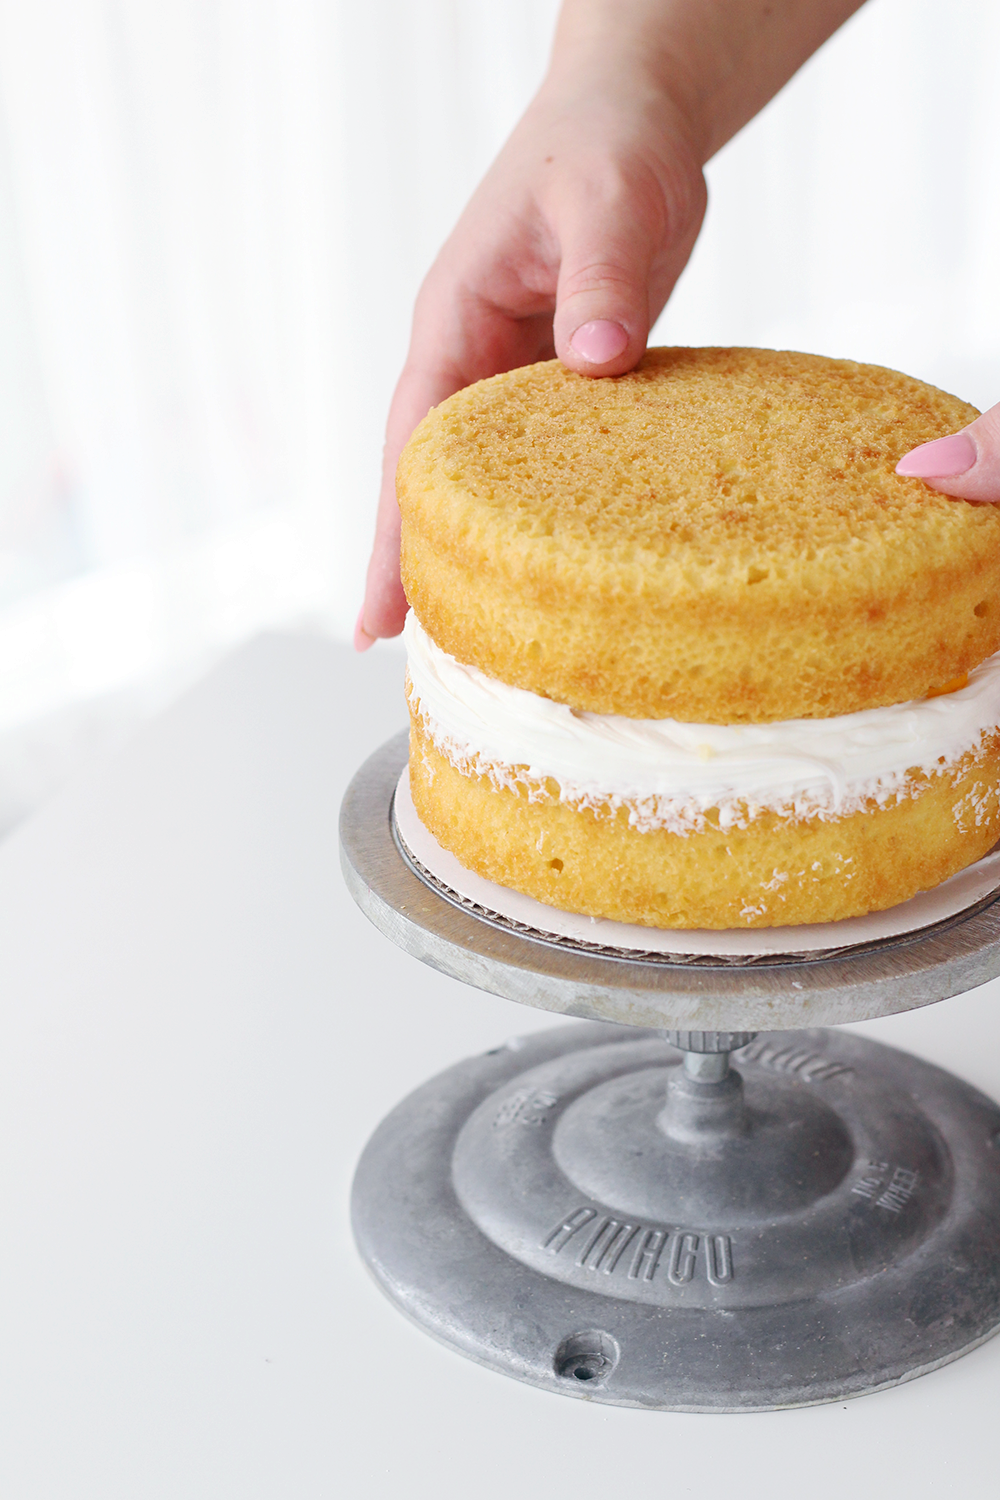 Now you are ready to add your second cake layer! Turn your second layer upside down, leaving the nice flat bottom to be the top of your cake. Gently press it into the icing to secure the layer in place.
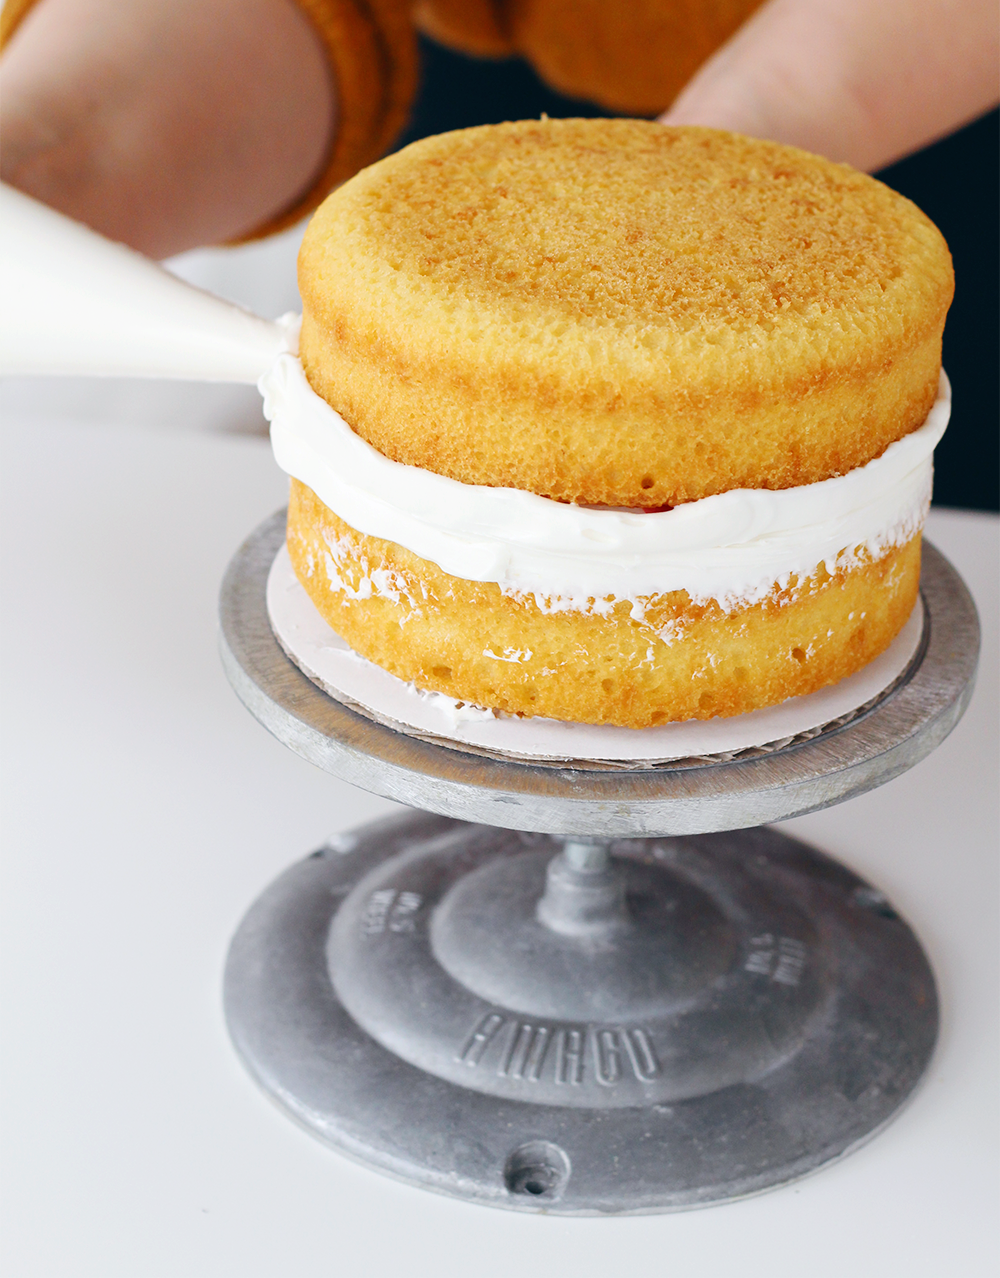 Add an additional line of frosting to fill in any gaps between the layers. Be generous! You want the frosting to be spilling out of the center for the next step.
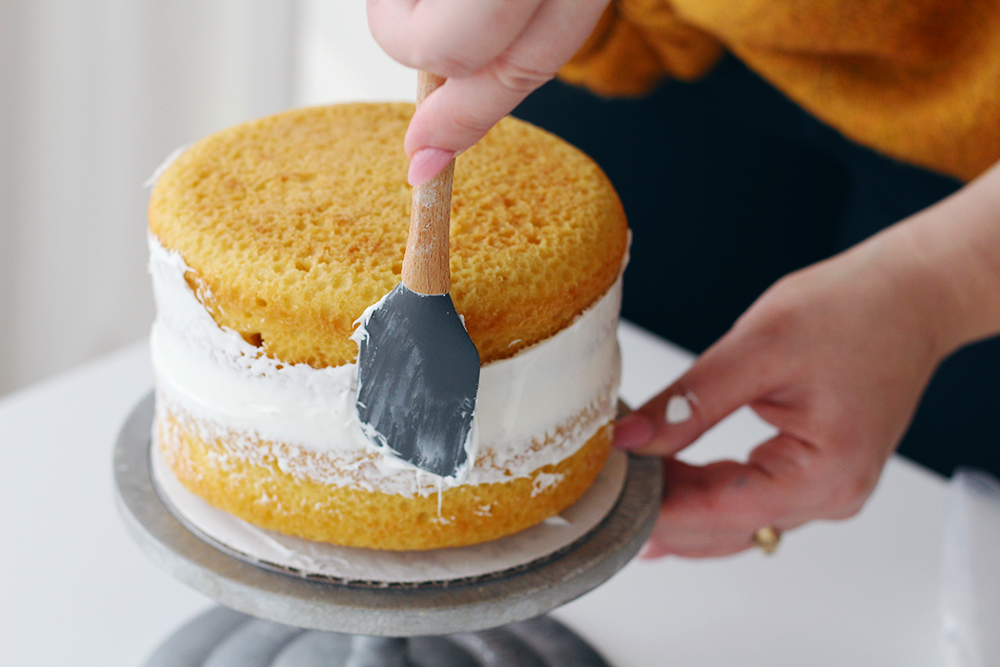 This step is called a crumb coat, or dirty icing. You want to spread the center frosting into a thin layer, making sure the center is even with the edges of your first and second layer of cake.
Remember: Slow and smooth.
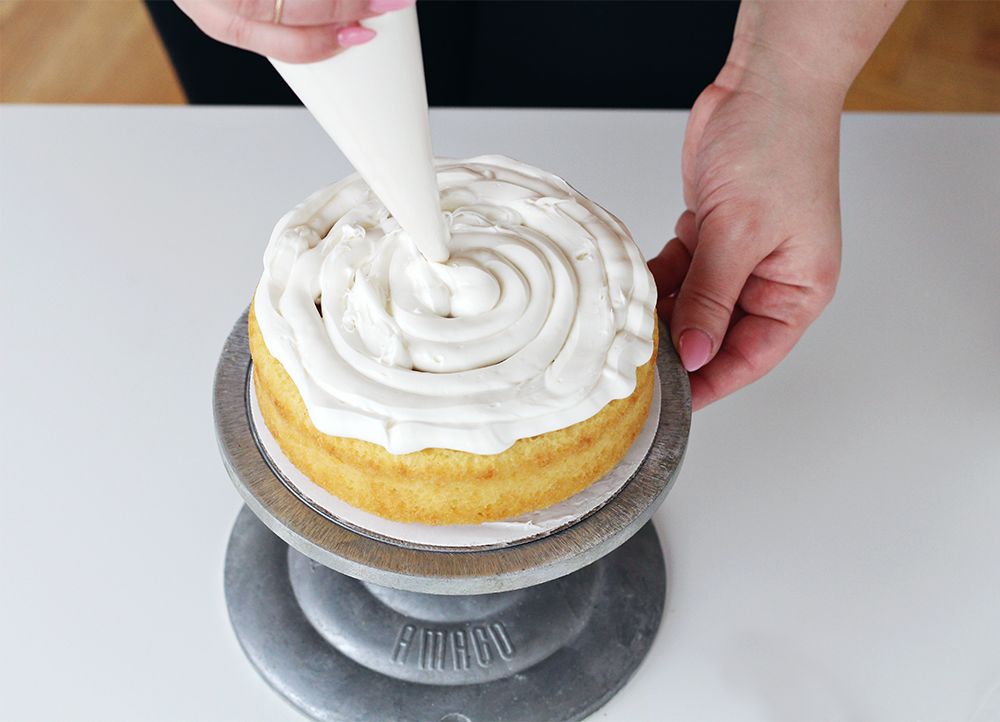
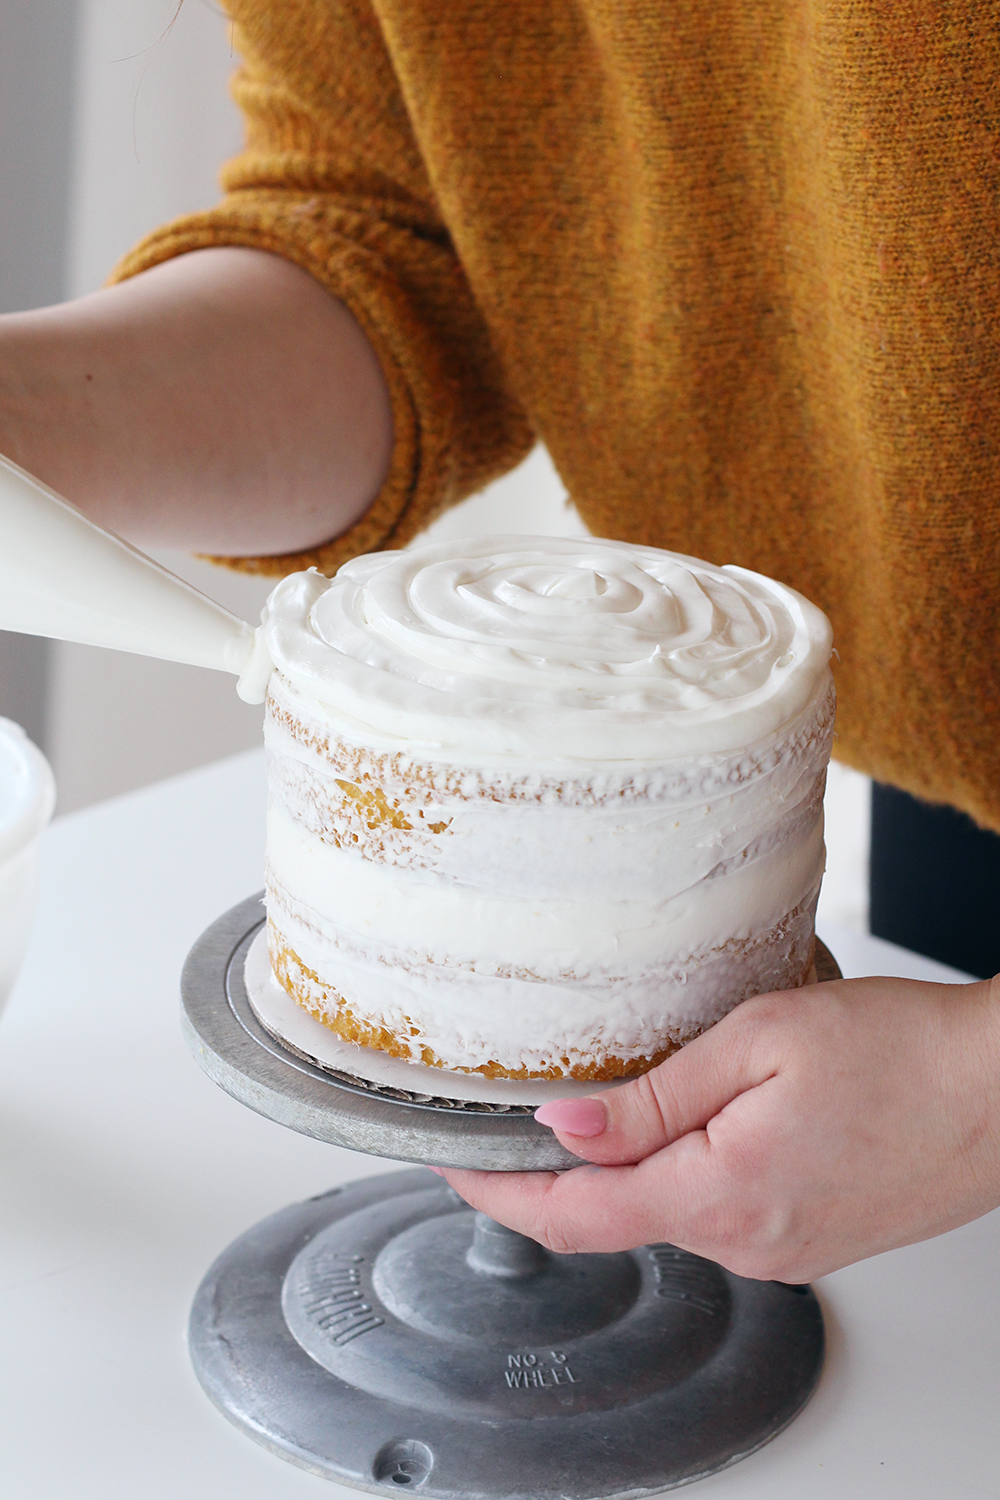
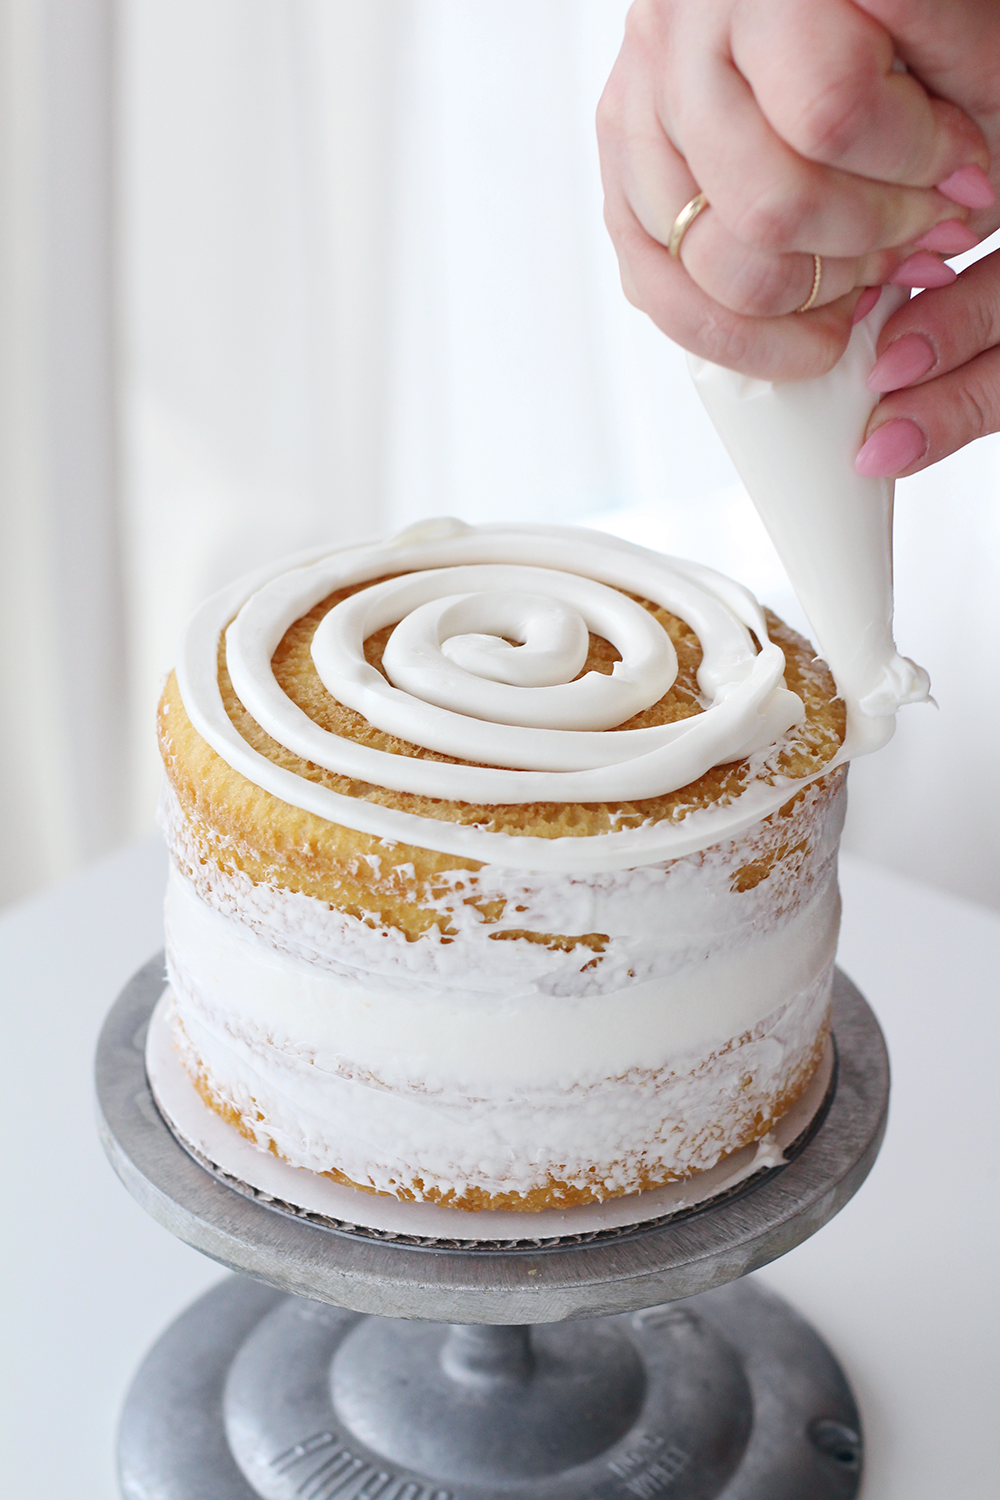 Once you have evened everything out and refilled your piping bag if needed, it’s time to ice the top! Start in the center of the cake, creating a thick spiral to the very edge of your cake.
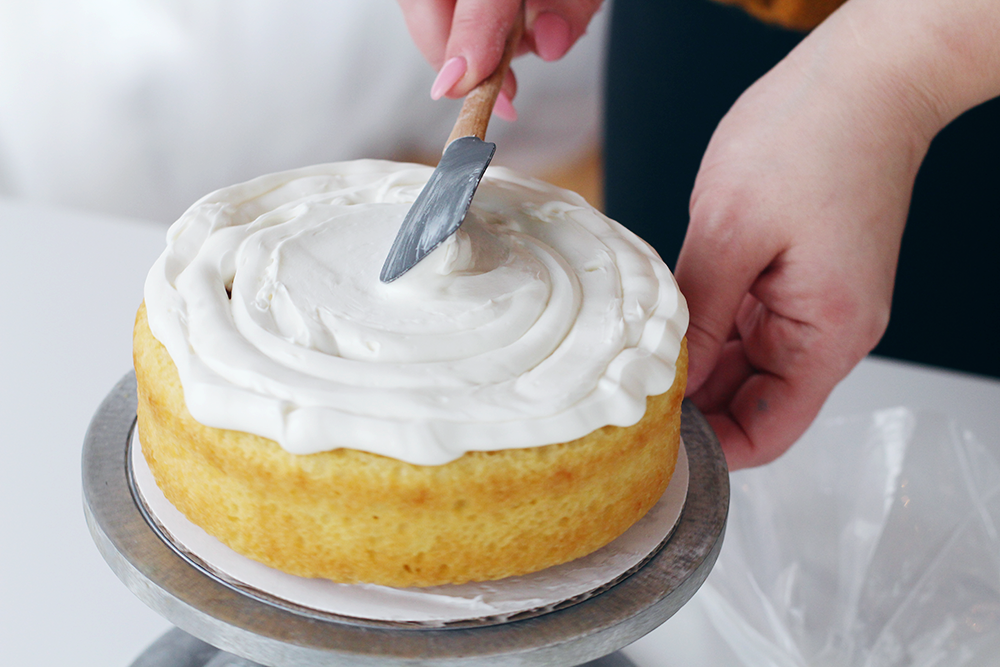
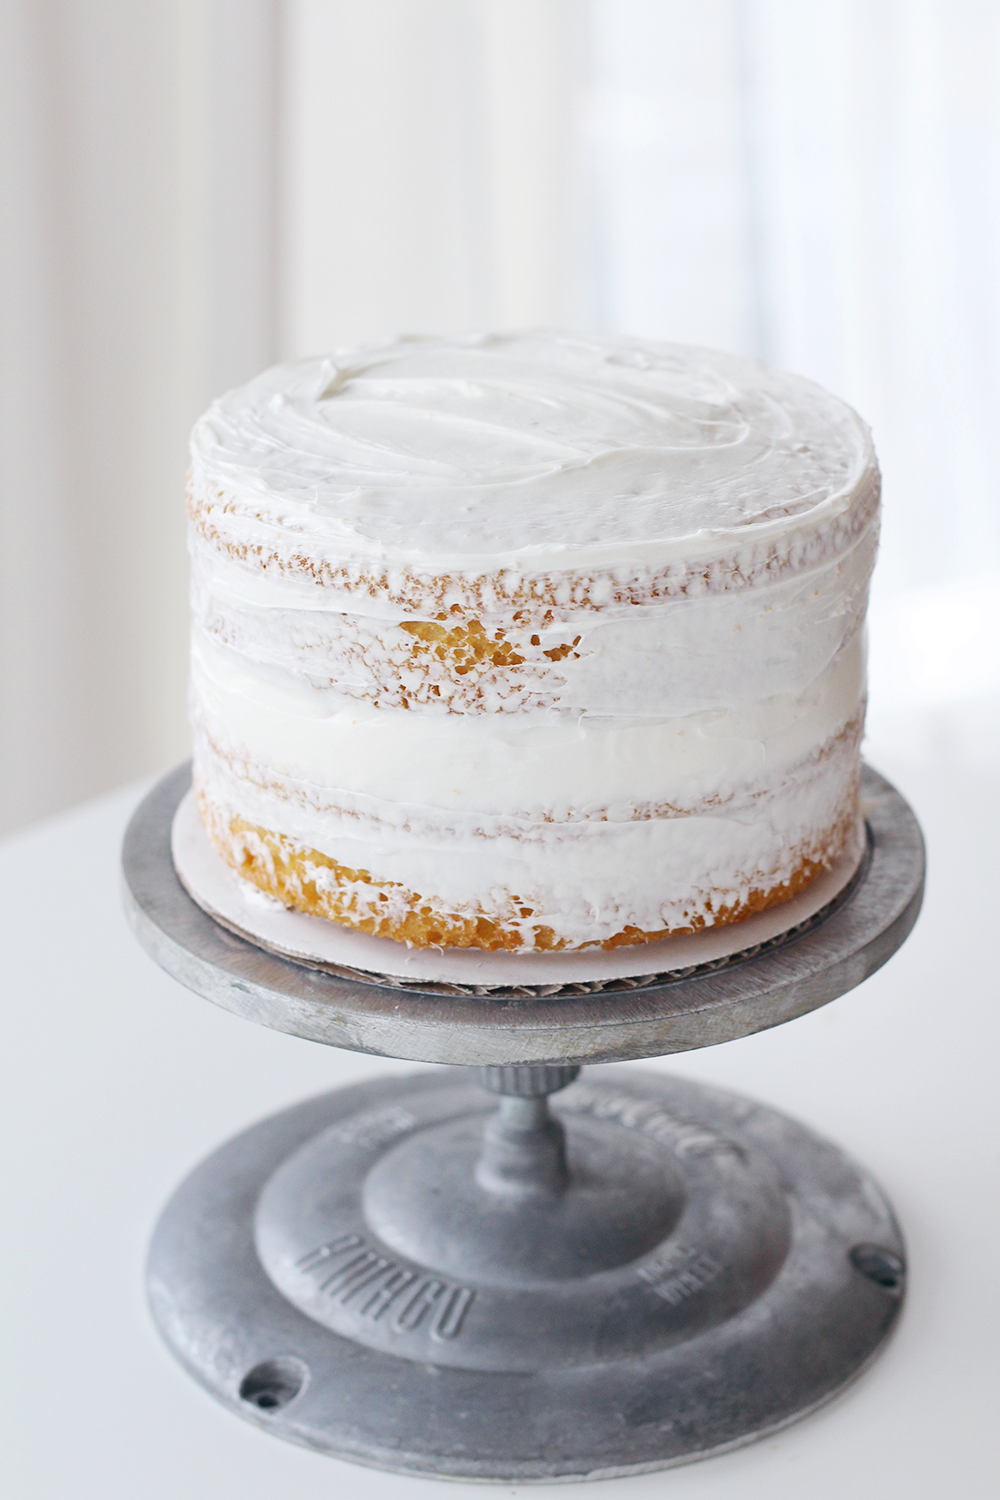 Starting in the center again, spread the icing smoothly to the edges of your cake. If it spills over the sides -GREAT! Use the excess on the sides to complete an even crumb coat.
Tip: I usually place my cake back in the freezer or refrigerator for a couple minutes before moving on to the final icing steps.
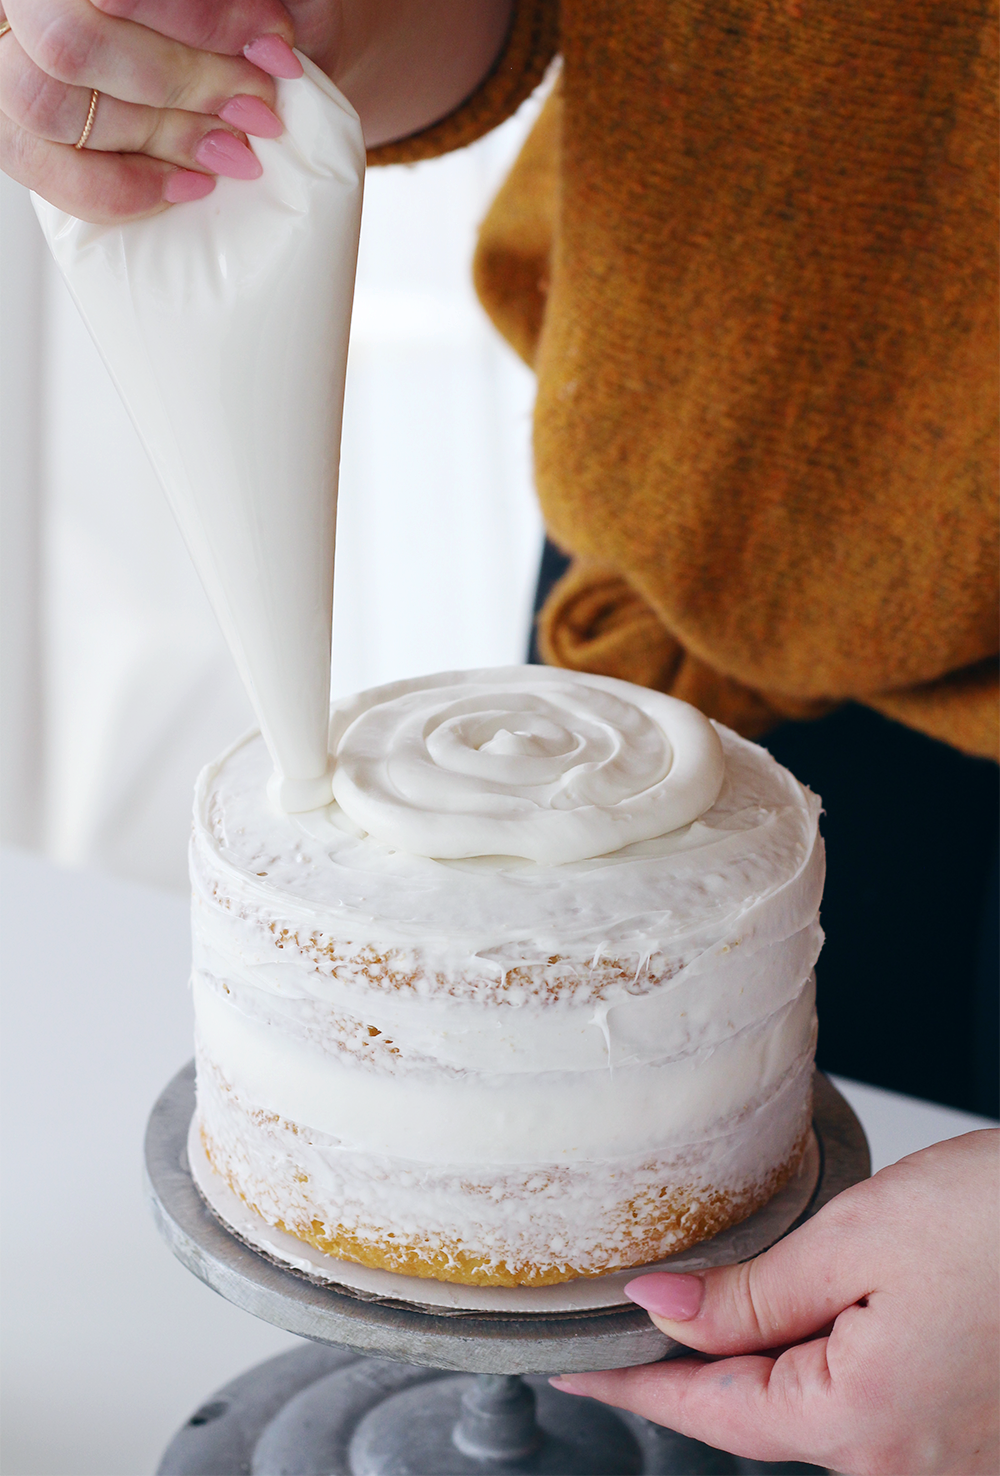
Beginning again in the center of your cake, pipe another thick spiral of frosting onto your cake. Be generous so that you have a nice even layer to spread into your final coat of frosting.
 Place extra icing around the top edge of your cake.
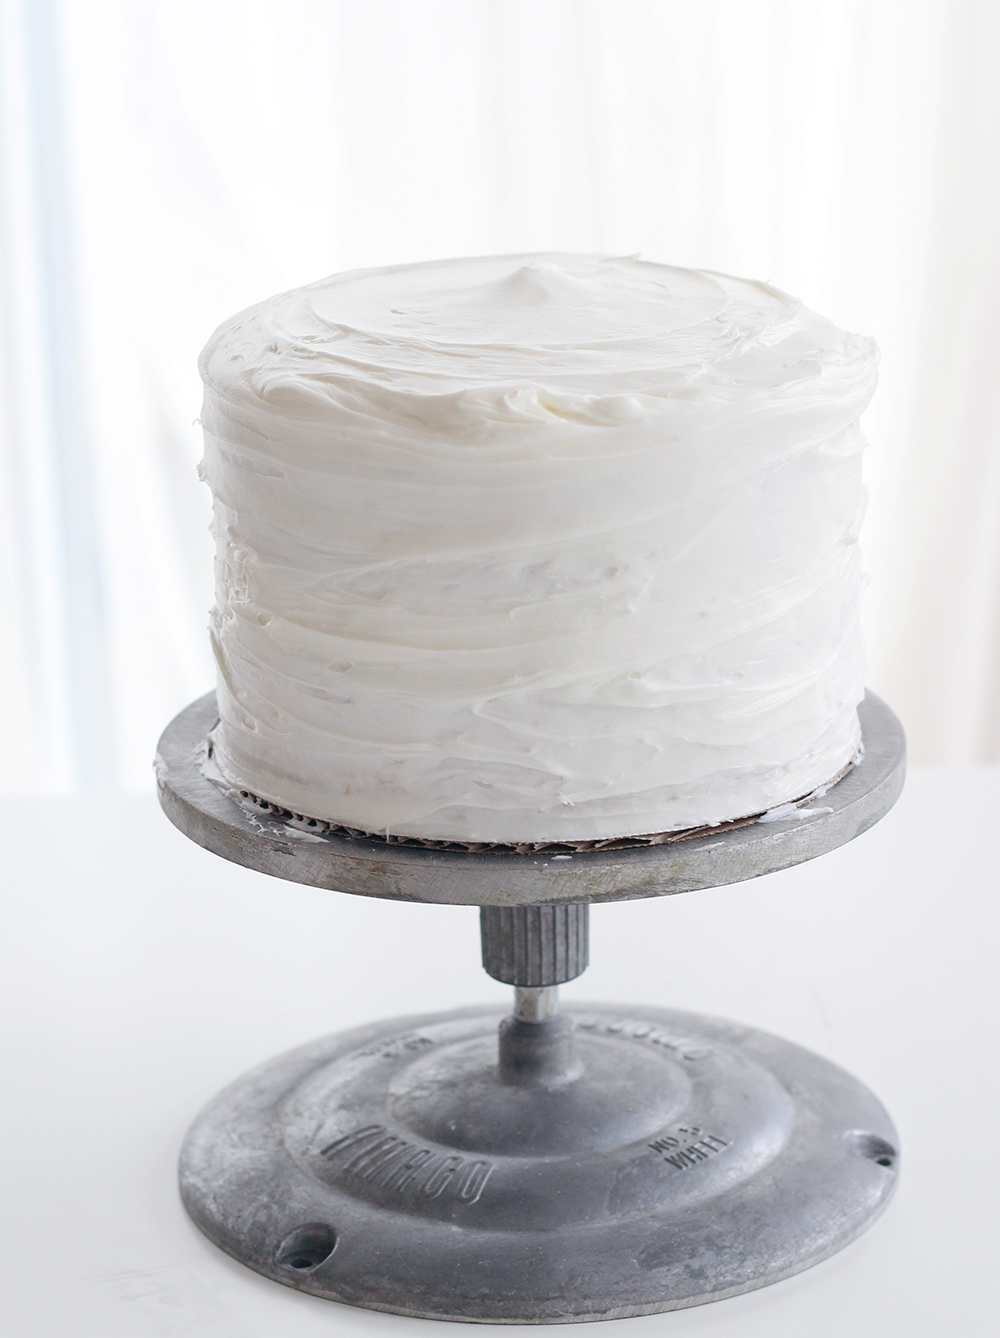
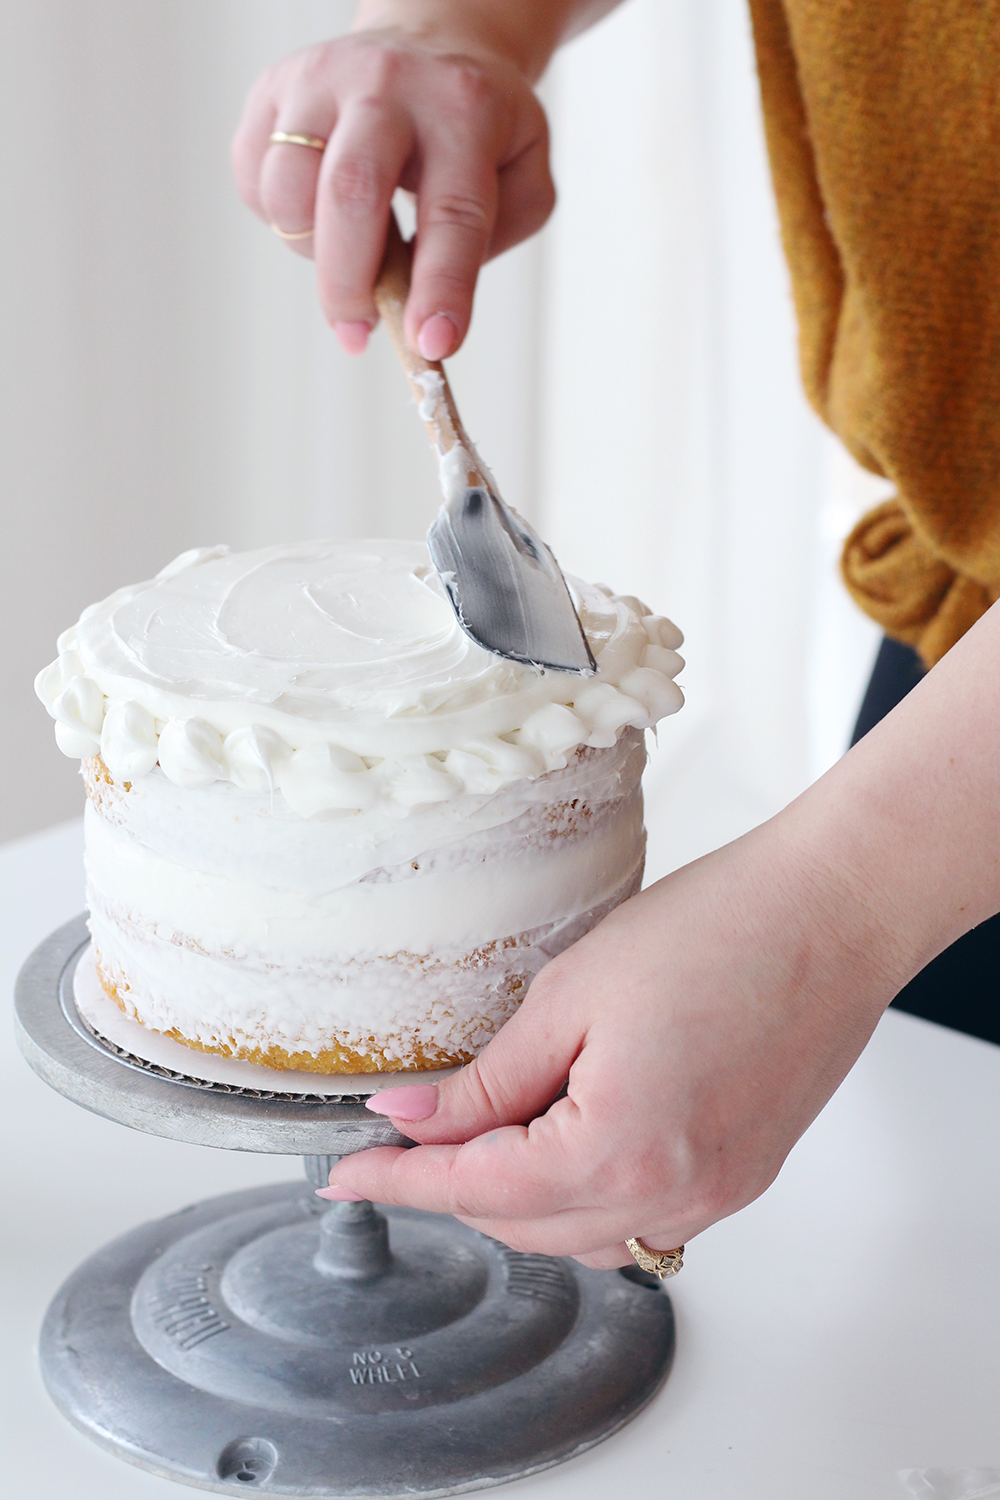 Again, starting at the center of the cake, use your spatula to evenly smooth out the icing. Go all the way to the edges of your cake and begin pushing the frosting down onto the sides. Don’t be afraid to move your cake in circles to help you. Always smooth in the same direction to avoid crumbs.
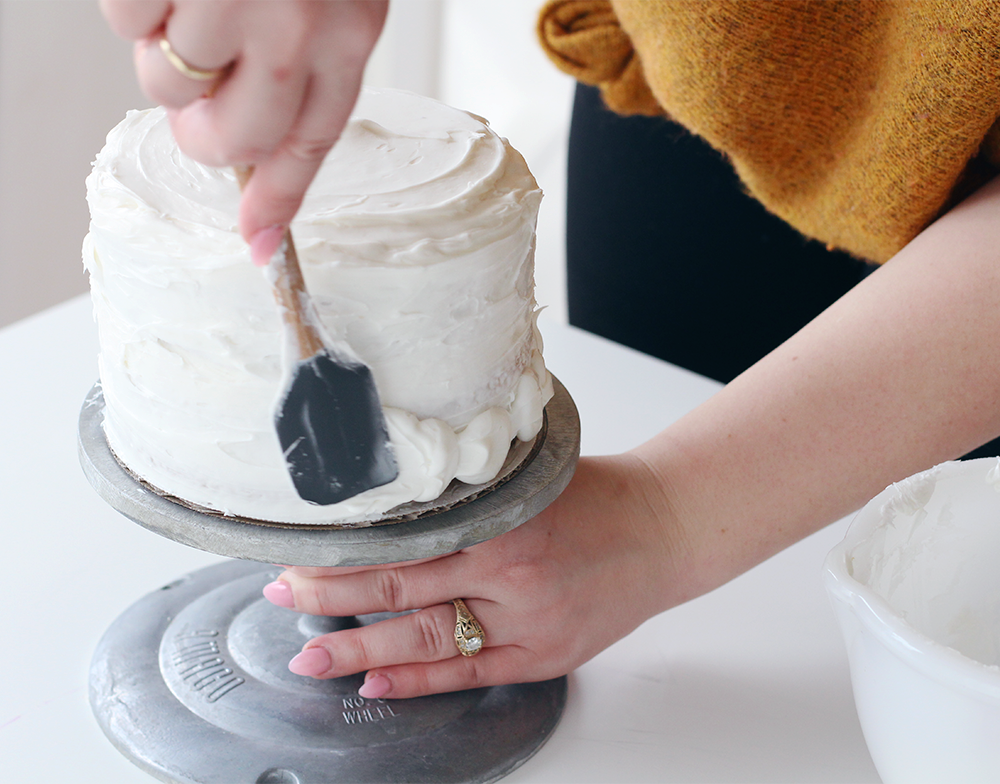
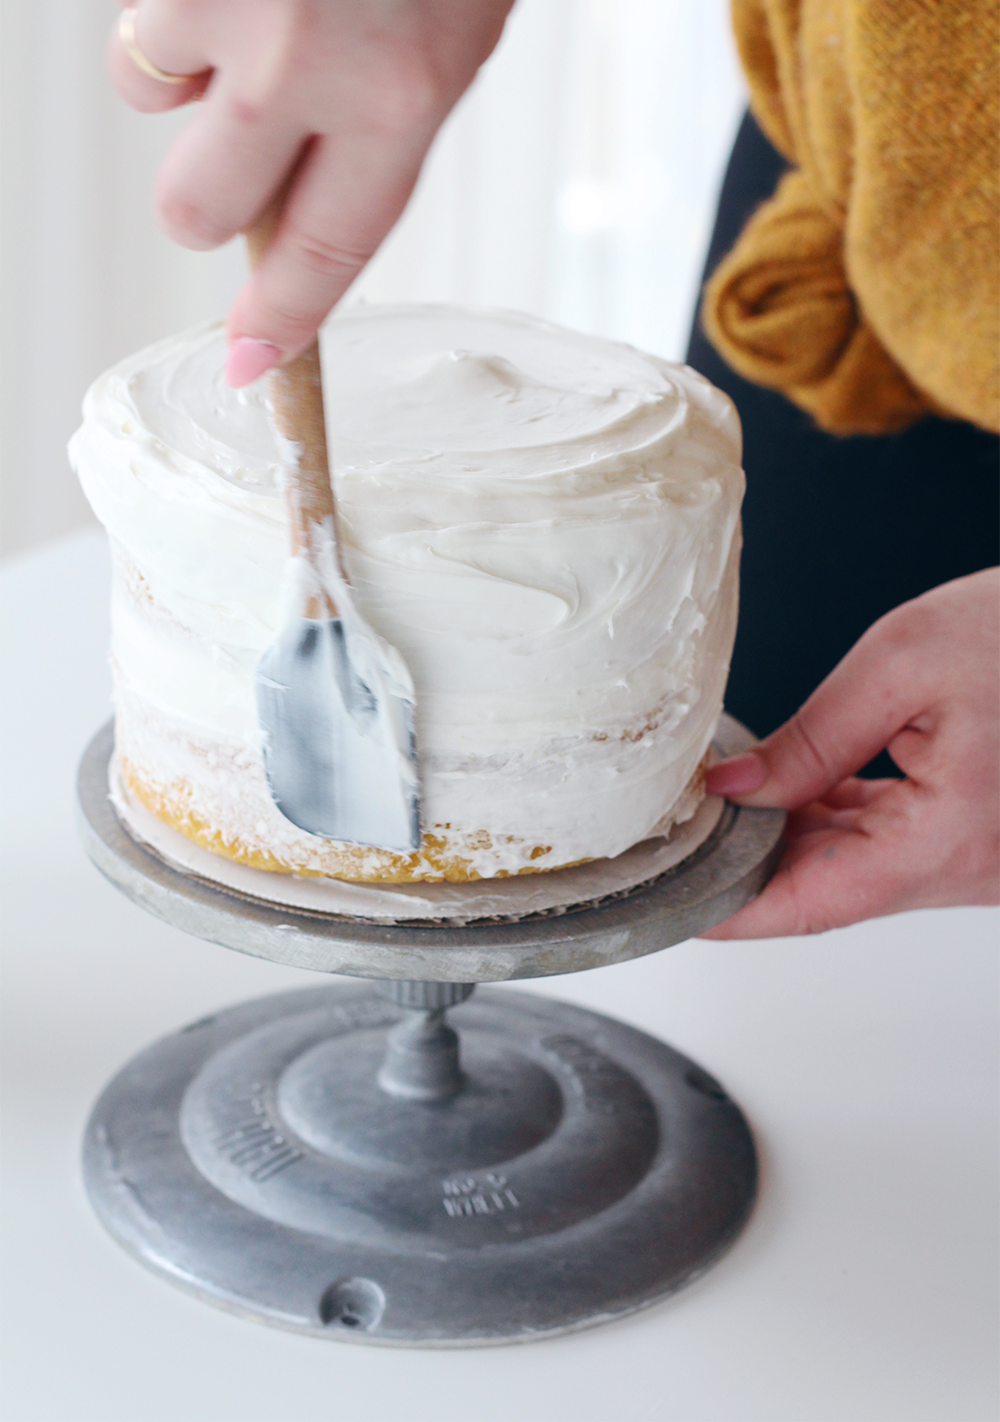 You may want to add more icing as needed to the sides of your cake while you are smoothing that final coat.
 Ta-Da! You have a lovely, simple, frosted, two-tier cake! Won’t Mom be proud!
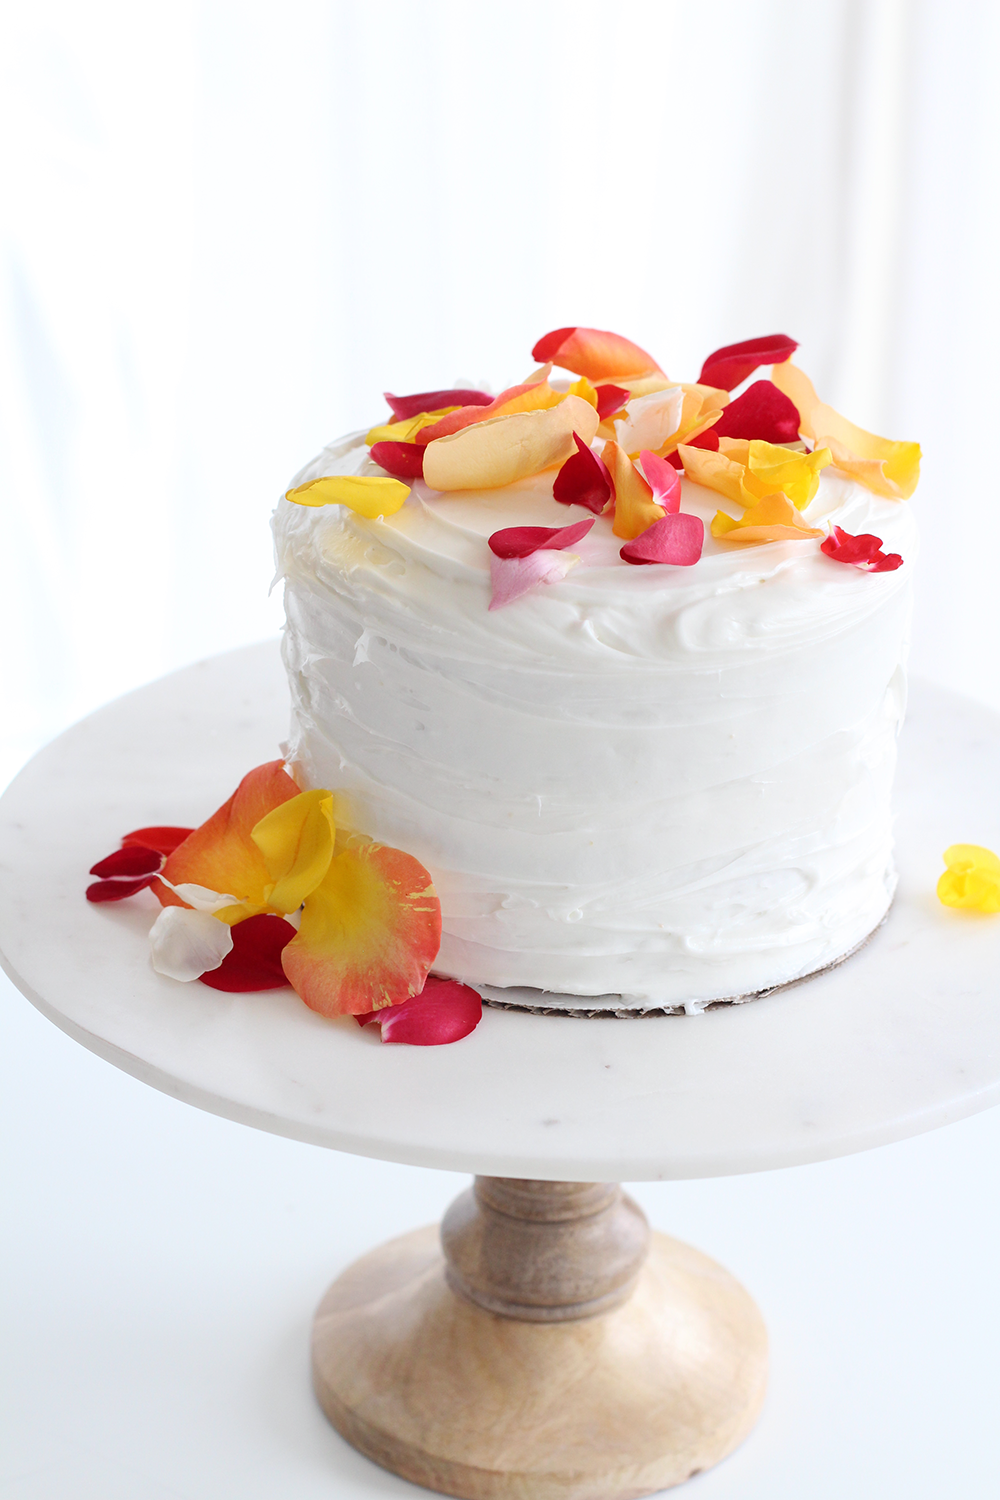
Now you can decorate any way you like. My favorite, simple, quick thing to do is to add herbs or flowers to the top and bottom edge. This is beyond easy and makes you look like you know what you are doing!
 Remember our post about candied rose petals! Well, I used some edible rose petals to decorate this cake. Just sprinkle around the top and maybe add some to your cake plate! Voila! Fini! Enjoy!
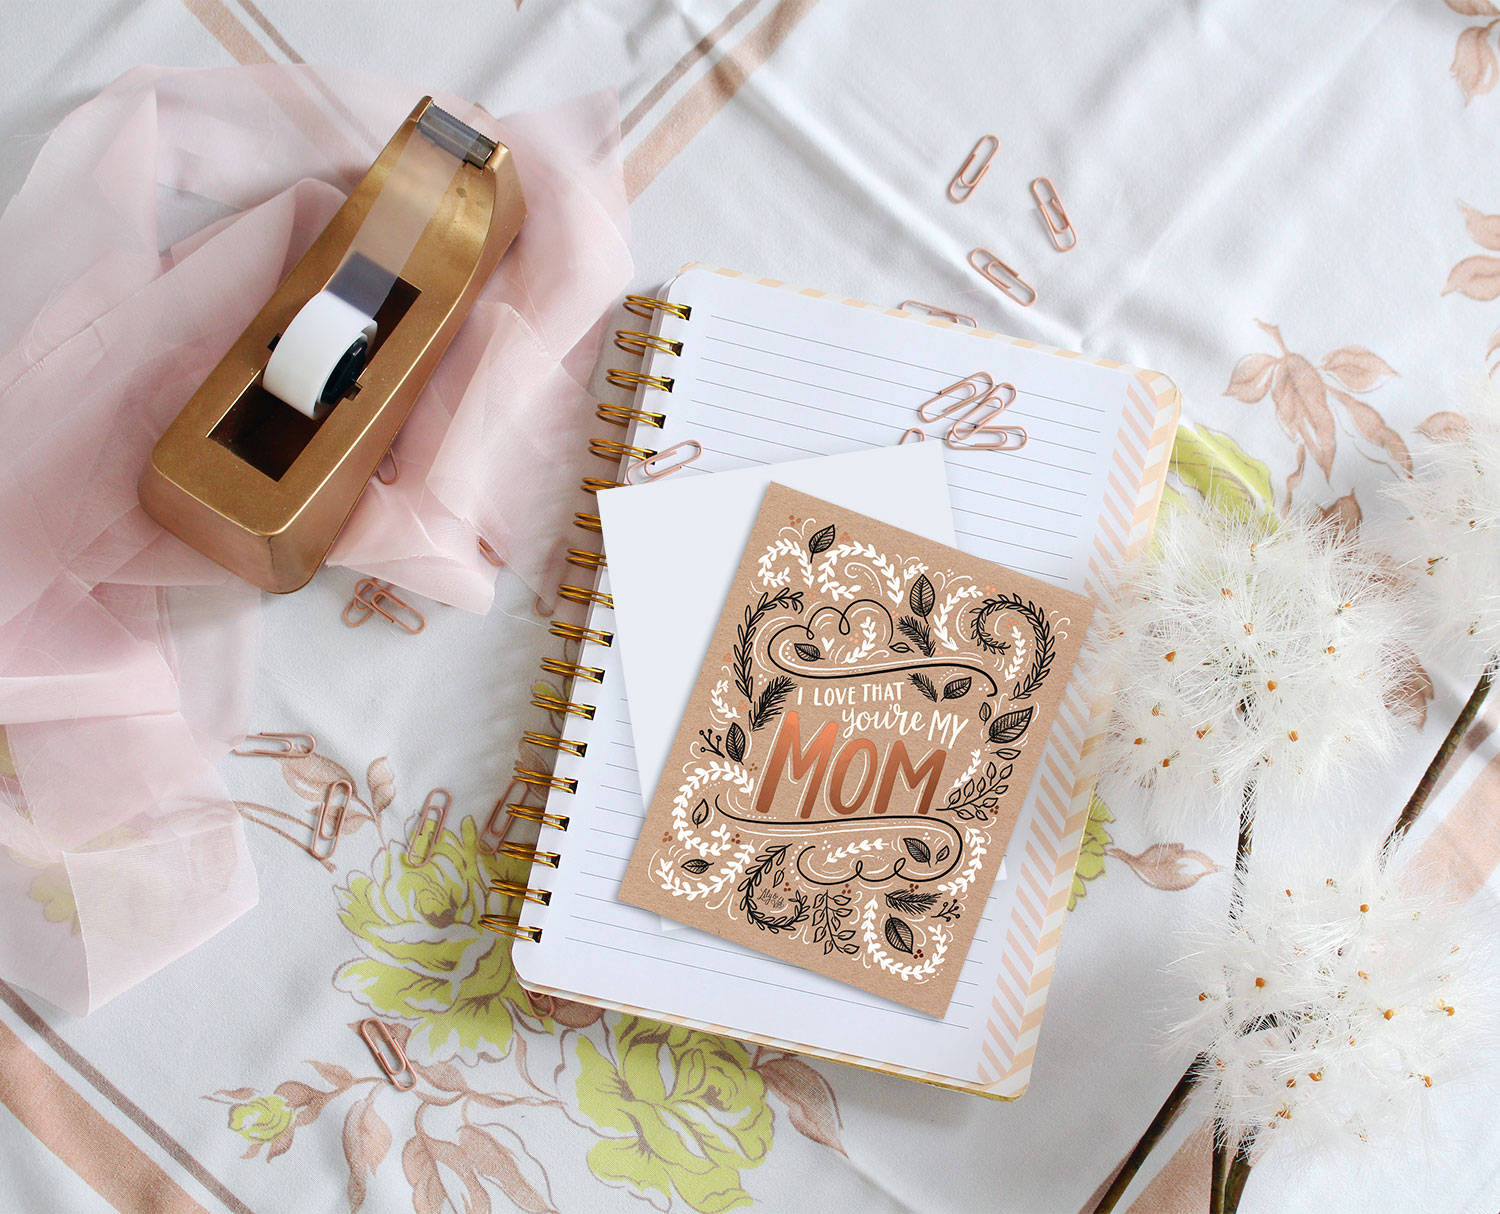
 With Mom’s big day coming up, doesn’t a homemade rose-petaled cake paired with a Keepsake Kitchen Diary sound like a beautiful gift? Don’t forget to pick up the card too!


No Comments